Today was going to be special. Deep within the folder of important documents required for this trip lies a single slip of standard computer printer paper with a couple highlighter marks on it. In order to obtain this single slip of paper, I had to call ahead months in advance (1st of December, 2018 to be exact), 10AM JST, right on the dot.
What was this slip of paper for? It was an admission voucher for the Ghibli Museum in Mitaka. Those who have tried to book reservations to this museum know that only a certain number of people are admitted per day, so tickets are extremely limited and sell out in mere minutes after they go on sale. I consider myself lucky to have gotten two of them for my sister and I.
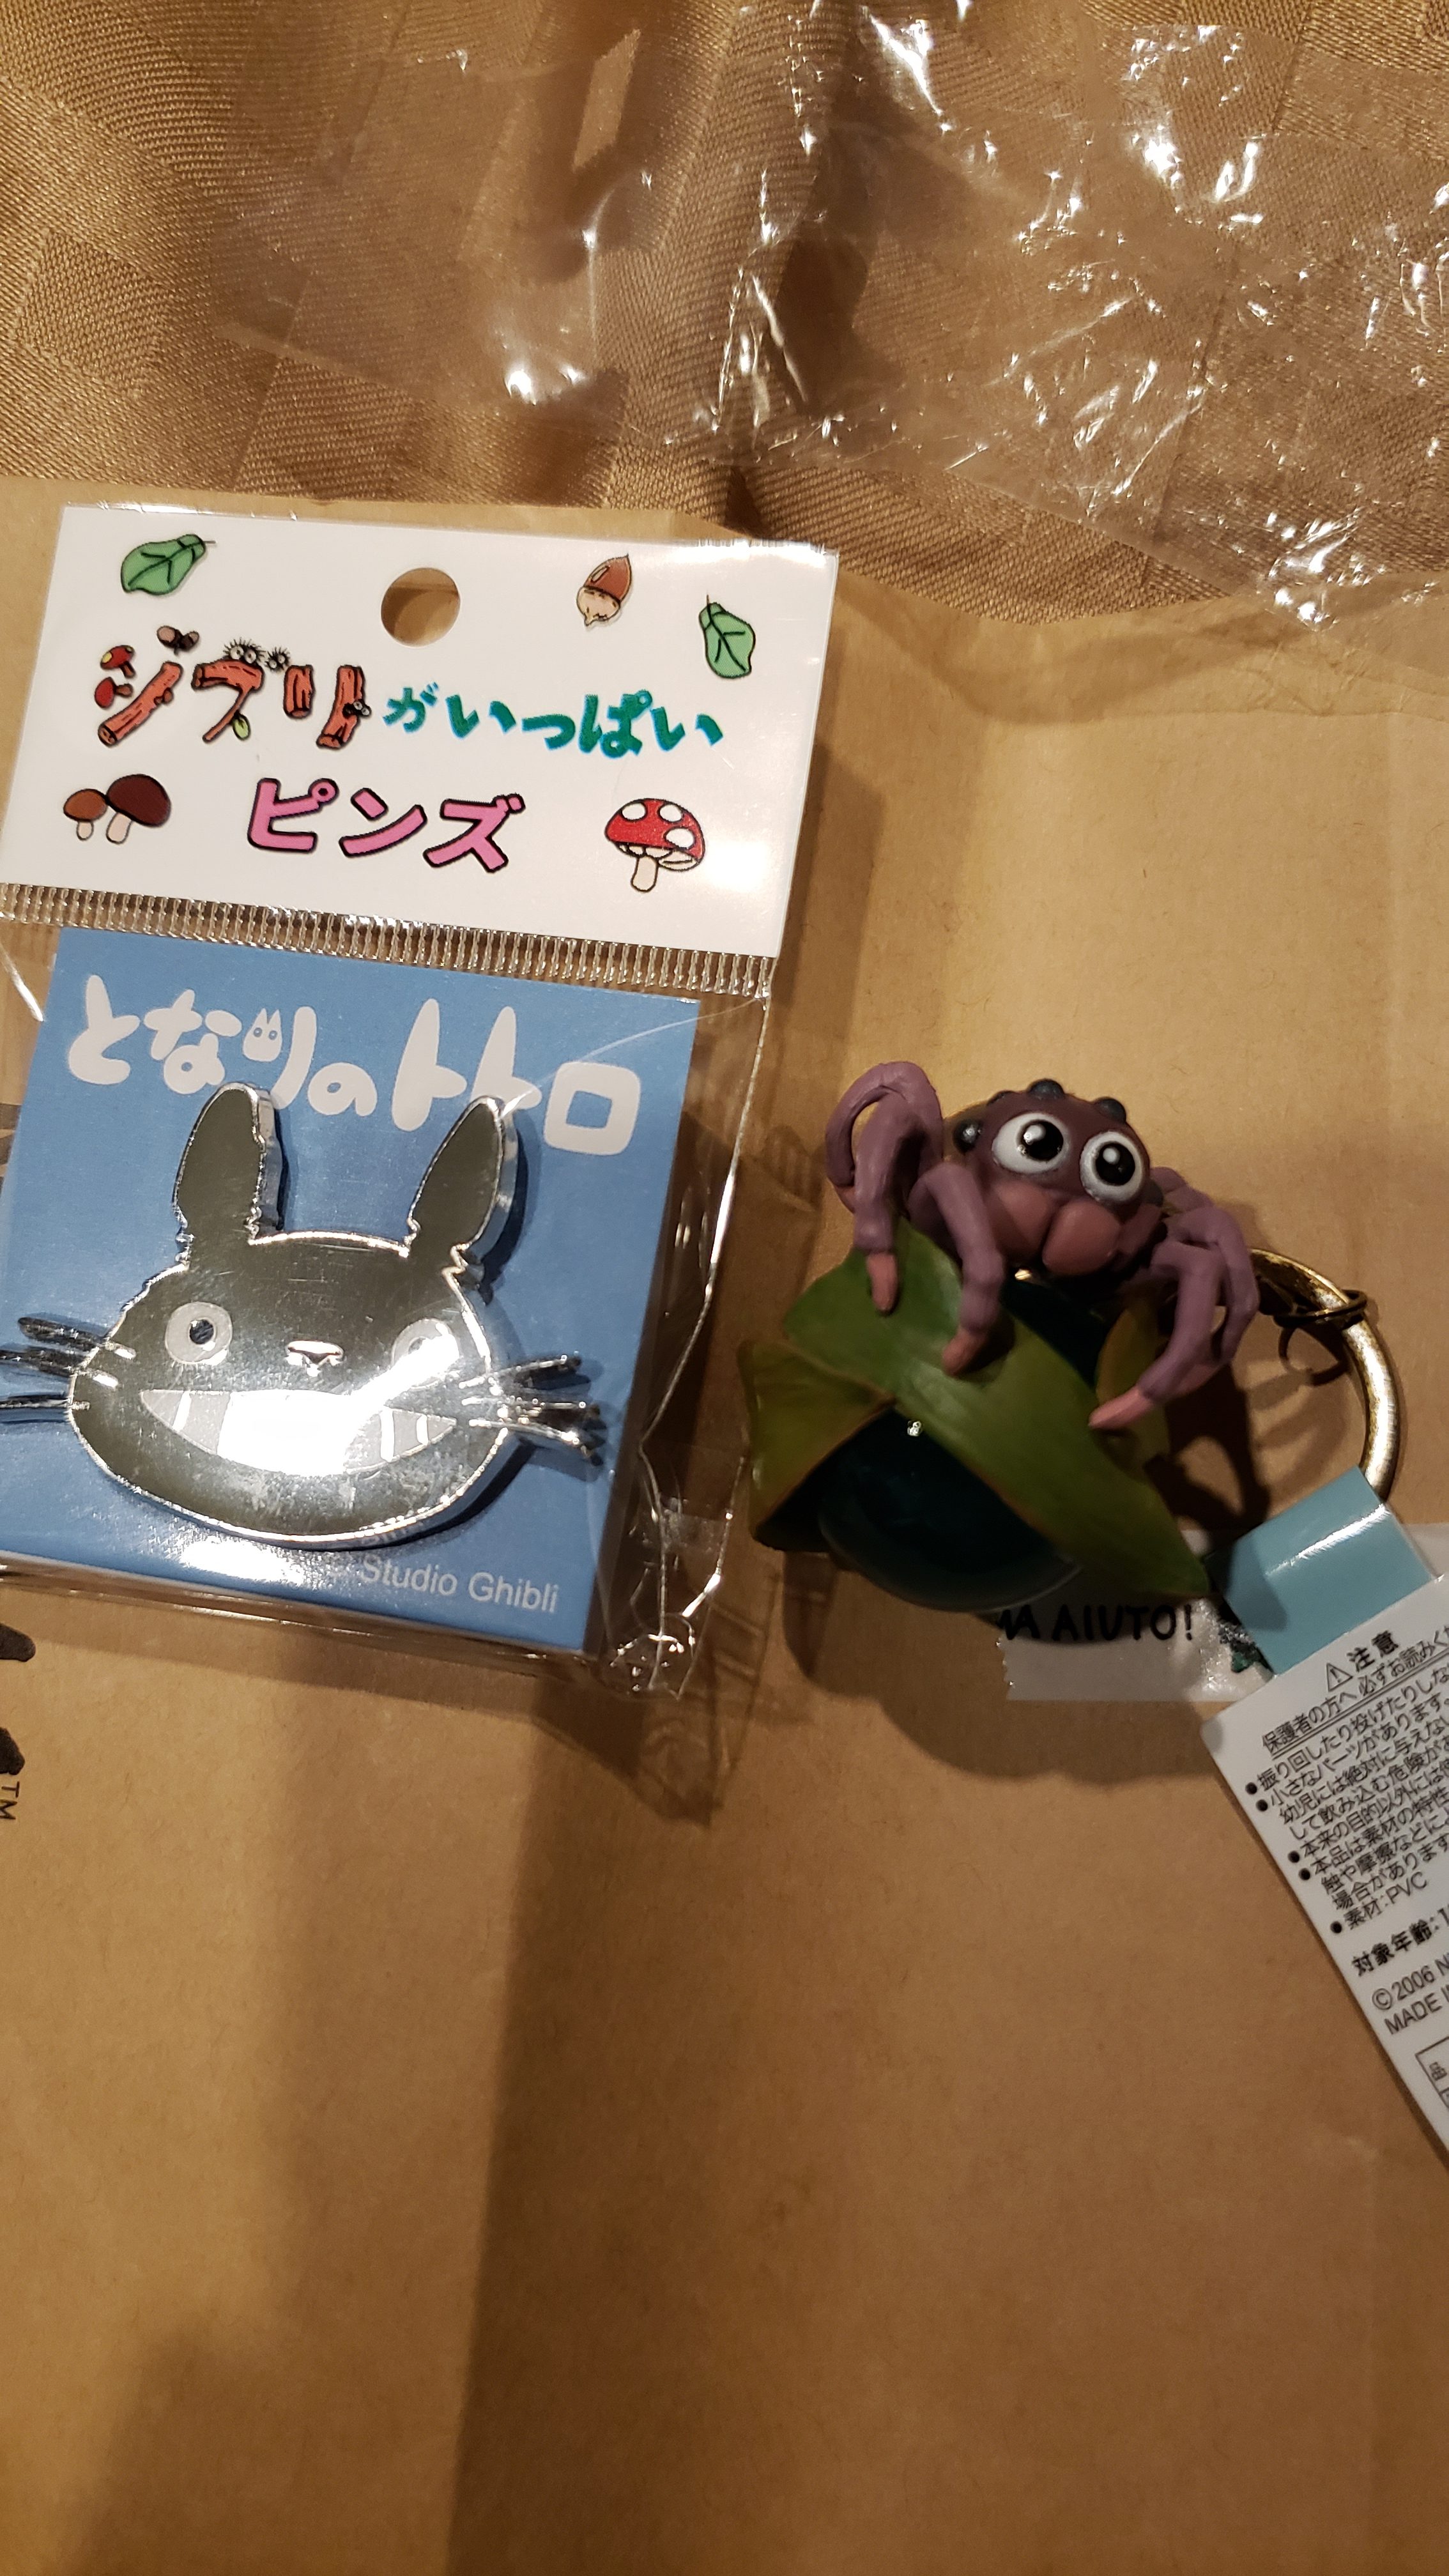
This wasn’t my first trip to the museum. I visited it last time and it was absolutely spectacular. The Ghibli Museum has one major rule though: no photos of the interior. You have to visit the museum yourself in order to truly experience it. I love this rule, but sadly, I could only really attempt to describe the museum to my sister (who is an artist) with my memories and a little paper fold-out model that they sold in the gift shop. I told her that I would bring her to the real one someday so that we can share the experience together – today was that day.
The morning started off early, like usual. We’re still quite jet lagged, so I decided to grab a container of instant coffee from the kombini last night. I normally have a rule of “1-cup of coffee per day,” but with how messed-up our body-clocks are, that rule went straight out the window. After I finished my serving of extra extra dark coffee, Abbie and I got dressed and headed to Tokyo Station, where we bought even more coffee. ….It’s just so good here.
This time, we arrived to the station a little bit later, around 8AM. There were only a few places open serving quick bites. That’s all we really needed, so we settled for a little cafe within the deep web of underground retail catacombs. The Japanese do in-fact eat breakfast on occasion, but it’s really nothing like the USA where it’s practically an essential staple meal that you eat right after you get up. Japan normally fully “starts” at 10AM, which sometimes makes it tough for westerners to start the day. If you know where to look, however, you can usually find something to munch on in the morning.
In the cafe, I decided to order an iced Americano and get Abbie a chocolate milk, along with a number of little baked goods. I was complemented by the girl running the counter for my ability to order in Japanese. She said it was cute that I knew what to say (aw. >//<). Even if it is a struggle, attempting to speak in Japanese is always appreciated by the locals since it shows that you’re interested in the culture of this island nation where the language isn’t spoken anywhere else. I’m more motivated than ever to keep learning!
Once the order came out, I think something got a little mixed up. Abbie ended up with an Iced Americano, which she exclaimed to be “really” strong. A quick chat with the counter and oh, there’s the cocoa! That’s better. The coffee was brilliantly smooth and delicious. Abbie told me that the chocolate milk was the best she’s ever had. Good stuff.
By now, it was creeping up towards 8:40AM. We needed to be at the Ghibli Museum gates by 10AM sharp. If you miss that time – tough, you’re not getting in. Thankfully, since we were already inside of Tokyo station, it was really easy to flash our rail passes to the counter and hop on the orange Chuo line towards Mitaka. As more and more people began to head to work, the station began to roar to life. Hundreds and hundreds of people coming-and-going to all of the different lines connected to the master JR hallway. I looked around and saw the distinct orange color of the Chuo line upon a time table sign. Looks like there was a train waiting at the station already. Common! Let’s hurry!
As the artfully arranged musical departure warning chimes, Abbie and I step on to the train and take a seat. Mere moments later, the doors close and the train departed. Whew, made it.
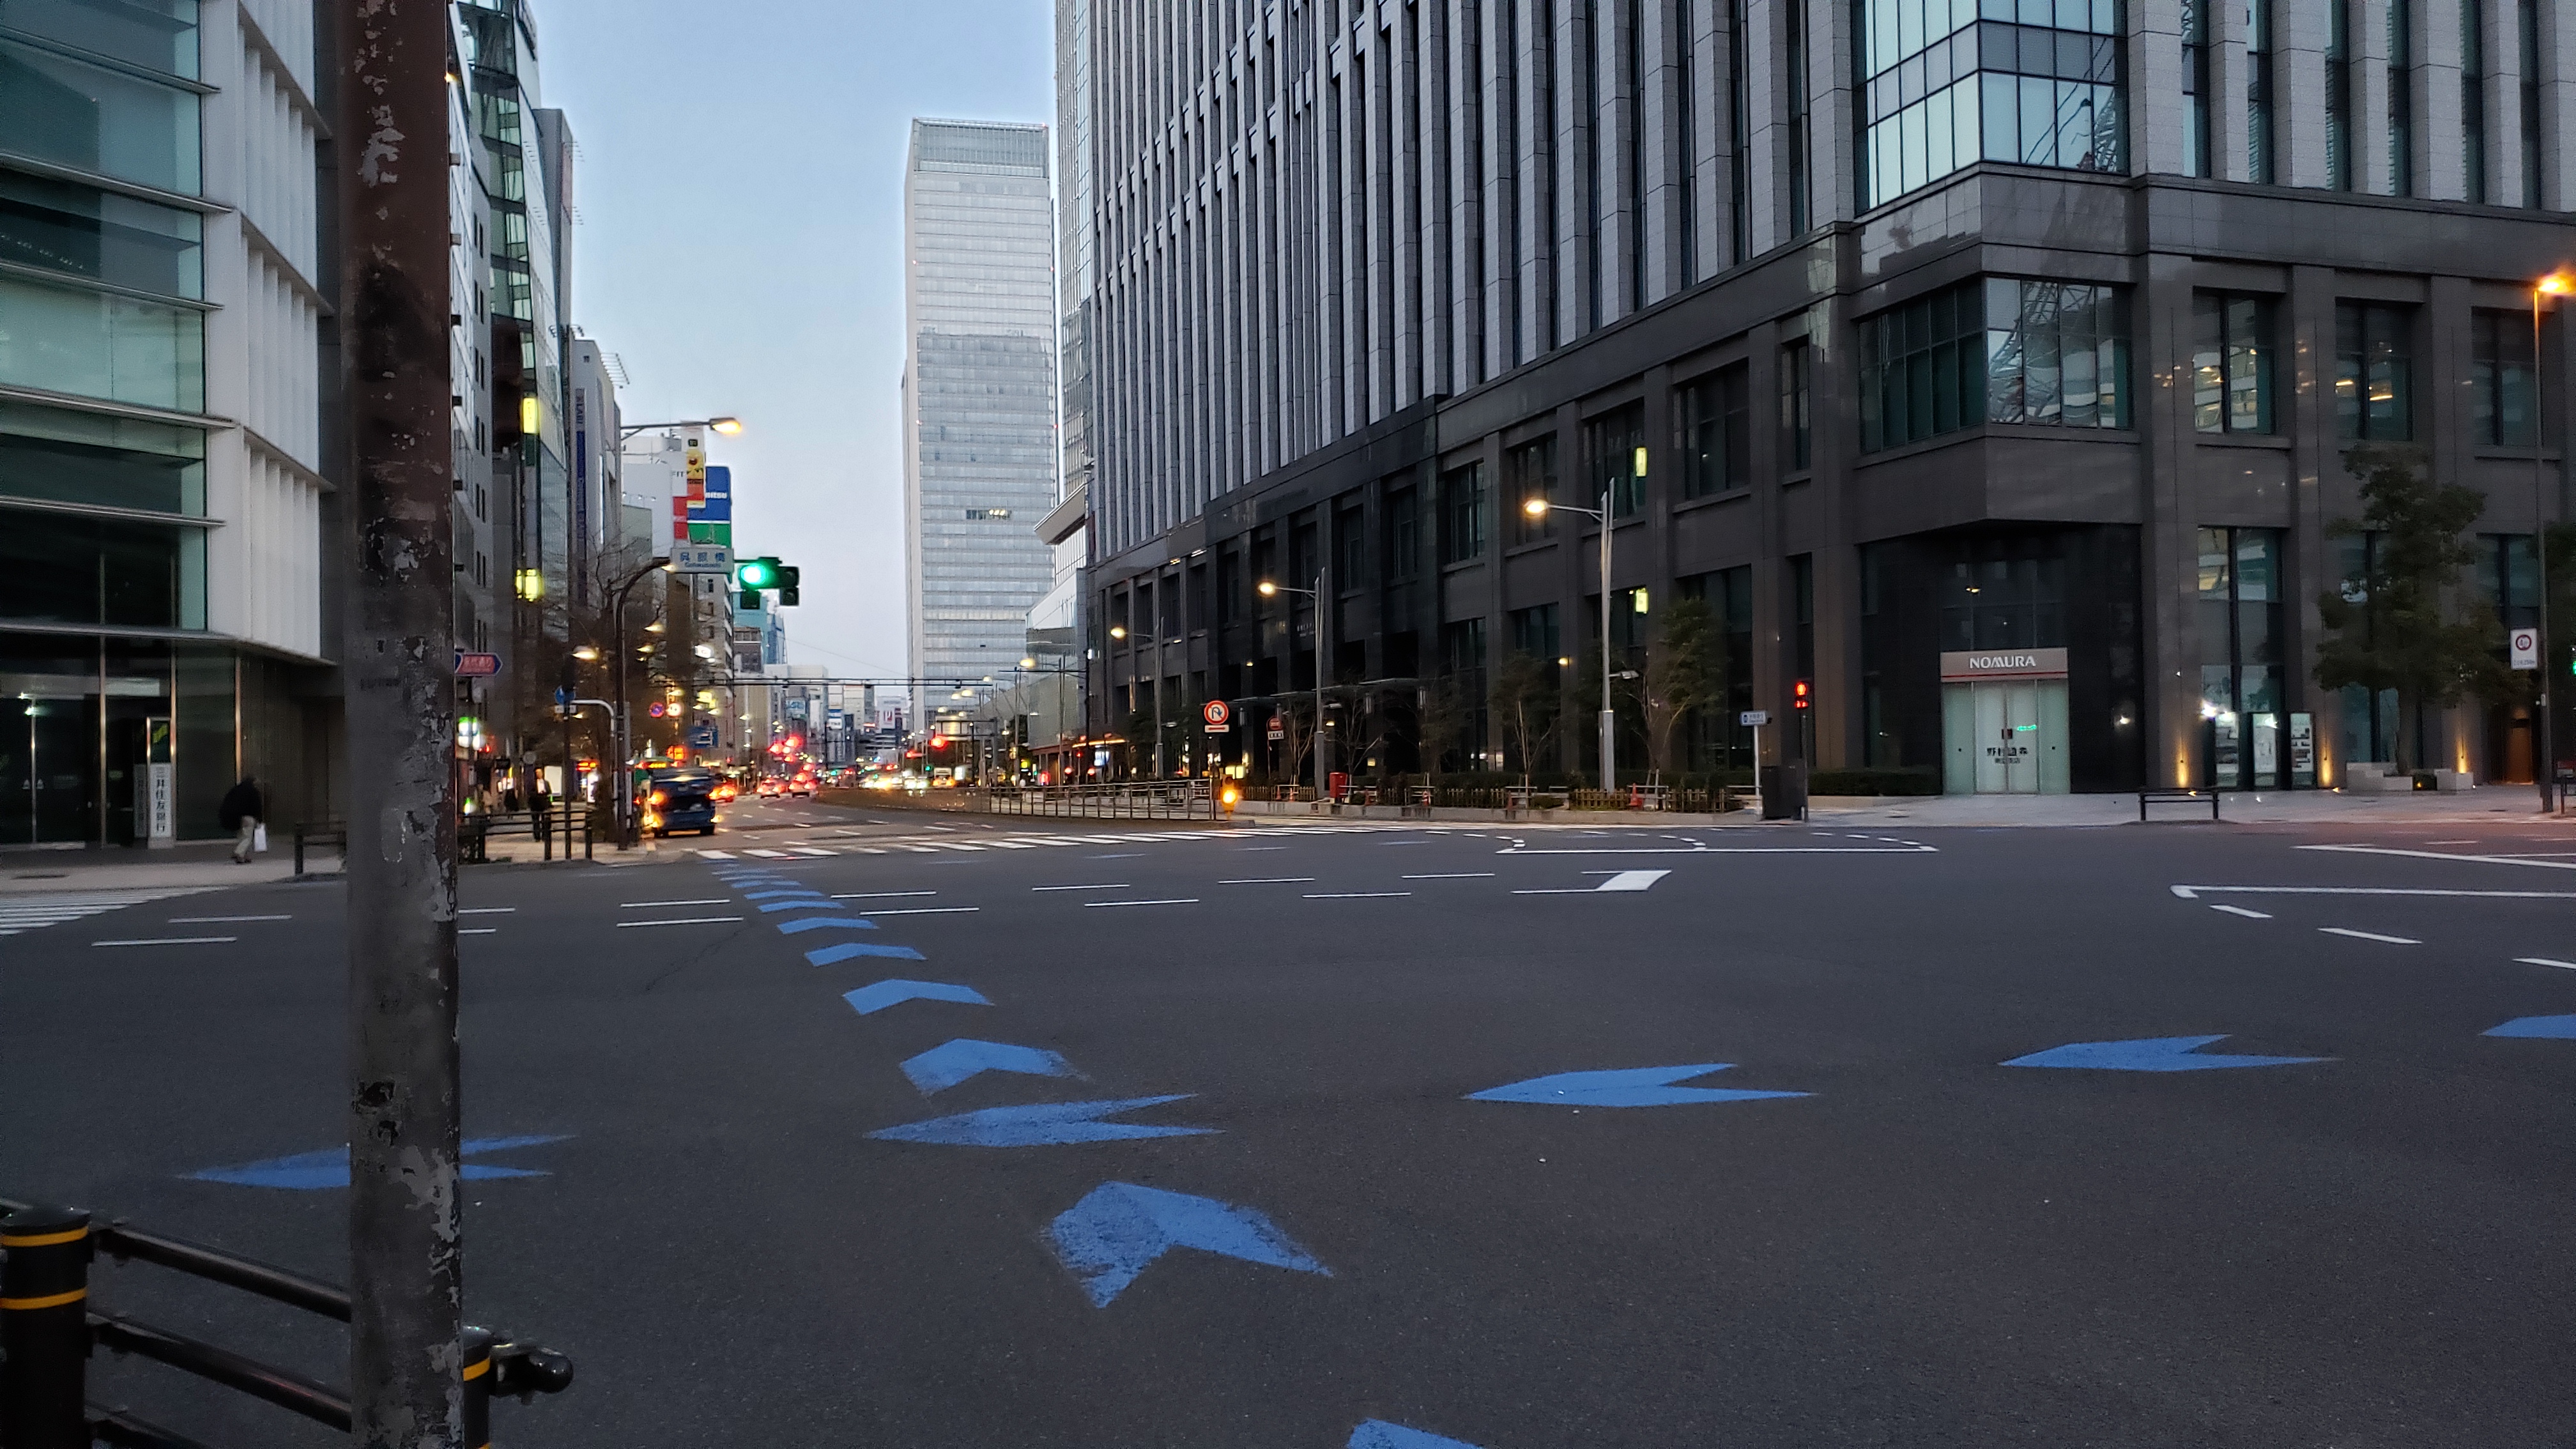
Off to Mitaka. The ride from Tokyo Station was only about 30 minutes, even though Mitaka is actually a decent distance away. I always loved how fast and efficient these trains are. They’re a marvel of civil engineering that would simply never work in the USA. A shame for sure, but that’s what makes these train rides special here and now. Lots of Tokyo passed us by through the big train windows and soon:
Mitaka in the morning
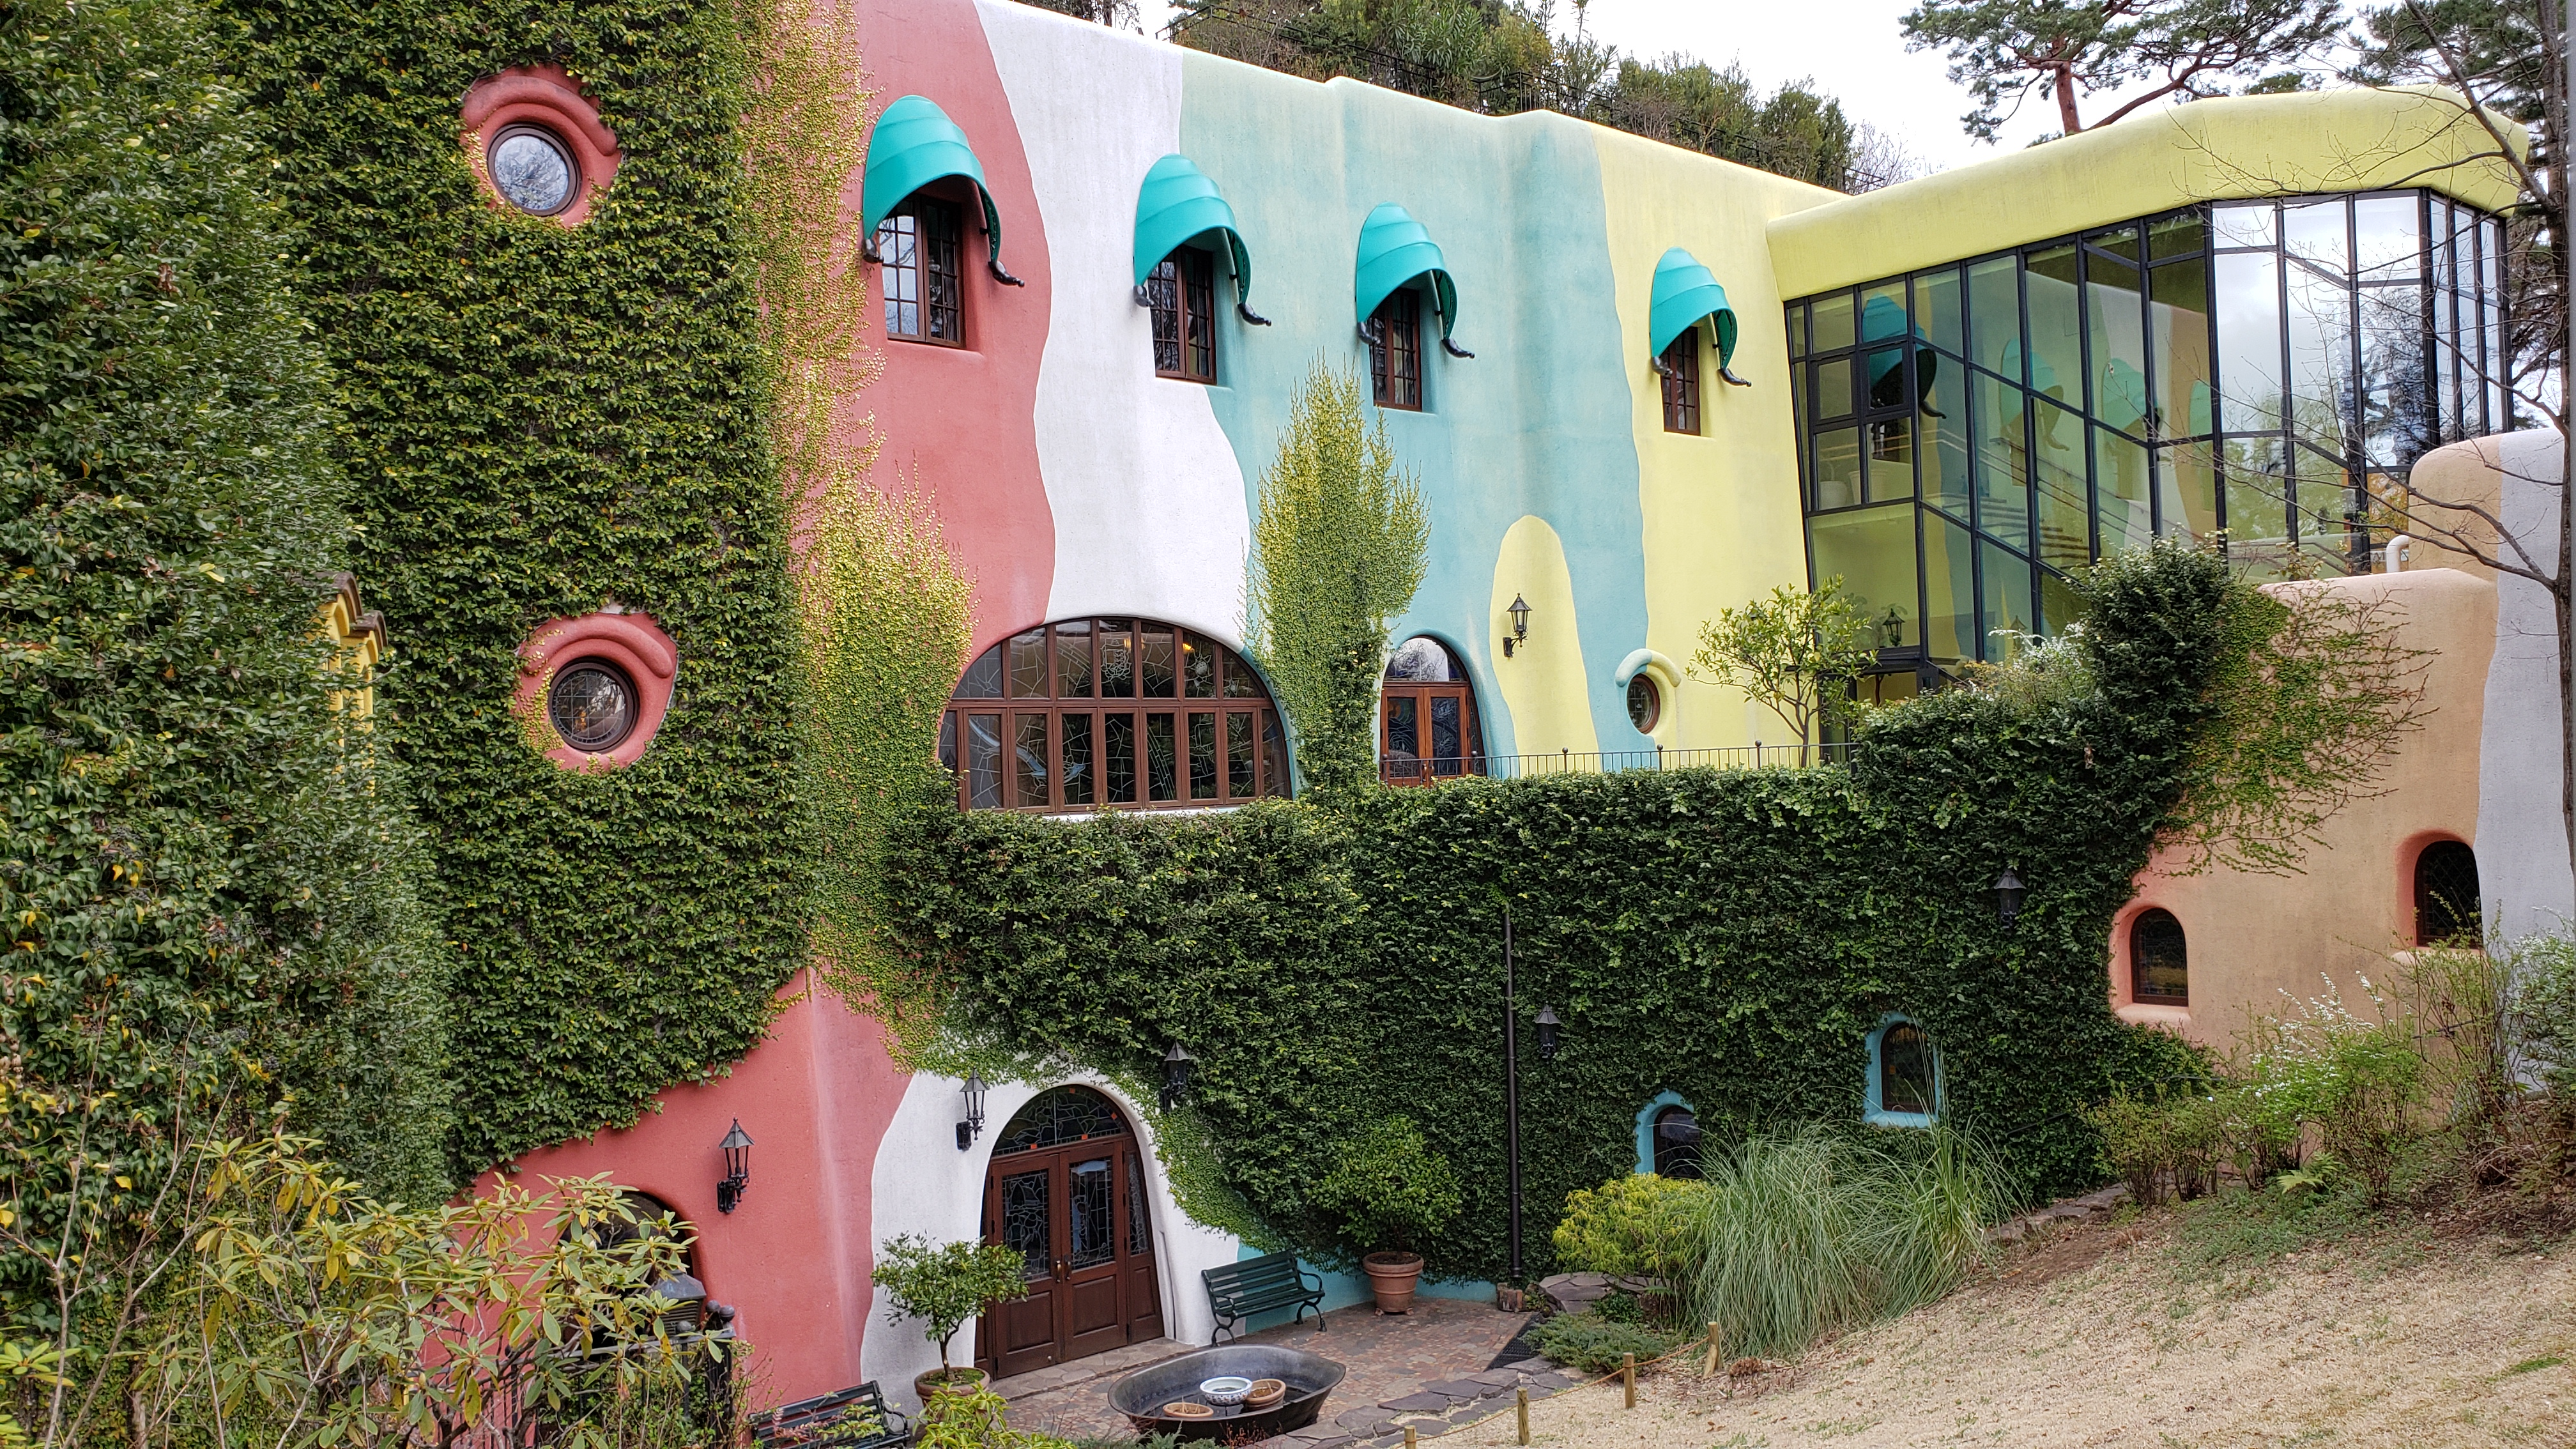
The museum was about 15 minutes away and we arrived at 9:20AM. Perfect, we can walk there without any issue and won’t be late. Soon we left behind the busy central metropolitan hub of Mitaka and began our walk through the residential area. There are lots of interesting houses to see here, all tucked away in a clean and quiet neighborhood. Ah, I remember this street. At the end of it, we’ll see a big wall of trees, and to the right of those trees, a sign:
Here lies a wonderful world of whimsical welcoming winsomeness. (“winsomeness” means beauty, I guess. Shut up, I needed another W word). The museum houses room-after-room of stunning artistic demonstrations and animation techniques. Today’s special exhibit was on the various lighting techniques and color choices made to achieve said techniques. There was also a special Ghibli short film screening of 水グモもんもん (Water Spider). Lovely!
Always such a treat
After we exchanged our voucher for our actual film-strip tickets, we congregated in the main lobby and awaited the short film. It’s always such a surreal experience to walk through the Ghibli Museum. Hand-crafted, stunningly intricate detail everywhere. Keep looking at that seemingly mundane wall. Keep staring at it. Longer… Look.. bet you didn’t notice the sea shells and the little painted lizards. Attention to detail is the name of the game here. It’s all so lovely.
The ceiling of The Saturn Theater is painted to look much like the toy room from the movie Spirited Away.
A poster for the short film we watched.
The short was wonderful, of course. There was no dialogue at all, so it was really easy for anybody to appreciate. It was now time to get lost within the museum and wander about to all of the demonstrations. Ornate works are art are everywhere in this building. From the colorful, movie-themed stained-glass windows, all the way down to the marvelously intricate bathroom (real, not just prints!) paintings. This place truly is a treasure and I’m so very glad that I finally have someone that has experienced it with me. To know what it’s really like there.
Abbie and I wandered about the exhibits on each floor, climbing all sorts of different shaped stairways along the way. Ghibli movies are known for both for their love of nature, and for the detailed machinations of machinery, both fantasy and real. The museum makes this self-evident, as beautiful nature scenes and settings are paired with brilliant automata and wonderfully detailed drawings of machinery.
The lighting exhibit was also very special. Genuine animation cels from countless Ghibli movies, all up for display, along with character specifications, color maps, frustum plane charts, paint color walls, coloring techniques. Everything. Each and every cel is hand-crafted and painted on stunning background paintings. Detailed expressions of motion, the illusions of weight, the poise of each character, and all of the wonderful colors that bring the scenes to life. All on display for you to see and to be inspired by. The level of detail per cel was just insane – and you need 24 of these to make one second of film. Wow. Any artist will likely agree with the idea that lighting, and the techniques used to achieve that lighting, make for the most dramatic impact on the mood and aesthetic of your scene. Here, you can witness advanced traditional techniques that I can only describe as “color-magic” paired with expressive and detailed line-art that really puts that sentiment to the test.
Then there is a recreation of Miyazaki’s workshop. Every single wall is filled with original artwork and artistic reference material. From base sketches, to watercolors, to the actual genuine background paintings. There. On the wall. Not protected behind glass or anything, just… there. For you to see with your own eyes. These background paintings are seriously my favorite part about Ghibli movies since they are so stunningly complex and beautiful, yet you often only get to see them for mere moments. Here, you could take as much time as you’d like to sit and stare at them in their true glory. You get to see what these works of art look like in their true color – some of which had been lost or dulled after being photographed for the films. You have to see it for yourself.
Room after room of the original background paintings. All of them simply pinned to the wall behind no glass – they humbly trust that their guests won’t touch or destroy the works. Incredible.
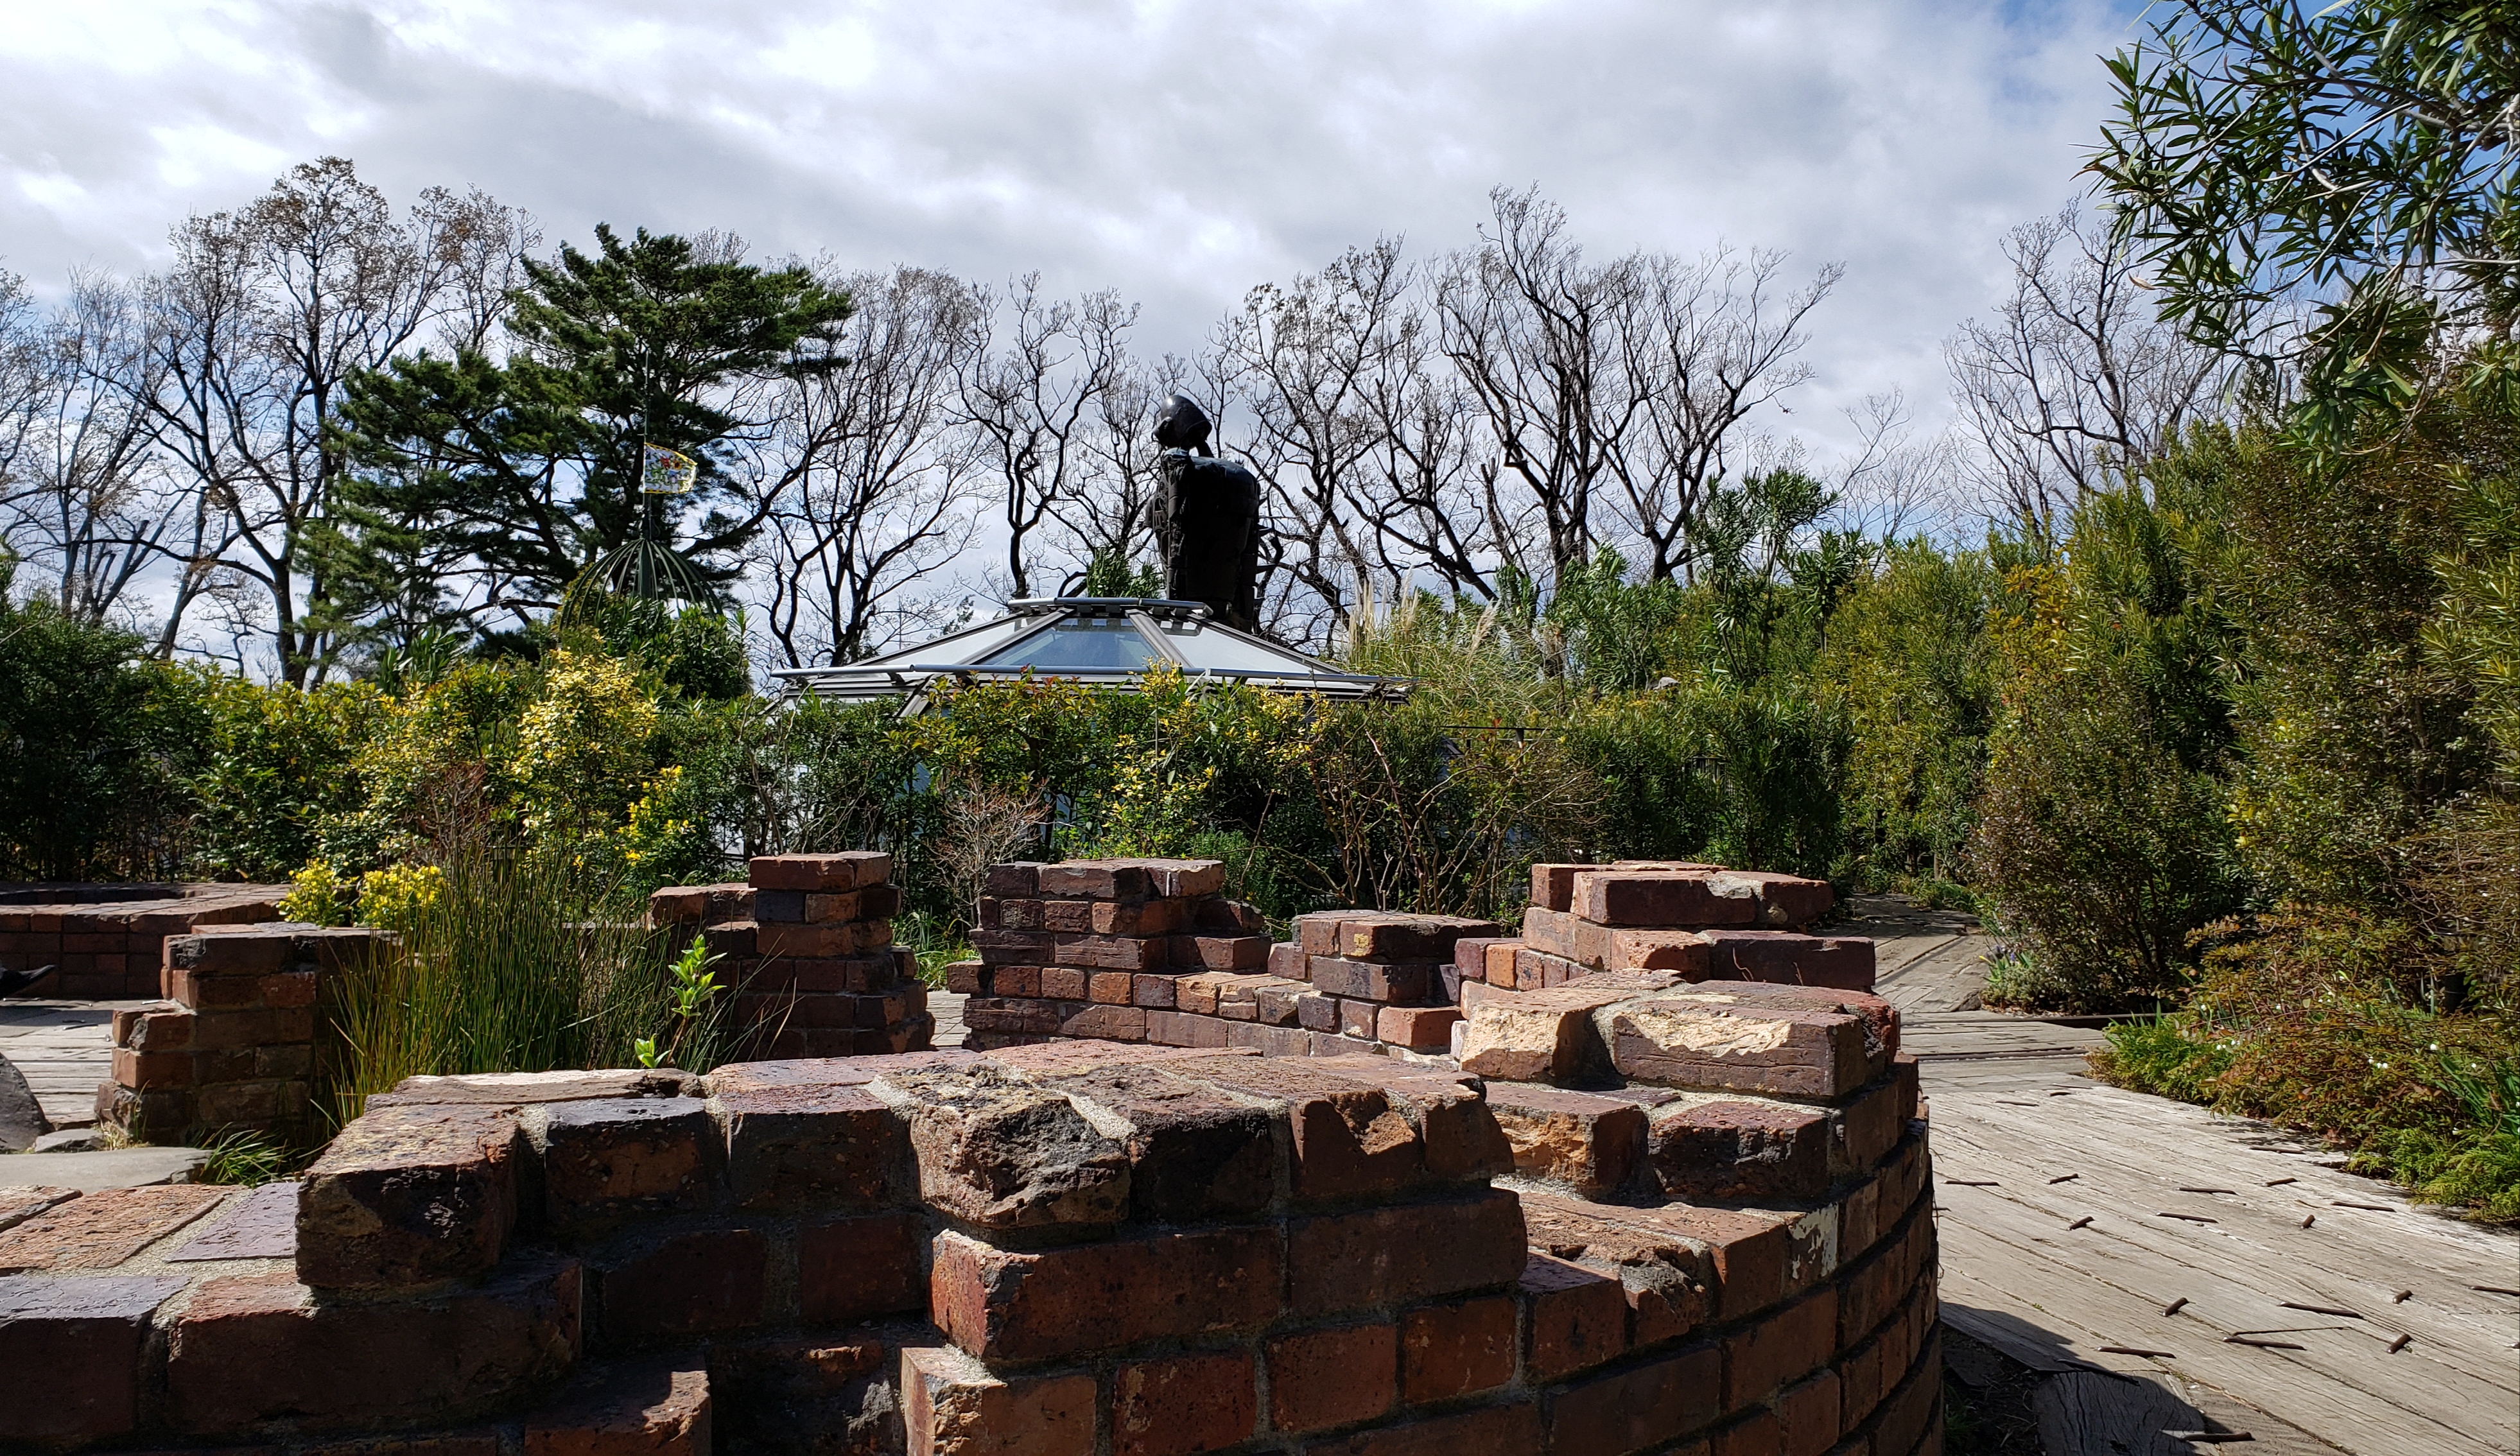
After a few hours of appreciating the artwork, there was one last thing I wanted to visit. The rooftop garden. The forecast for today was predicted to be cold and rainy, which it was for a little while in the morning, but now, it was shaping up to be a beautiful 70°F sunny day. We climbed the bird-cage spiral stairway and… there he is!
Today, I do not stand alone
Last time I was here, there was a brief moment where I sat on a bench at the rear of the rooftop garden, right next to the obelisk from Castle in the Sky, and just appreciated the scenery… alone.
My previous visit
But today, I share the same bench with the person I grew up with. The one who appreciates art in the same way as me. The one that I think should be a part of my own personal Ghibli movie.
The very same bench. I had a feeling I’d be back.
On the rooftop garden
How could we make this day even better? Oh yeah, letting Abbie experience authentic Ramen for the first time.
Needless to say it was divine.
After the long trek home with our stomachs full of ramen and our minds full of inspiration, we decided to take it easy for the rest of the night. The ramen, while incredibly delicious, was super heavy, so we decided to just get a couple onigiri rice balls from the local store along with a couple of snacks to go with it. Yummy and simple. I’m sleepy.
A postcard print of one of my favorite backgrounds. It really captures the special kind of light the sun casts on buildings here in Japan.
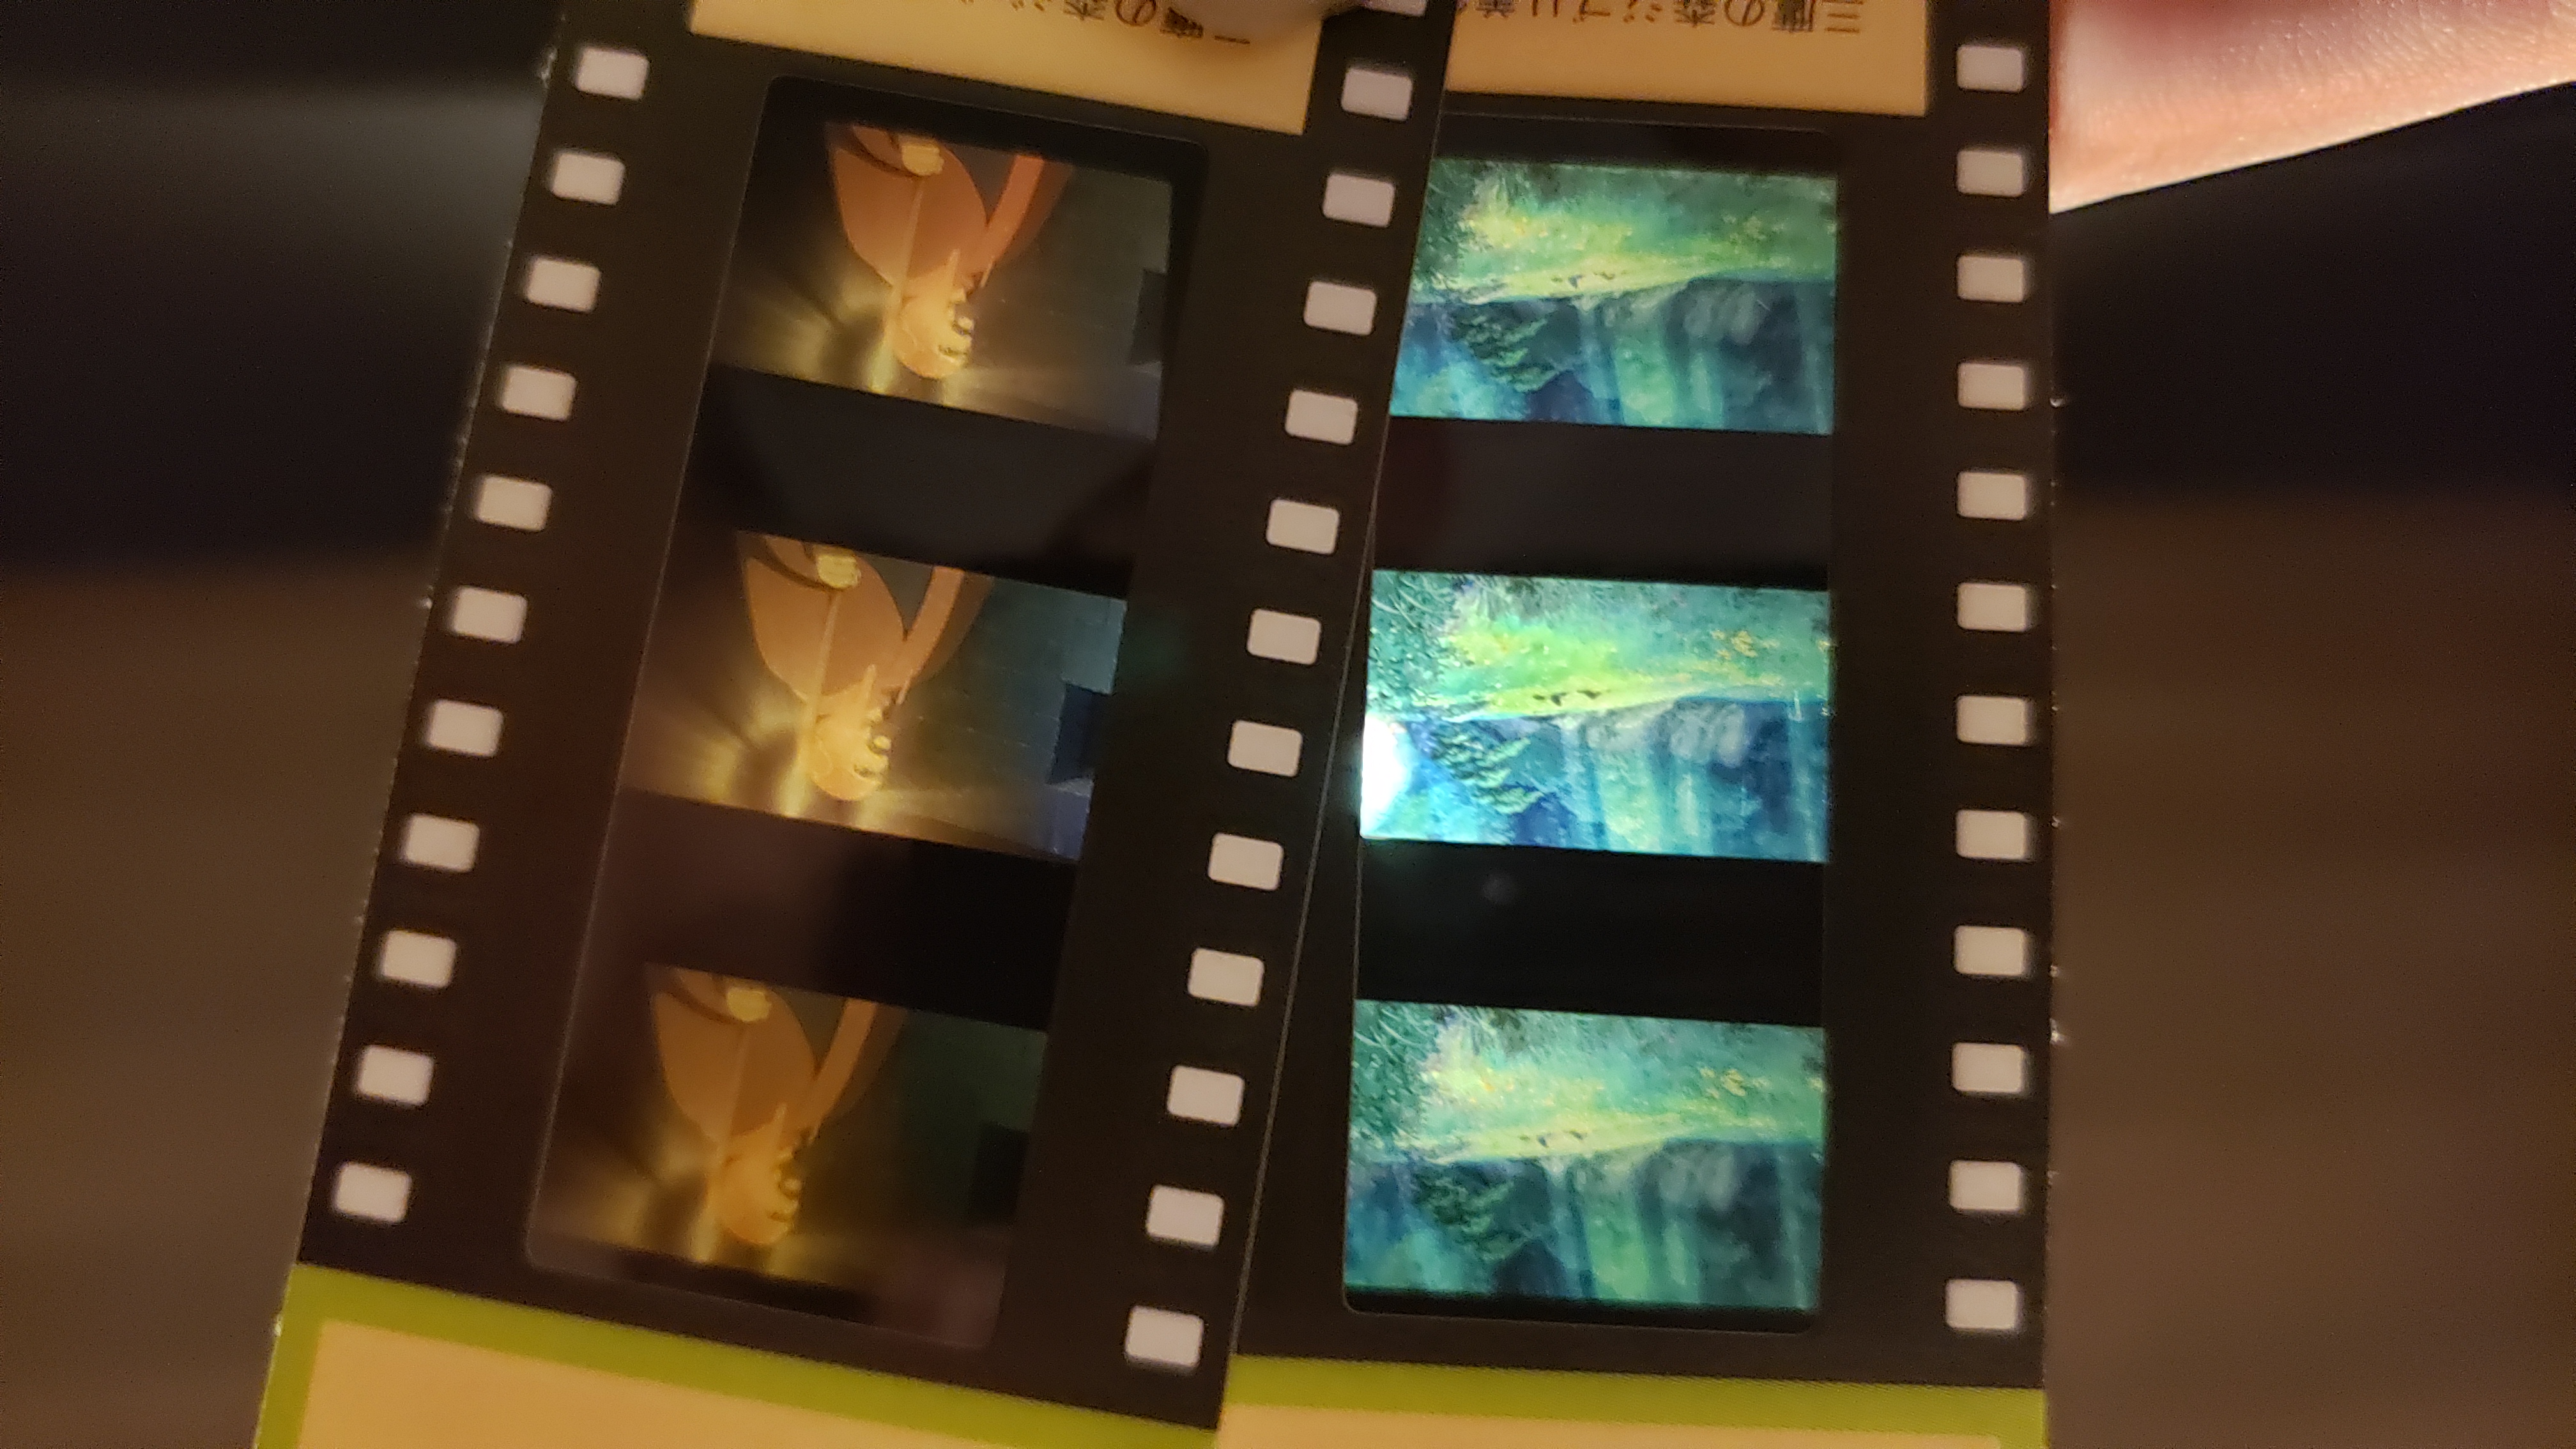
Every Ghibli Museum ticket contains original strips of film. Which movies are these from?
2:50AM. If you see this on your clock in a foreign country, you’re likely experiencing the effects of jetlag. We too were not immune. Both Abbie and I decided that we desired sleep more than a meal last night, so we were both really hungry. We haven’t had our first meal in Japan yet! I didn’t really want to have our first meal be from a convenience store (even though the quality of those meals are still pretty good). I wanted it to be special.
Tokyo in the early AM
We decided to wander down towards Tokyo Station which lies about 1.5KM from our hotel. We’d get a nice morning walk in and see Tokyo wake up. By the time we were ready to leave, it was still only about 5AM. The sun had just barely scraped past the horizon line, basking Tokyo in a faint morning glow.
The idea was that Tokyo Station is filled to the brim with restaurants, so surely SOMETHING had to be open to serve breakfast to the few early risers. Soon, we arrived to the station’s gigantic south entrance and made our ways to the massive underground catacomb of shops & restaurants. Hundreds and hundreds of stalls… all closed. Maybe there’s something down here… no, all closed. Oh. It was still only about 6AM, so I decided to see what time most of the stores opened. Most were 10AM, some were 8AM, and a select few were open at 7AM. With our now ravenous hunger, we admit defeat. Let’s just get out of the station for now and make our way back to the hotel to wait for the world to wake up a little more. We’ll grab something from a kombini along the way. Not the best first meal, but we were so hungry.
Soba noodle breakfast. So good.
So, we made our way back out of Tokyo Station and began to walk towards the hotel. Be on the lookout for a kombini – there has to be a bunch around here. Hmm.. none over here, or over here… what? How could we have not found one by now? Wait, look across the street. YES! A soba noodle shop was open! That will make a perfect breakfast and first meal! Abbie and I wait for the crossing green signal and make our way over (see: practically sprint) to the noodle shop.
Like most noodle shops, this particular store operated with meal tickets dispensed from a vending machine out front. Take a look through the window and you will see plenty of detailed plastic example meals along with their names and numbers. You don’t have to know Japanese to use these machines – simply find the meal that looks the best to you and remember the number, then find that same number on the vending machine. Easy!
Abbie and I both pick our meals and head over to the machine sitting just outside the front of the store. This machine had seen better days. It rejected my cash several times before finally accepting it. At first, I thought I was doing something wrong, but no, the machine was just a little weathered. Soon we had our meal tickets. We stepped inside the warm noodle shop and instantly the smell of kombu broth and all the delicious toppings amplified from “subtle hint in the streets” to “omg it this smells so incredible I need it now.” Especially since it was still pretty cold outside. Warm, delicious soup for breakfast on a cold morning. Yes.
Within moments, our soups were ready. “Hai, Dozo!” says the woman operating the store. She hands me both of our bowls and we sat down to eat among the many other early rising salary men. Warm soba broth, a delicious poached egg, sea weed, a bit of crab, puffed rice, and of course, a squishy slice of aburaage (fried tofu). This seems to be a pretty loaded version of Kitsune soba, or “Fox-soba.” It was SO good. That was a proper first meal, stumbled upon by sheer luck. Once we finished, we gave our empty bowls back to the woman operating the shop and exclaimed “Dozo gochisosama deshita!” (It was wonderful!). Proud replies of gratitude rang back from the kitchen, and we were back out on to the chilly streets of downtown Tokyo.
With our hunger finally satiated, we decided to walk back to the hotel for a little longer while we wait for a bit more of the world to wake up. Along the way, Abbie and I discuss the pleasures of traveling without much of a plan. You simply go where you want, when you want. If you’re tired, go back to the hotel. Find something interesting? Go towards it. Your trip is not dictated by a schedule, or a guide telling you to ‘walk sharp!’
Of course, we just had to stop by a kombini to pick up a couple of staple treats and my beloved cheap, crappy Boss coffee. So good. I gather up a few cans of the stuff, as well as some mochi-choco-pan (squishy chocolate bread) and some melon-pan (melon bread). Soon, we arrived back at our hotel, where Abbie and I split our melon-pan. This was the first time Abbie got to experience the wonders of Japanese baked goods. Wonderfully soft and airy with a distinct subtle sweetness. Wonderful.
After-breakfast treat
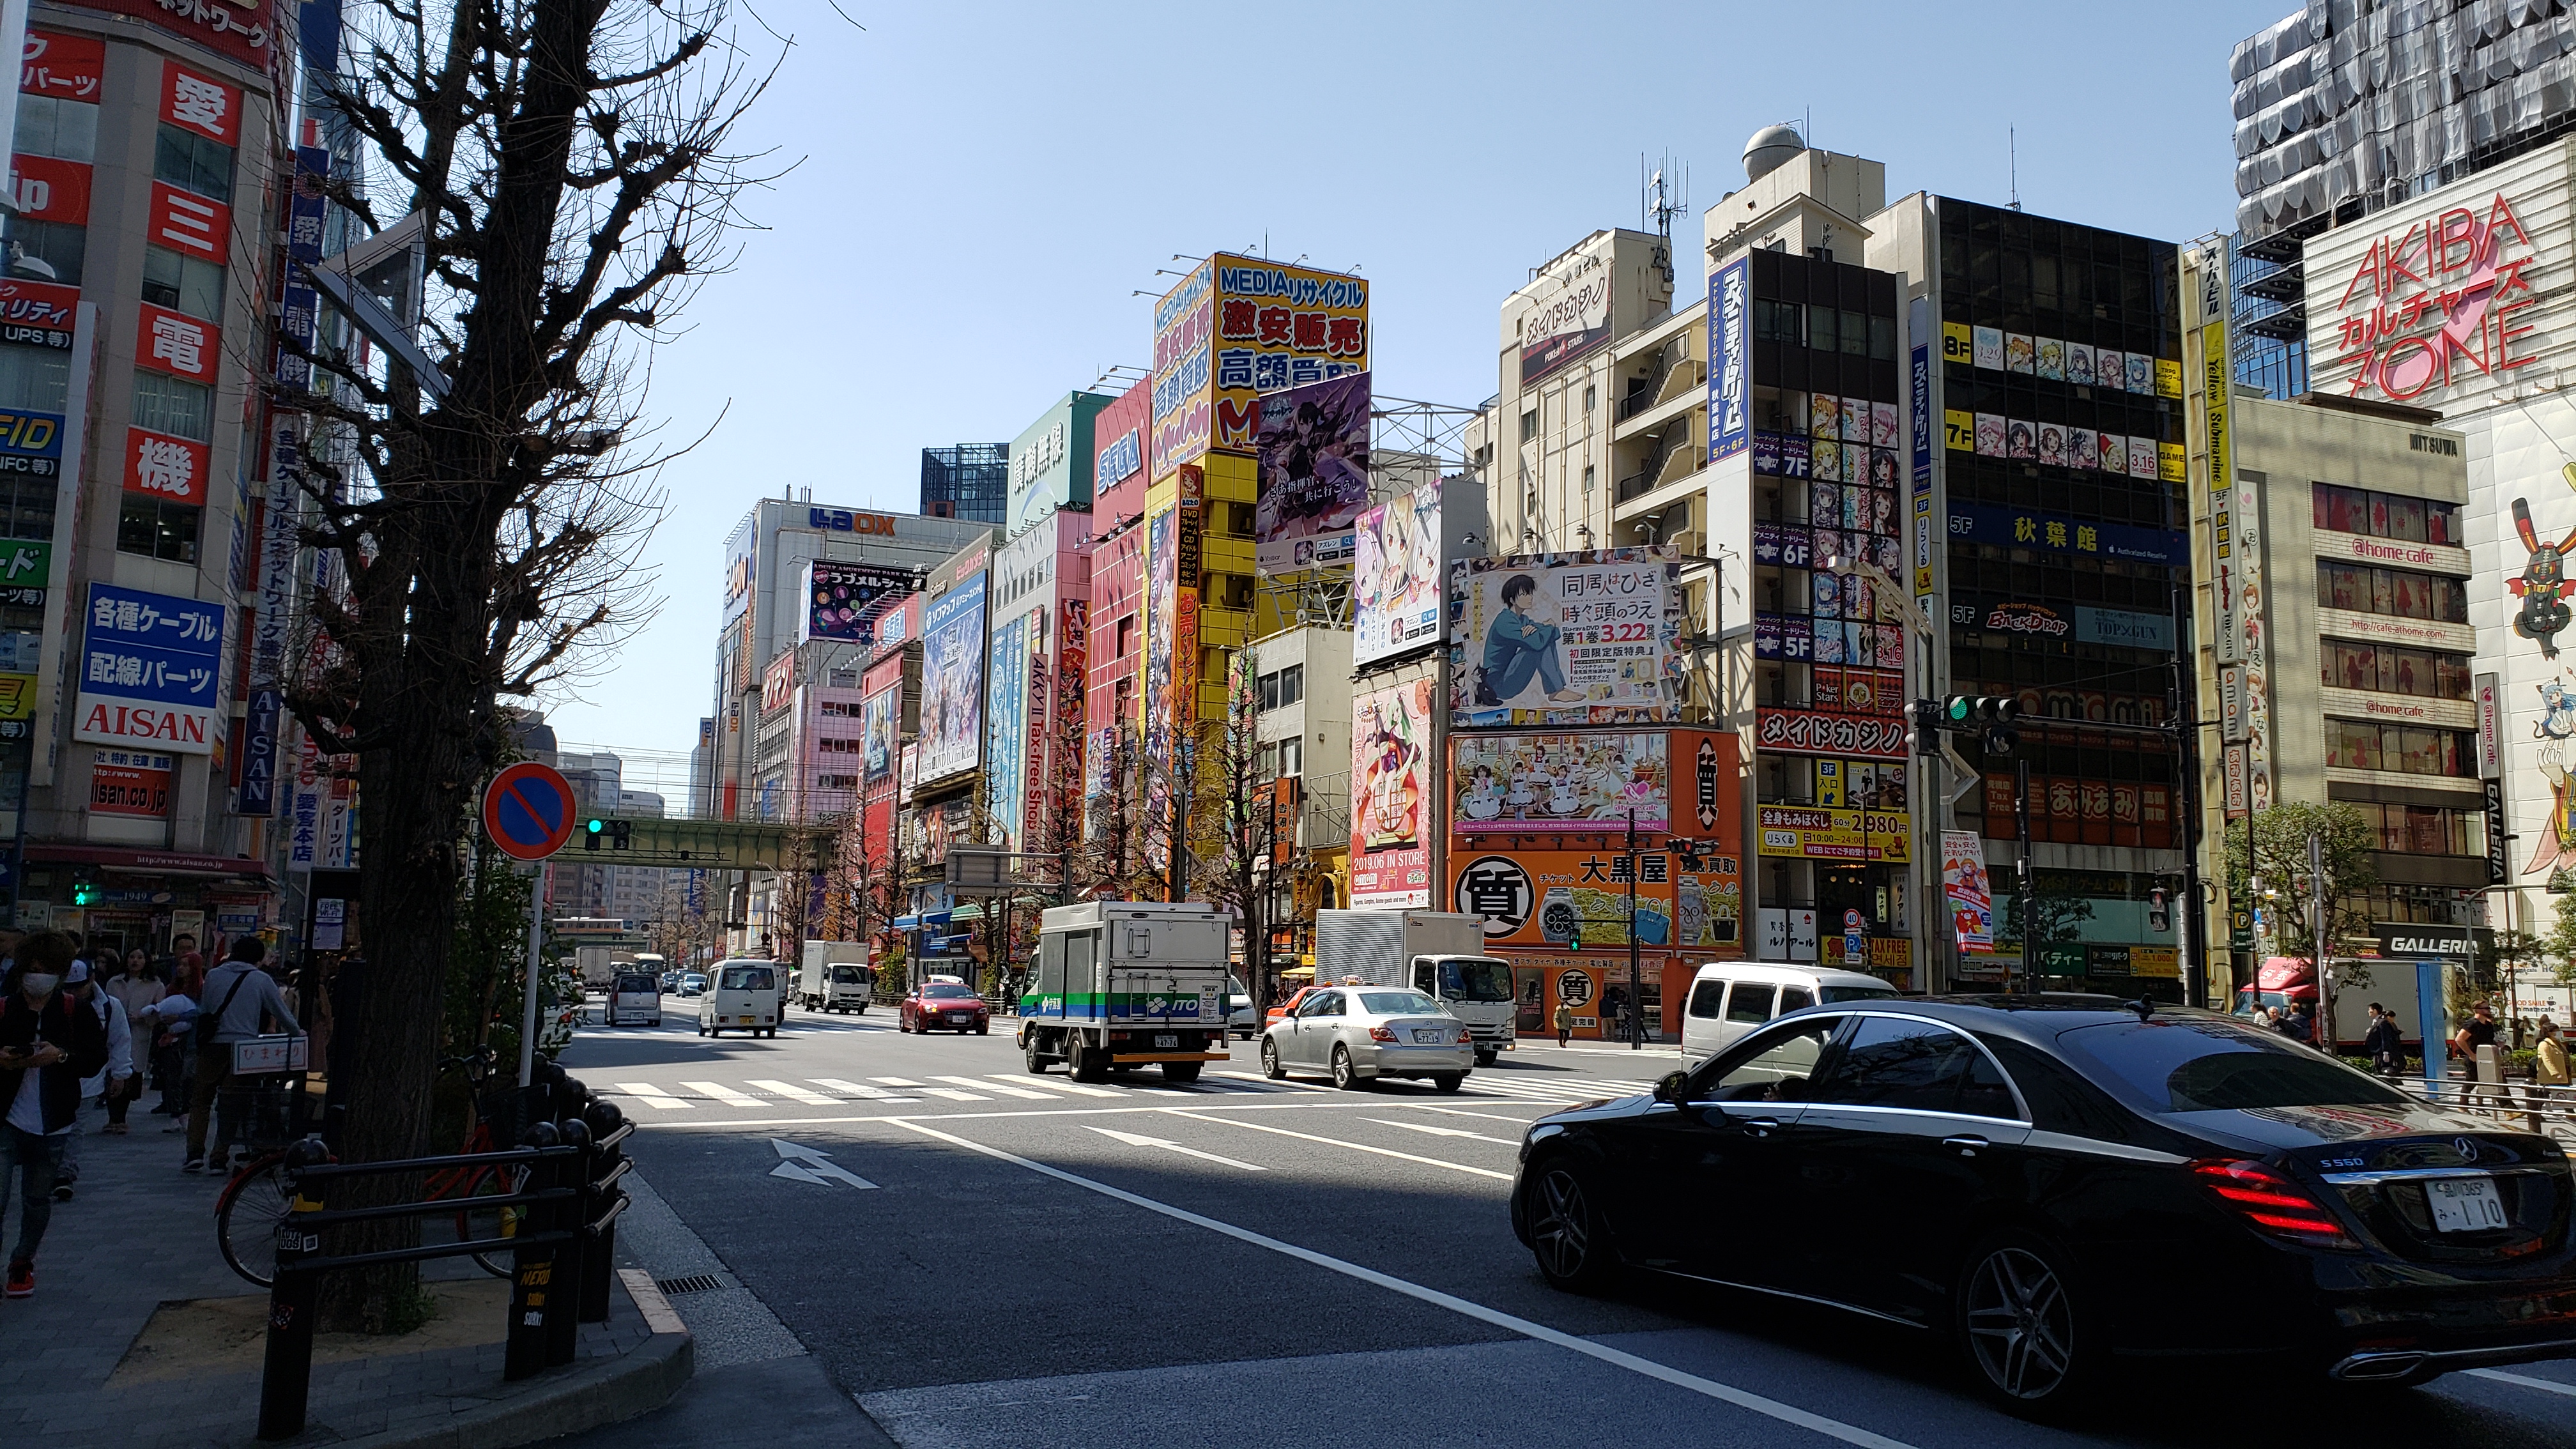
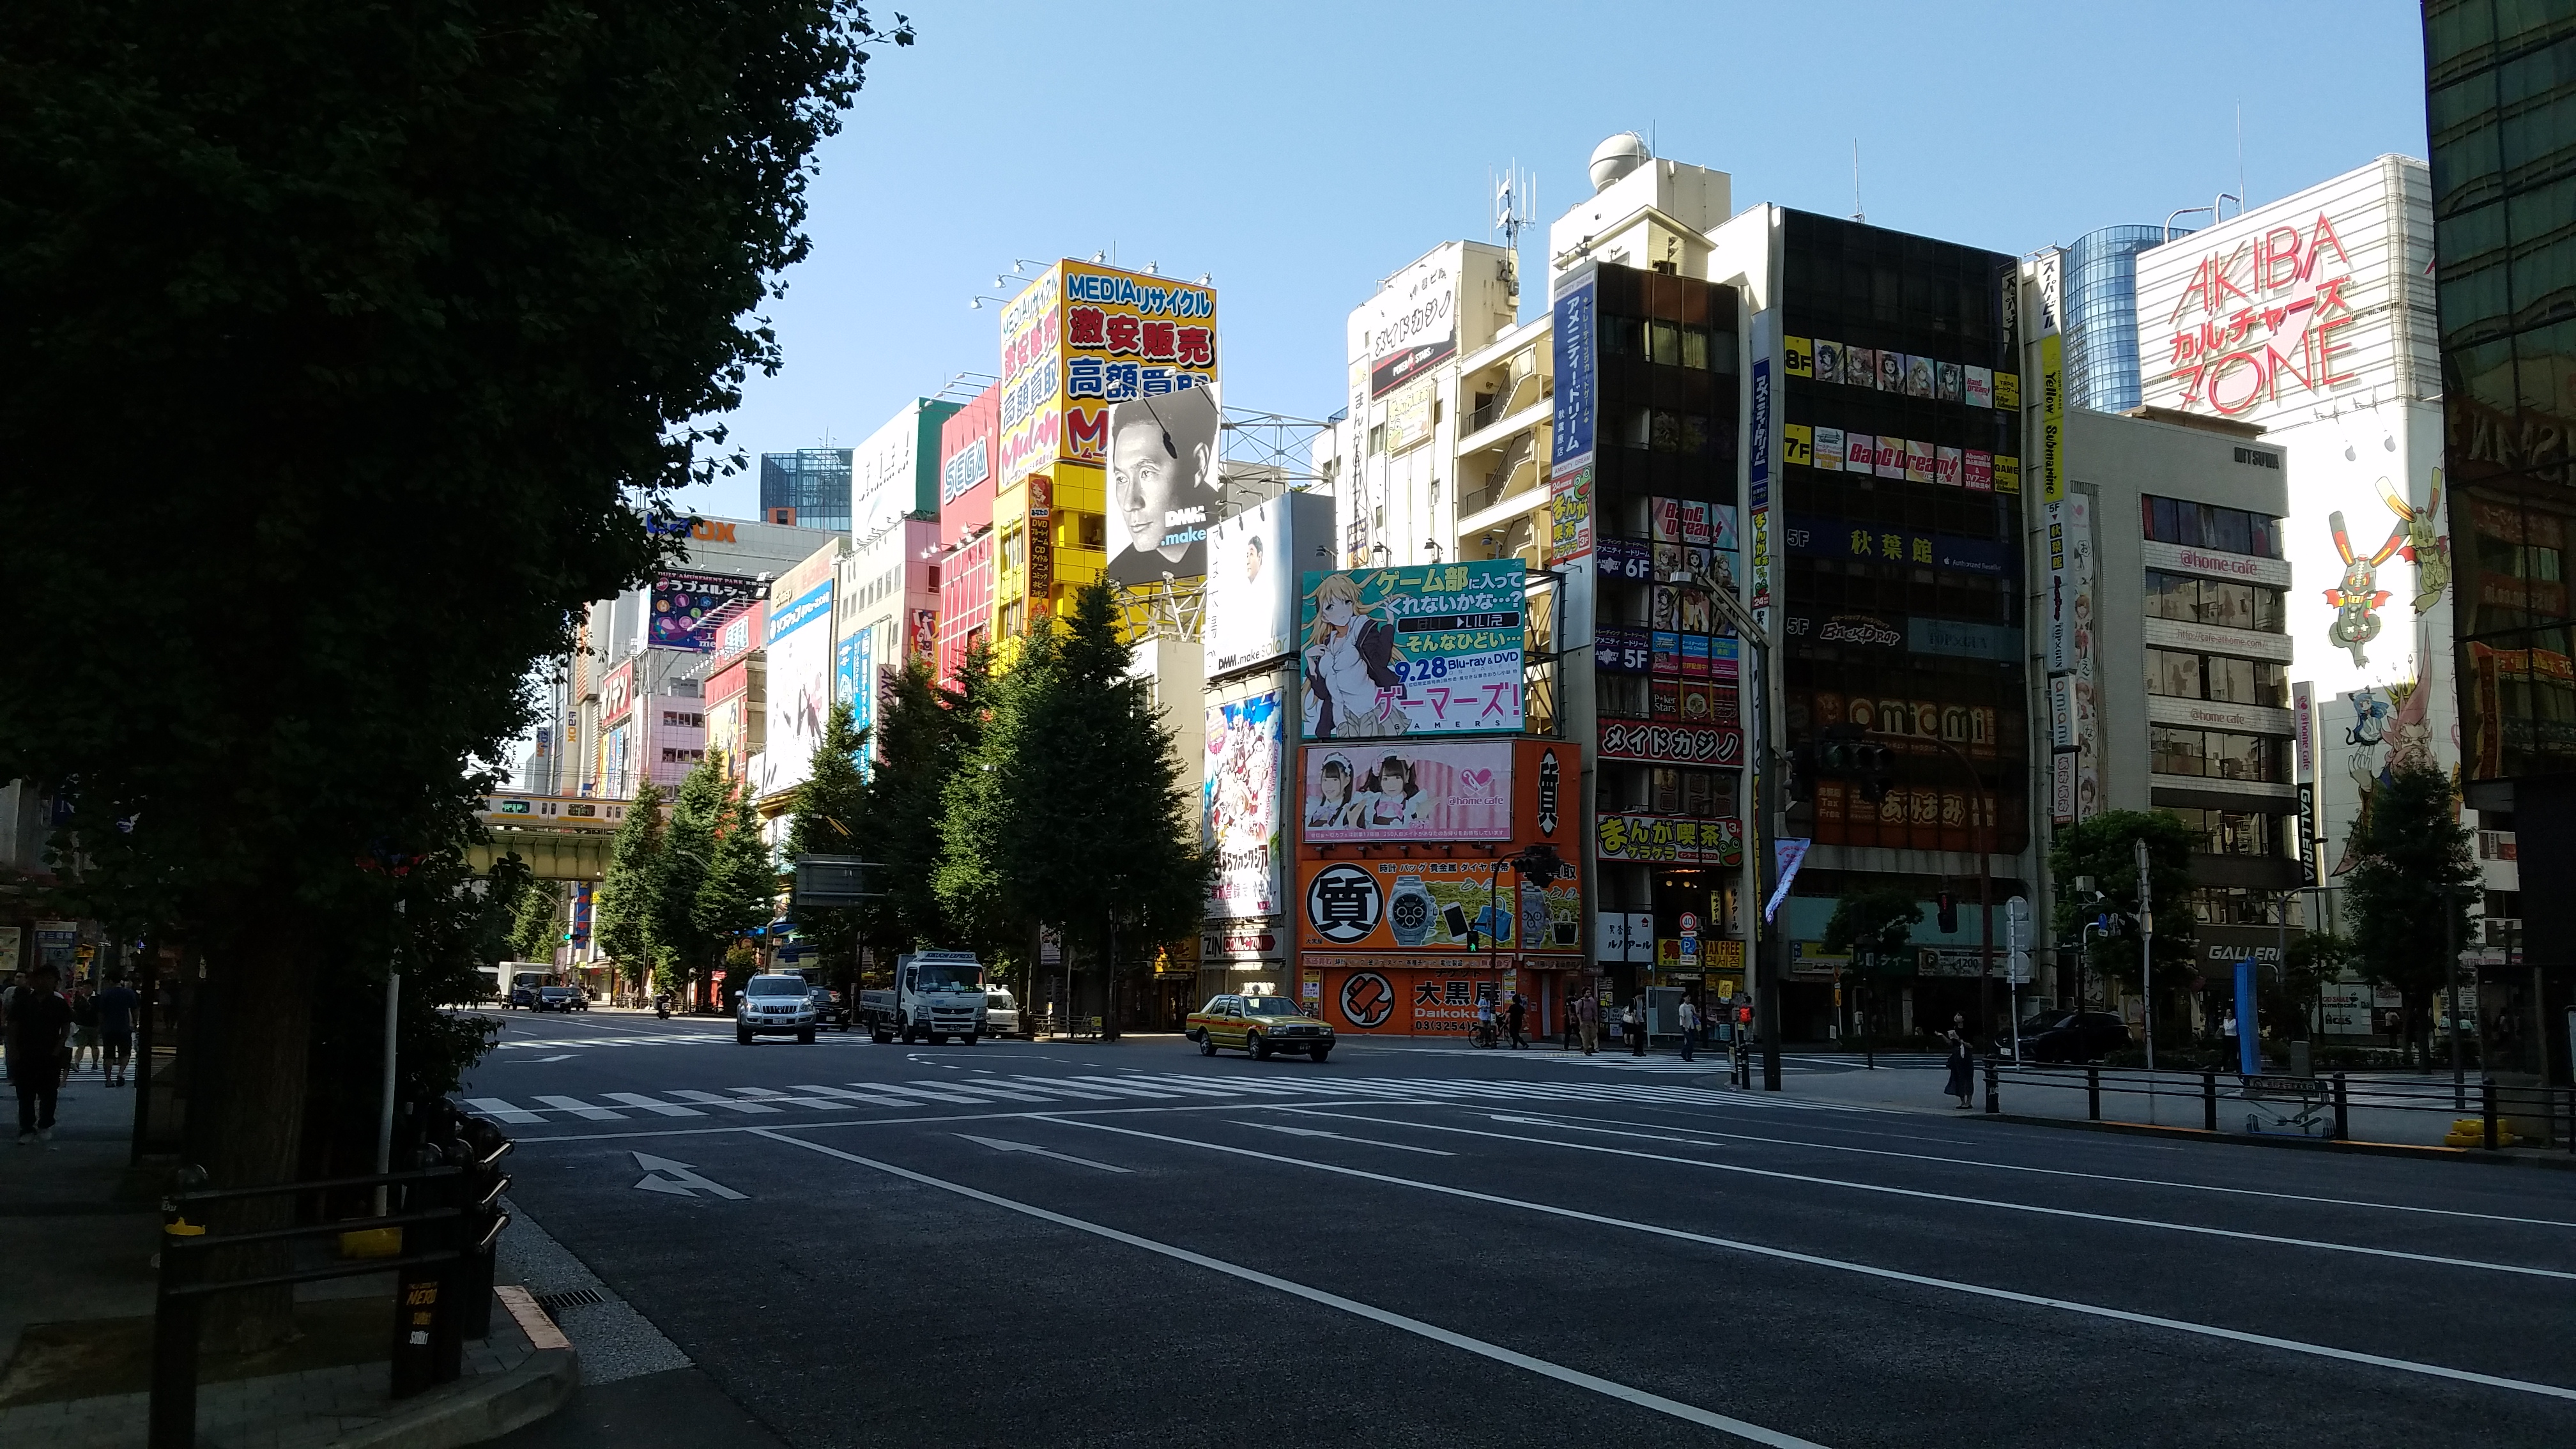
After a little more relaxing at the hotel, and a little bit of early-morning Japanese TV (an entire show detailed miniature scenes accompanied by peaceful music, how lovely!), we looked up the weather for the day. Perfectly clear, sunny, and 21°C (~70ºF). A literal “perfect day” was ahead of us. We needed somewhere fun with a lot of walking around. I’m thinking: Akihabara. Yes. YES.
The Electric City of Everything. A tourist hot-spot for manga, anime, and video games for sure, but I had a different goal in mind in addition to all the other wonderful things you can do in Akiba. There was this one specific vendor there that I’ve heard so much about that specialized in something that I’m very, very fond of. Sometime today, we’ll seek him and is store out. At about 9:30AM, we decided to head out and just jump on the subway since the station right outside our hotel has trains that shoot straight to Akihabara. Convenient! I also used this as an opportunity to show Abbie how the seemingly complicated train maps worked. With a little help from Google Maps, it’s not so tough to order the correct ticket.
We quickly zoomed off underground and arrived at the Tokyo Metro station just south of Akihabara. Going to this metro station instead of the main JR Akiba station was actually pretty fun, since you must cross under a giant train bridge that served as a surprise-reveal gateway for the pure sensory overload that Akihabara is known to provide. We passed under the bridge and, oh yeah, here it is.
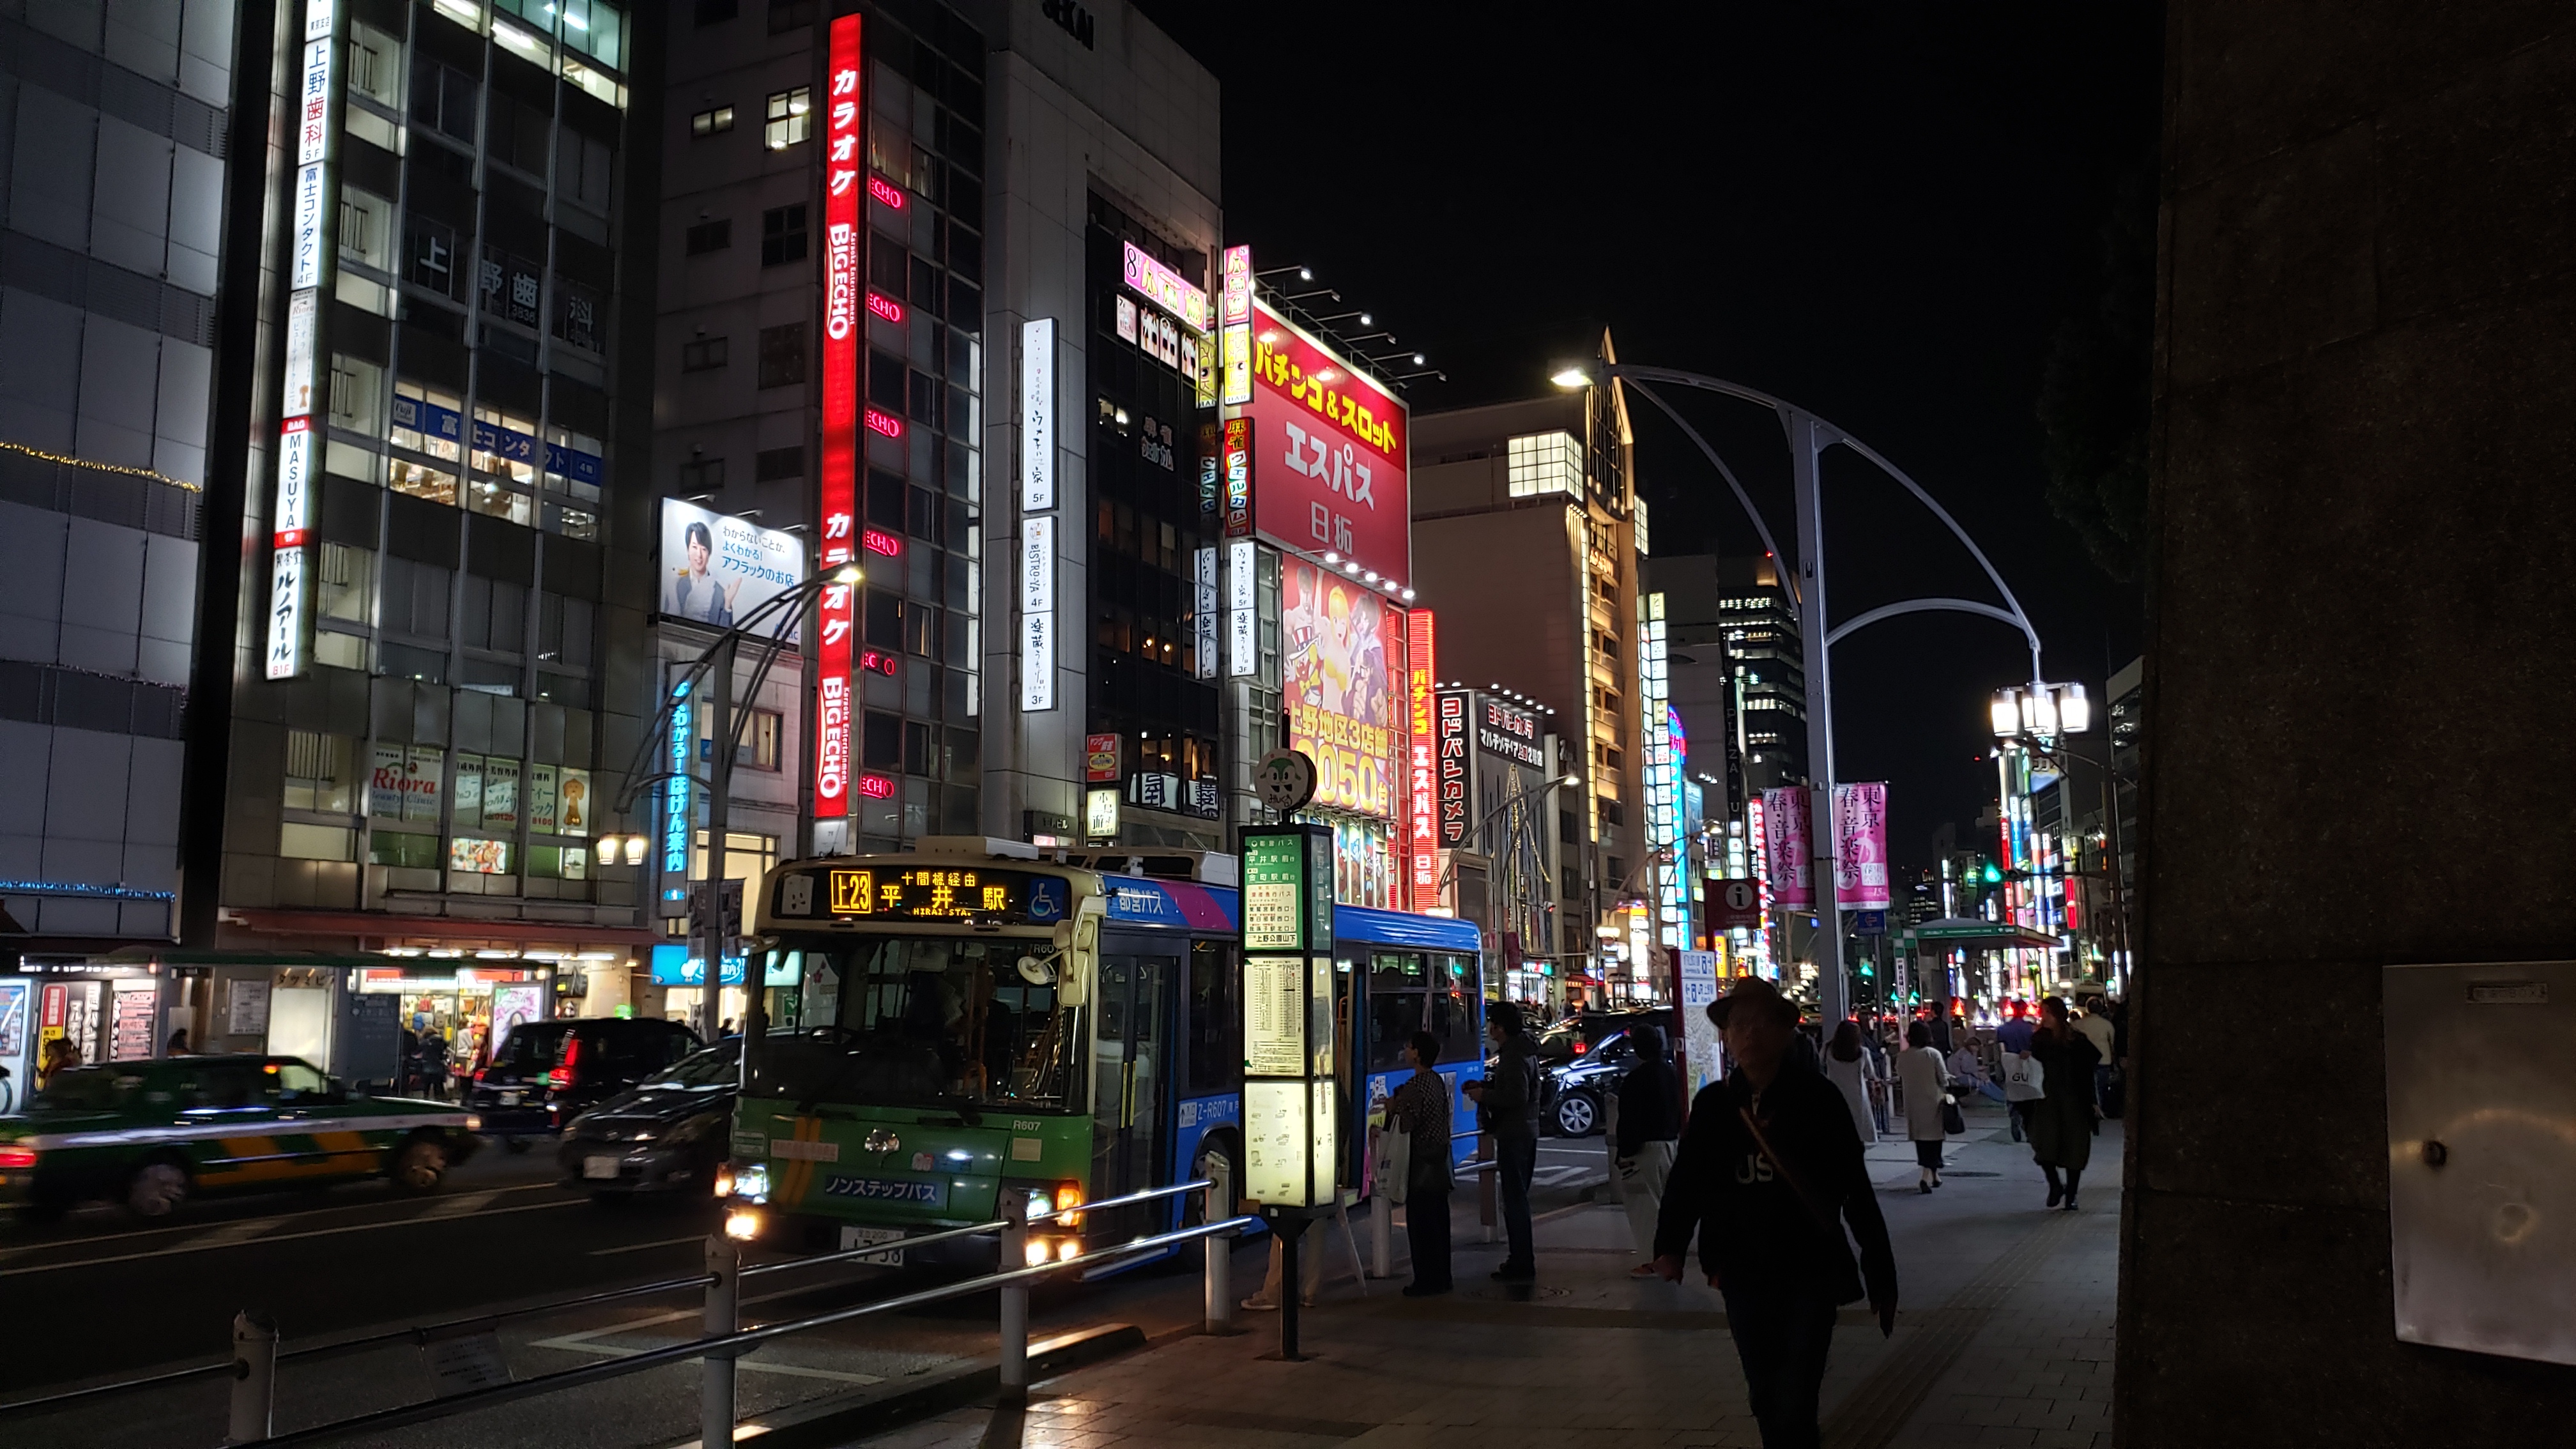
This part of town is always so bright and colorful with the bright blue Japanese sky. If the cities goal is to mimic the cartoon-y, brightly colored, fun aesthetic of anime, they’ve definitely nailed the aesthetic. While I’m aware that Akihabara is a bit of a caricature of Japanese culture, it’s still wildly fun. I don’t really watch anime since it’s not exactly my thing, but when you’re here, it’s best to just cut-loose and immerse yourself in the insanity.
Let’s pick a random arcade and have some fun! Last time I was here, I definitely explored the arcades, but when you’re alone surrounded by intense Japanese games that don’t make a whole lot of sense to you, it’s hard to indulge. This time, I had a buddy, so we can suck at these games together! Oh, wait, I remember this arcade! It has Mario Kart cabinets in the basement. Yes.
….It was neck-and-neck for almost the entire race, but Abbie beat me by mere milliseconds. Good Game, Well played.
Before the race, you’re given a character hat to match a photo of your face with. I love this game.
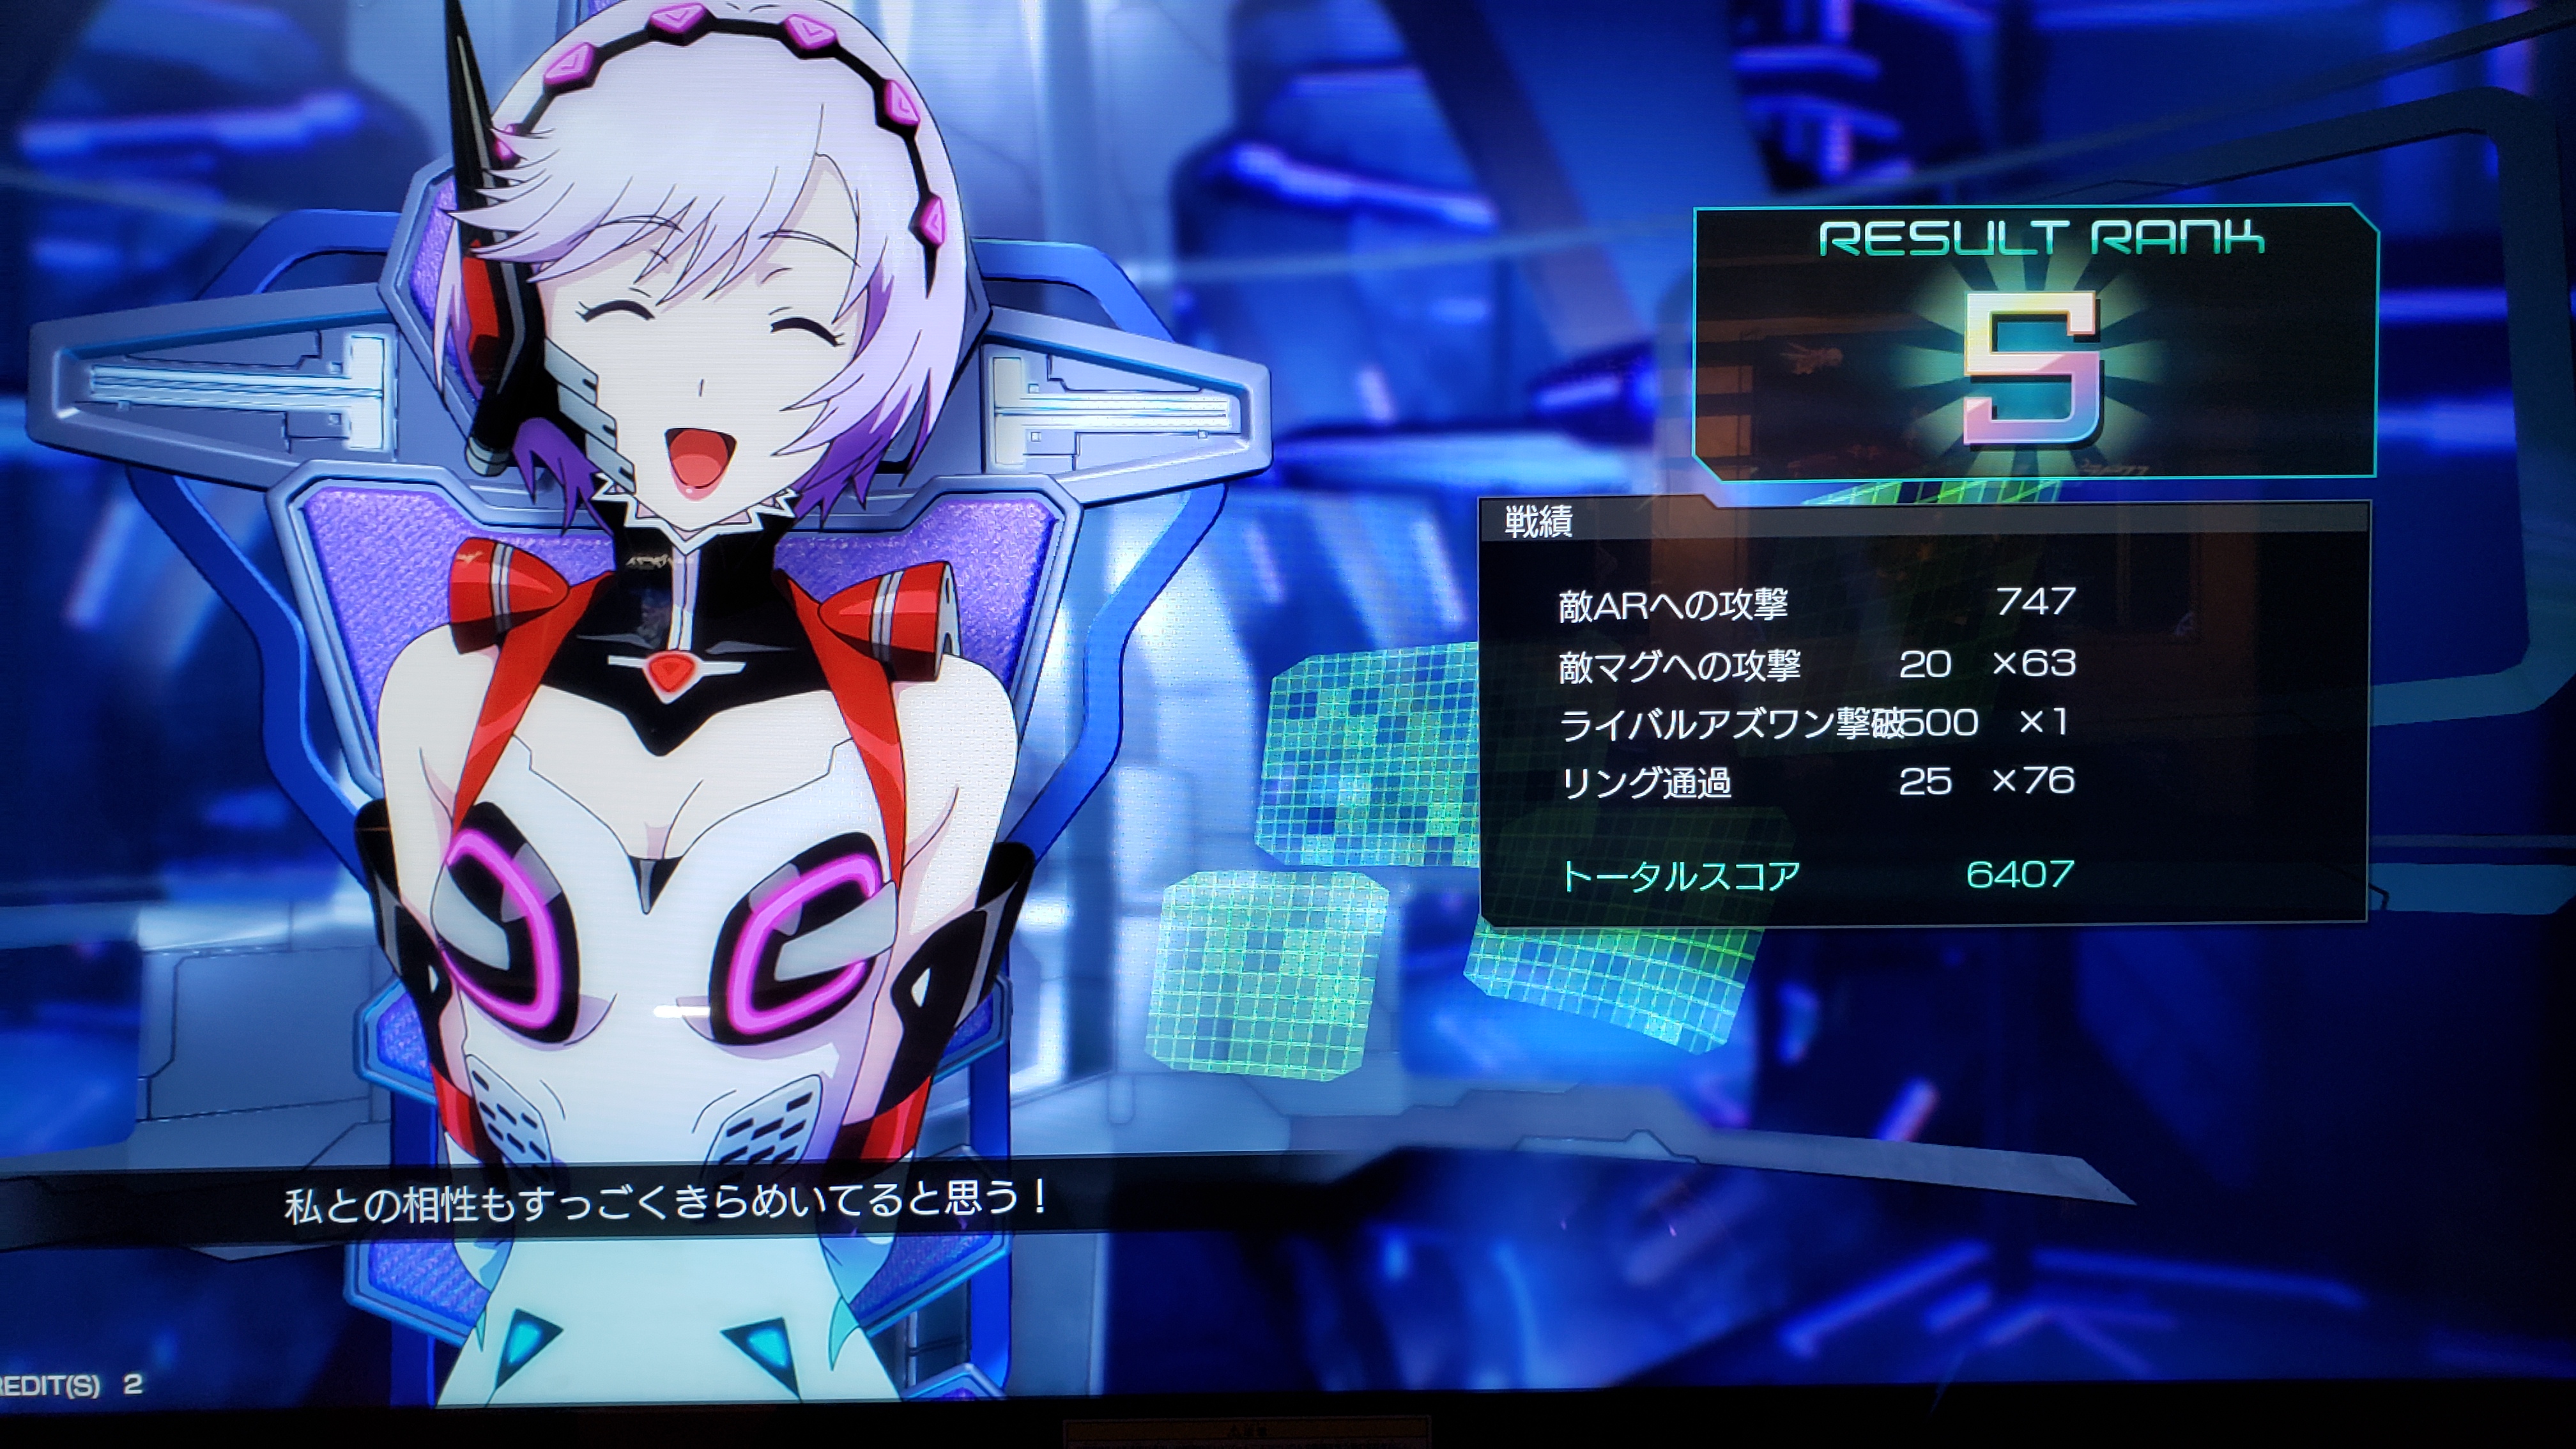
After Mario Kart, we wandered about the several maze-like floors of flashing, magical, loud, and amazing games. Each floor had a different genre of games. Bottom floors are usually reserved to prize-catchers, while middle floors are usually rhythm games. Top floors are often multi-player networked games, fighting games, and retro arcade games. Rhythm games here are intense so naturally, Abbie and I needed to try one and make ourselves look like fools to those that can keep 21/16 time at 300 BPM like it’s nothin’.
After being bad at DDR, we found some other neat rhythm games that involved a sliding capacitive keyboard filled with colorful lights and “airtime” sensors. This game was pretty awesome. Abbie was fairly good at it too (though, our intensity level was “basic”).
Nicely done, Abbie!
I decided to give it a try, too. Most of the songs available were completely foreign to me. Mostly just high-intensity J-pop, idol girl bands, and anime intro songs. But… hey.. I know this song!
If you don’t share my affinity with sexy dragon girls, I don’t think we can be friends anymore.
Anyways,
I wanted to give Abbie a brief tour of the Bic Camera store. I visited this place last time and was enamored by the sheer variety of stuff they had for sale. Floors and floors of EVERYTHING cool.
While we’re out and about, let’s check out Super Potato, the vintage video game shop where thousands of old-school consoles and titles are preserved and sold in like-new condition. I also visited this shop last time, but since it’s so iconic to the area (and also really cool), I figured Abbie would like to see it too.
How it feels.
We navigated through the streets of Akihabra in search of the non-descript hallway leading to a non-descript stairwell, leading to a VERY descript Super Potato. Posters lined the upper floors preceding the entryway. Here we are, vintage game heaven. Prices here are definitely very steep and you can surely find better deals in similar shops in the area, but for sheer consolidated variety, it’s hard to beat Super Potato.
Famicoms (NES) and Super Famicoms (SNES), disk drives, and other accessories in massive stacks.
Gonna need to stock-up on the Megadrives
Feels pretty amazing to actually hold a copy in my hand, to be honest. Go Technosoft!
After perusing floor after floor of vintage games, Abbie picked up a souvenir for one of her friends and we departed. Super Potato is always a treat. They even have a vintage arcade on the top floor if you’re interested in playing some classic titles.
By this point, it was just about noon and we were getting pretty hungry again. Abbie mentioned before we left on our trip that she’d like to visit a “rotating sushi bar” at least once. I happily obliged as there just so happened to be one just down the street! Once we arrived, we were immediately seated right at the bar. I explained the pricing rules to Abbie (colored plates are matched up with different prices), then told her to screw the prices and get as much as she wants because JAPANESE SUSHI, YO.
First bite – heavenly. Sushi is just so different in Japan. You can’t even compare it to American sushi. It is just pure bliss. Round after round of sushi. I also ordered a Miso-clam soup and it was wonderful. All the while, the staff bustled at break-neck speed through the crowded restaurant obliging the requests of many different customers at once. We soon finished with a decently sized stack of plates between us both and called for our check to be tabulated. The waiter counts up the plates and gives us our check. We stuffed ourselves full with tons of wonderful Sushi, and the bill was…. $22. For both of us. I love this country.
Back out on to the streets. We had yet another goal in-mind. Find table-flip game. I remember from last time that it was in one of these Sega arcades – problem is: there are like 4 here of them and they all look the same from the outside. We visit each one, up and down the many flights of stairs in search for our virtual domestic insanity simulator. No luck. But what we did find instead, was this:
A MASSIVE set of motion-equipped ridable cock-pit cabinets where you play as a virtual Gundam (large fighting robot, think similar to Transformers). The cabinets featured two joysticks, foot pedals, a side-display, and a MASSIVE screen. This was an arcade game that you actually needed a seatbelt for and it was AWESOME.
Strapped in
No big deal, just S-ranked it (well, the Tutorial anyways).
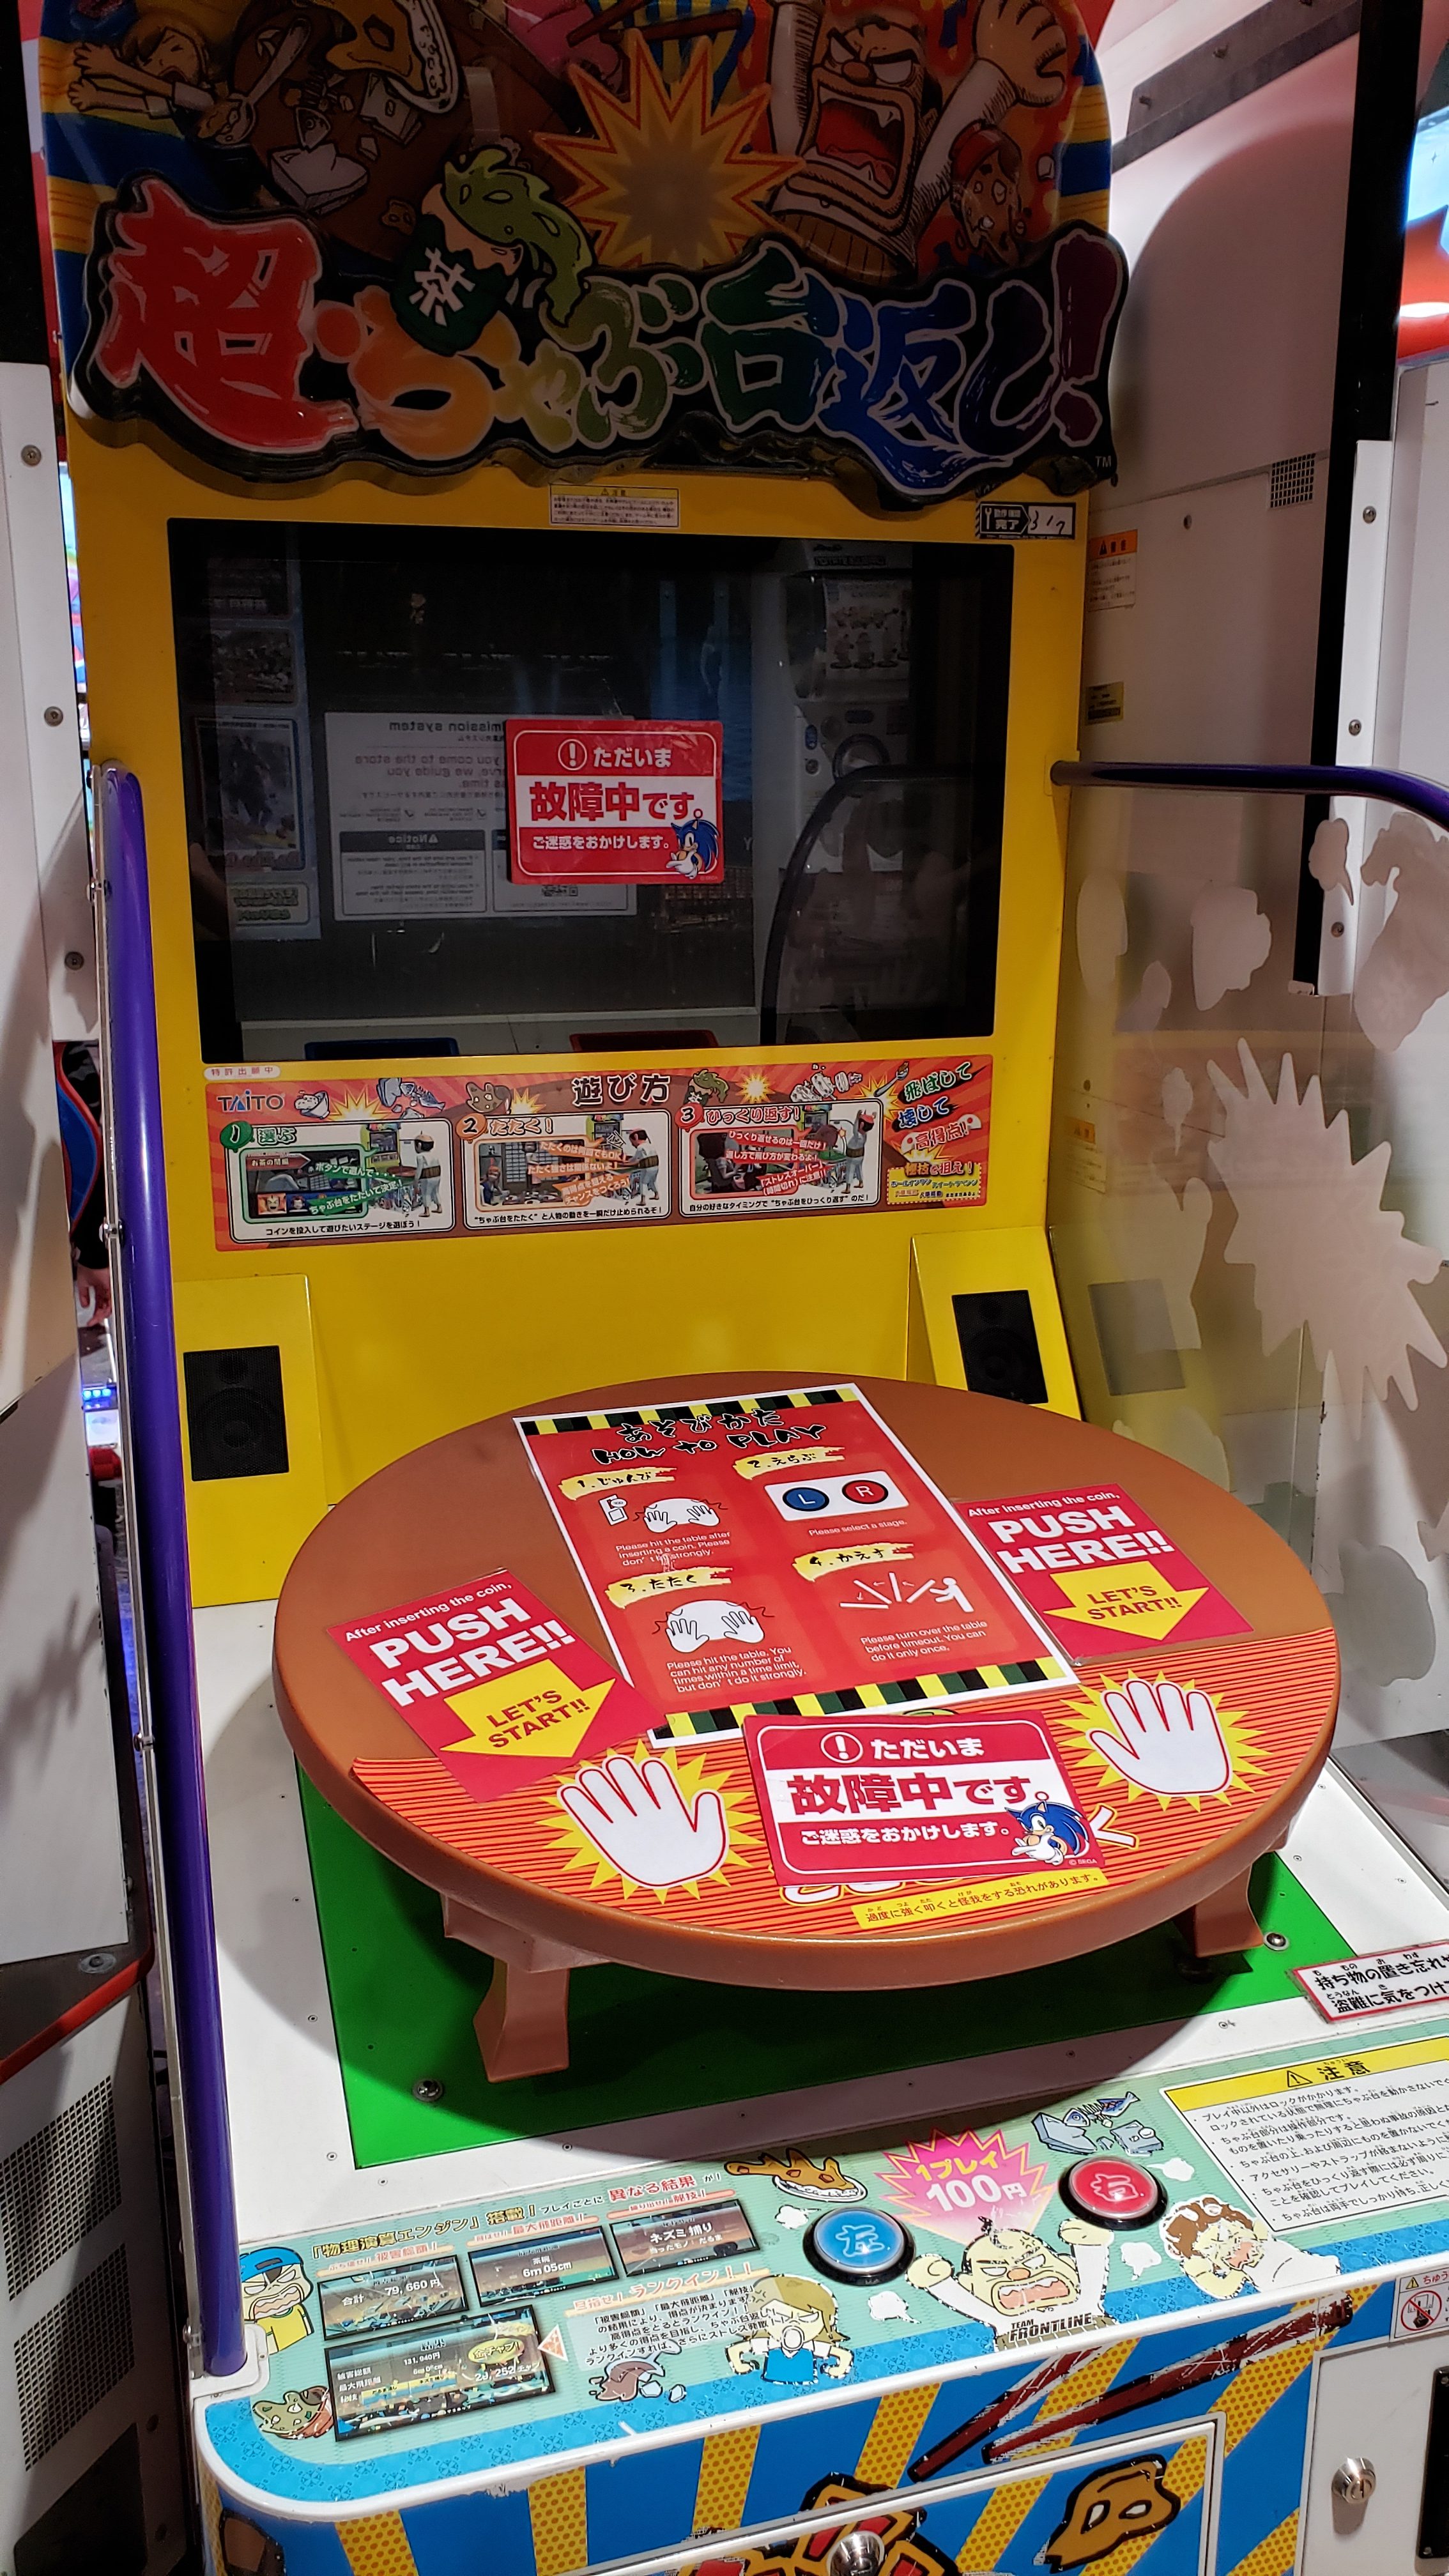
That was pure insanity and I loved it. But I still want to find Table-flip game. Wait, I know where it is. It’s in the special “Club Sega” arcade just down the street. We walk over and… yeah! I remember this stairway, it should be right around the corner. Oh my god, look! There it…
Sonic Sez: Get rekt kiddo
Broken. Aw. I have a sneaking suspicion that they just disabled the game due to the hordes of tourists (like me) making a ton of noise. These arcades were already blaring, but I remember that this game was a constant source of loud banging noises (because that was, you know, the core mechanic of the game). Oh well, maybe it will be fixed when we get back to Tokyo at the end of our trip.
Slightly disappointing, but that’s nothing a little ice cream can’t fix. Abbie found a little ice cream stall on the side of the street and got some choco-ice cream. I decided to pass since I was still stuffed from lunch. Abbie dropped a bit on the floor, so I had to ask the servers for a napkin. Why is this important? Because I’m actually conversing with people in Japanese now. Simple as the phrases may be, I’m not relying on Google Translate for most of my daily interactions. It feels like a super power. Don’t get me wrong, I’m still a complete scrub when it comes to Japanese, but I’ve been studying for years now and it’s finally paying off. Day after day of studying with nobody to actually talk to makes it seem all-for-naught, and yet… I can do it. Even if it’s as mundane as asking for a napkin, it feels special to speak in another language and be understood. Someday I wish to truly be bilingual, but that will take many more years of study. Regardless, it’s still an amazing feeling that I would soon put to the test.
Heaven for Electrical Engineers
Tucked away in a slightly shabby building labeled “Tokyo Radio Department Store” lies the ultimate goal for our visit to Akihabara. Inside department store, nestled between countless sub-stores selling just about anything you can think of in regards to electronics lies a special man who goes by the nick-name Ken-chan. I first heard about this store through a friend of mine, but Scotty from Strange Parts actually just so happened to explore his shop too. They say in Akihabara, you can find a store catered to directly to your personal interests and Ken-chan’s store was mine.
Yes. Absolutely YES.
Wall-to-wall video game music players and self-made DIY kits that used the same exact vintage sound chips that I’m known for working with and love so dearly. There was even a wall of gotcha machines that dispensed random vintage sound chips. Heaven.
Behind a little register room was a man sitting quietly. I go up and ask, “Sumimasen, Ken-chan des-ka?” (Excuse me, are you Ken-chan?). “Hai,” he responds. (His name isn’t actually Ken-chan, but I’ll refer to him as such to keep his true identity safe)
I introduce myself and explain that I myself have a very similar hobby and have also made my own hardware video game music players. Almost immediately, he lights up with glee. I explained that it was very rare to find people that are into the same niche hobby, especially in the US (though, I think I got lucky there since I know a pretty cool girl that’s into these chips too!). I showed him videos of my video game music player designs and very quickly we both realized that our interests were extremely similar. He seemed to really love my most recent design – a MIDI controlled Sega Genesis synthesizer. We had a great time chatting. I can’t describe how AMAZING it felt to actually have a genuine conversation with someone in Japanese. My sentences were littered with errors, and my pacing was terrible, but I was being understood. I shared interests with someone. I made him laugh. I impressed him with what I made. He impressed me with what he had made. We were talking. Incredible feeling. There were times that I did have to bust out Google Translate because, you know, frequency-modulation synthesis is a tricky subject to talk about even in English, but for the most part, it was all me. He walked me through all of his designs and showed how his driver software worked. VGM files! Just like my designs! He even showed me some incredible portable designs and a complex FPGA-driven prototype of a YM2610 player. For those that don’t know, that is the beastly Neo-Geo sound chip that is incredibly hard to drive. Everything was so neat.
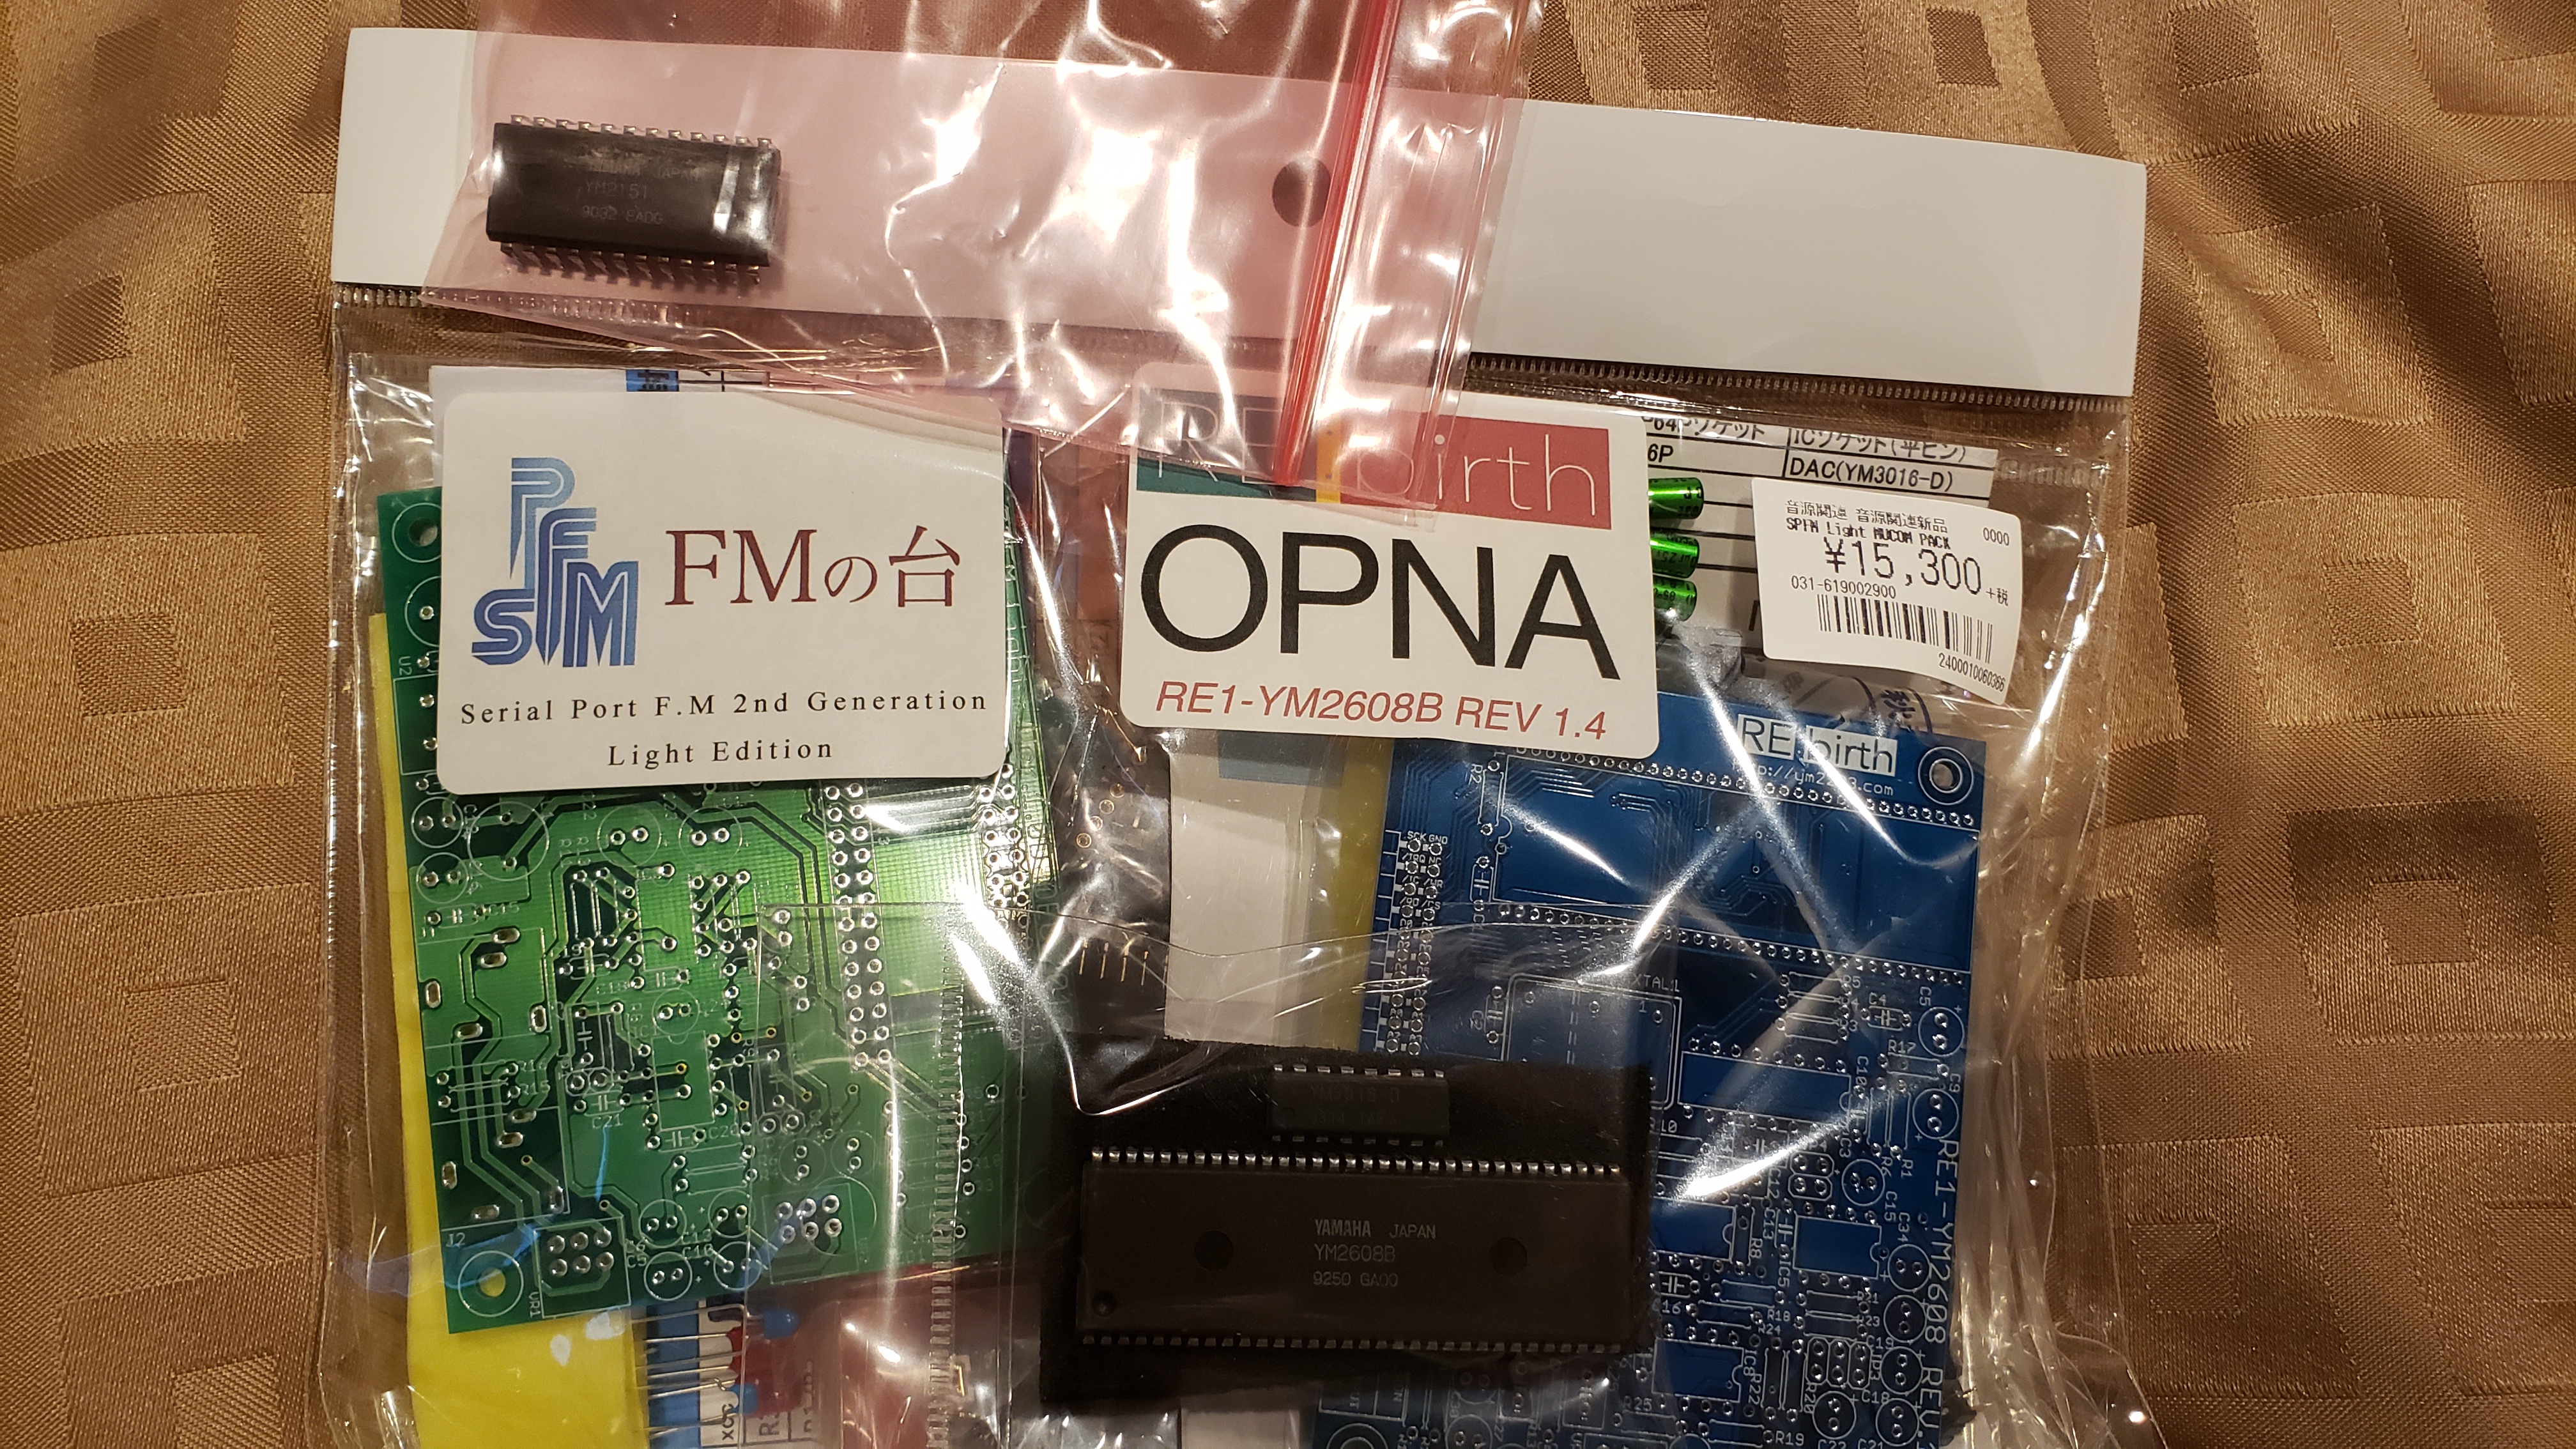
I decided to try out his sound-chip gatcha machines. I told him that I would try and predict the chip that would come out. “OPM desu!” I said as I added my coins and turned the handle. OPN2 (YM2612), which just so happened to be my most-used and most beloved model of sound chip. Sweet, but not an OPM (YM2151). I grabbed one more capsule for a friend back home. After a bit more chatting, Ken-chan dug through his many drawers and pulled out a little red bag with a chip in it. “Presen-to (present for you).” It was an OPM YM2151 chip, the chip that I tried to predict from the gatcha. He was giving it to me as a gift. Oh, my, god. That’s what makes Japan so special. A single gesture like that. I’ll remember that moment forever. A little while later, I turn to the wall of video game music player kits and find the most expensive model. A beastly DIY kit that included every module I needed to replicate his design along with a YM2608 (massive 16-channel FM chip). I’ve never worked with this specific chip before.
I point to the kit, “Ko-re wa” (This one). “Kai-imasu” (I’d like to buy it!). His eyes lit up, “Hai!” I couldn’t tell who was more excited, me or him! I can’t wait to build this thing. We talked for a little while longer going over software and chatting a bit more about our designs. It was just about time to leave, so I asked, “Ken-chan (implying friendship), Tomodachi desuka?” (Want to be friends?). He quickly turns around and rushes to his small desk and pulls out a card. It was his personal business card. I grip the card politely with two hands and study it. He explained his true name to me, to which I now addressed him by formally. “Dozo Yoroshiku,” (It is nice to meet you), I say after announcing his true name. Bowing is shown as a sign of respect in Japan, so I did so, but also extended my hand for a handshake. I think it was an appropriate display of gratitude between our cultures. “Sayonara (Bye, until we meet again), see you online!” I say as I depart. “Sayonara, arigato gozaimashita” says Ken-chan, laughing.
That was the best experience ever. I can’t wait to build this massive kit. Please check out his shop online and RE:Birth website if you’re interested in this sort of thing!
The YM2608 DIY Kit along with my OPM Present from Ken-chan.
Sound chip Gatcha Surprises!
After all that, Abbie and I caught the Yamanote back towards hotel, stopped by a kombini to pick up some instant coffee, and promptly crashed on the beds after we arrived. It was about 6PM. “We’ll just take a short rest.”
So my sister Abbie and I have found ourselves in Tokyo – you know, as you do – wandering the streets like brain-dead sleepy zombies in search of our hotel. Actually, that was the easy part, let’s talk about the hard part:
Everything began back at home. 8AM, rush-hour traffic to LAX, a non-coffee related diversion to Starbucks, airport, security, freedom from the TSA. Abbie and I explored the gorgeous Tom Bradly international terminal since we had a couple hours to spare. Abbie decided that her breakfast was going to be KFC. Truthfully, that’s probably the most Japanese thing that she could have picked.
This was going to be my second trip to Japan, the previous trip being written about in detail here. This time, however, as mentioned above, I am not traveling alone. My baby sister, who is now an actual adult now by the way (what??), will be joining me as we explore The Land of the Rising Sun. Now, it’s just up to us to get there.
Last time, I took an American Airlines 787 Dreamliner to Japan and it was pretty nifty. This time, I’ve chosen Japan’s flagship carrier, ANA on a 777. ANA is a “five-star” airline, and it most certainly showed. Attentive and friendly staff, tasty in-flight meals, galleys stocked with lots of incredible snacks – yeah, full-service airlines rule. Only thing I could think of docking them for were their rather stiff seats that really wore on me through the flight, but that’s more Boeings fault than anything.
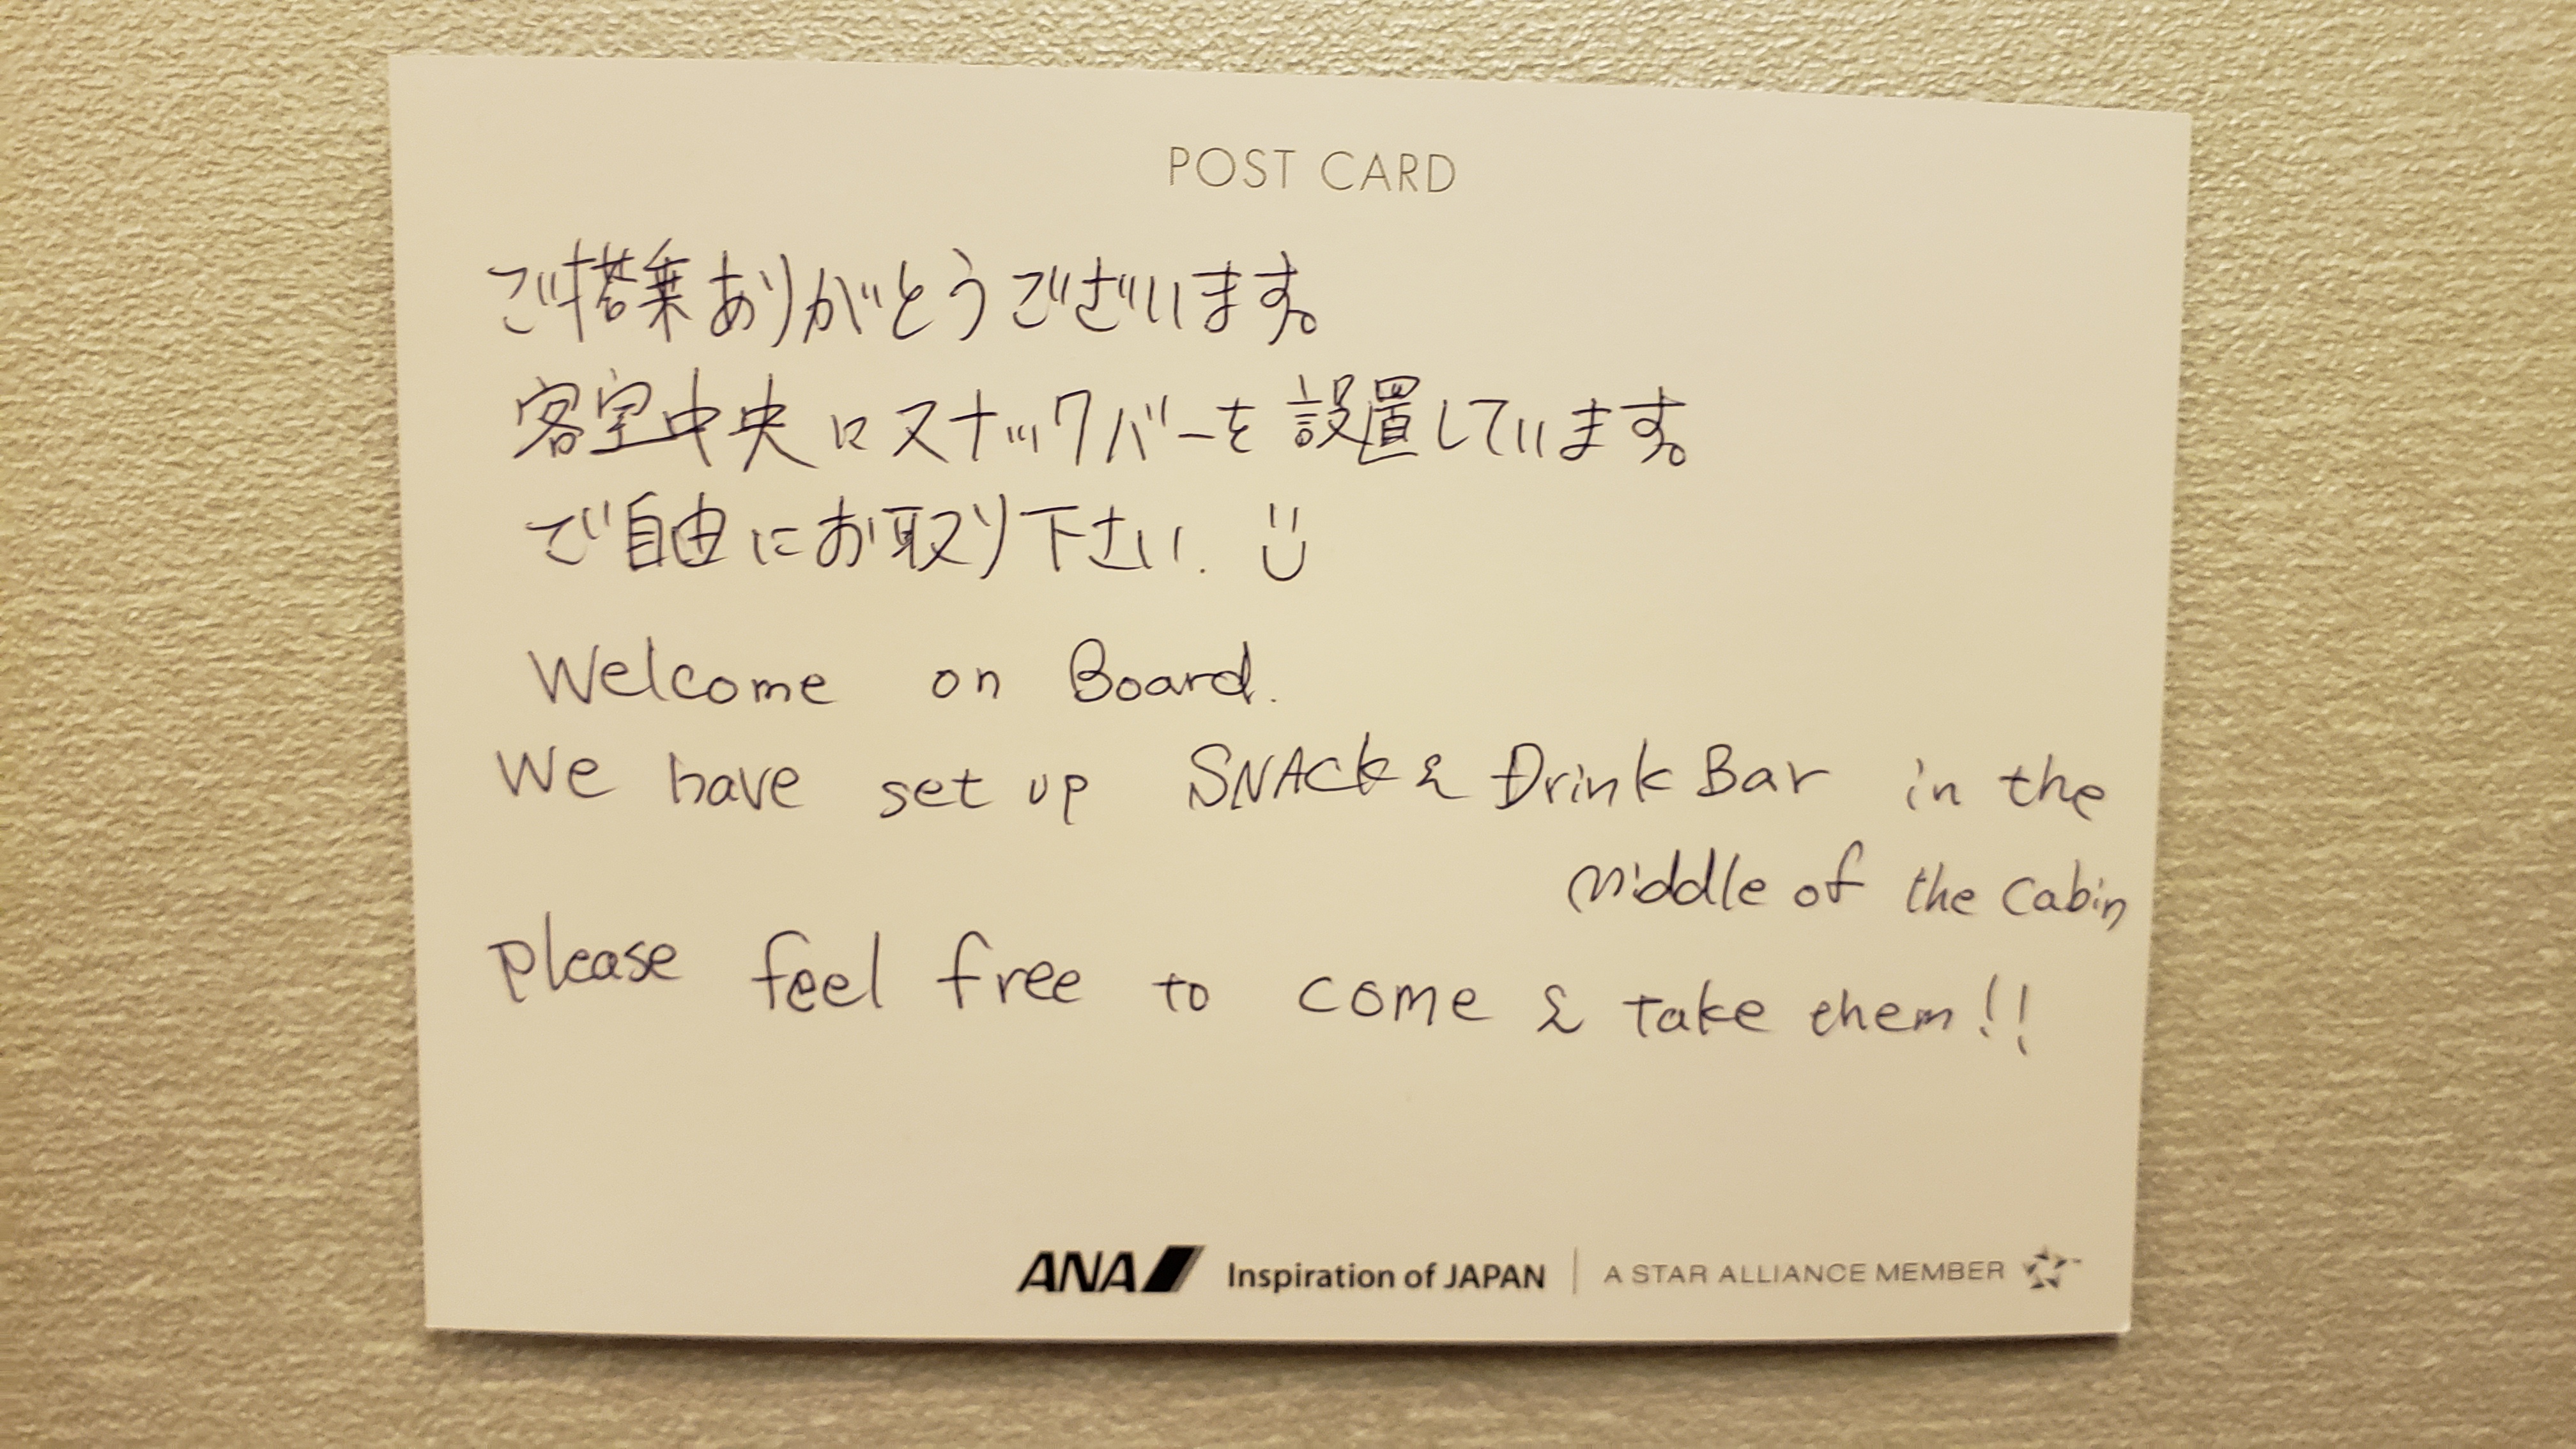
A note inside the bathroom. So nice.
I digress. 12 Hours in the sky is enough to make anybody go crazy, but when the service is flawless, it makes the time go by so much faster. There was also a group of young children in front of us with a baby who could have been no more than 1 year old. At the very start of the flight, this baby immediately spun up and started crying. Abbie and I feared the worst, but only moments later, that baby fell asleep for nearly the entire flight. Wow, good job kid, props to you.
Main was a little soggy, but tasty. The sides were where it’s at though!
Eventually, we made it. As always, walking off the jetway instantly invigorates your soul with a newfound energy that you thought had left you once you crossed the international date line. We were here! Zip through immigrations, zip through customs. Easy. In fact, customs didn’t even search any of our bags like they did to me last time. Neat.
Okay, so last time I arrived in Narita, I was in terminal 2. Terminal 2 is definitely a bit more “foreigner-friendly” and has a better layout overall. I needed to find our SIM cards to use our phones and exchange our rail tickets. Finding our SIM cards took me longer than I’m willing to admit. Last time, my SIM card was available at the little post office. I assumed that this time would be no different. NEVER ASSUME. After about an hour of walking around to find the post office, we were informed that the SIM cards were delivered to a different shipping lines office, which we had already passed, at the opposite end of the terminal. Let us never speak of the SIM cards again.
Land. Japan is a sight for literally sore eyes.
After that, though, everything else was relatively smooth sailing. We exchanged our rail passes without a problem and jumped on the Keisei Skyliner train on our way to Tokyo. This was actually my first time on the Skyliner. Last time I took the Narita Express, but since we were here for a slightly awkward 15 days, I decided to activate our 14-day JR rail passes for the following day and grab the Keisei Skyliner instead. Soon, our train lurched forward and sailed into a really, really long tunnel. Wow this tunnel is super long. Why isn’t this tunnel ending…? OH WAIT, it’s dark outside?! Yeah, guess we were looking for those SIM cards for a little too long. Oh well, Tokyo is awesome at night.
Soon, we arrived at Ueno Station. Abbie had previously fought with the ticket gates and failed to get her card punched in, so I was totally waiting for her to insert her ticket and get stopped by the automatic doors. This would have been both hilarious and frustrating since we were both beyond tired. I insert my ticket, walk through the gates. Abbie inserts hers (this time, the correct way!) annnnddd…. right through. Phew. Okay, this is it. Tokyo. Get ready for your first time walking up those stairs:
Ueno
Yeah, I love this city. Let’s get to our hotel. We had two options: Yamanote train line and a bit of a walk, or the Tokyo Metro which takes almost directly to the hotel. It was about 7PM at the time, so peak rush-hour. Japan is infamous for its incredibly crowded trains at this hour, so I decided to take a chance on the metro since it was heading towards central Tokyo instead of away from it. Another thing I was thankful for was my ability to read the rail maps still and use the ticket machines. Being as tired as I was, not having this prerequisite knowledge would have been a disaster. Fortunately though, I managed to grab us both tickets for the proper amounts in no time. Once we were at the station, a train departing central Tokyo arrived and it was PACKED. Uh oh, is our train going to be like this too?
….Nope. Just like I predicted, our train had very few people on it since it was heading away from Tokyo. Perfect. A couple stops later and tada! Our hotel is just across the street.
The streets were filled with many smells of delicious and tantalizing foods. We were so hungry, but also tired to the point of literal delirium. Let’s check-in to the hotel first and THEN we’ll get something to eat. Yeah no we checked in and we were done for the day. As disappointing as that sounds, trust me, the fatigue was unbearable.
As I write this at 3AM, now rested, it was time to prepare to hit the town and grab something to eat. …or maybe just the kombini for now.
Those of you that are familiar with my previous works, namely the MegaBlaster, know that I’m very much into old-school FM synthesis chips that were mainly found in 80’s/90’s arcade systems and home video game consoles. I’m pretty well-versed when it comes to playing VGM files on these old chips. The VGM format, while confusing in its own right, mostly handles all of the complicated register-specific aspects of these sound chips. Essentially, you just read-in the commands and push them to the chips without caring about what that data means. The chip knows what to do with that data so I don’t have to.
Almost immediately after I published my work on the MegaBlaster, I was asked about possibly adding MIDI functionality to it in order to use it as an instrument. At first, I was hesitant to do so – While I’m sure the MegaBlaster itself is more than capable of functioning as a MIDI device, it wasn’t really designed for that. Further still, controlling the synth chips with MIDI would require me understanding the complete ins-and-outs of each chip. It was possible, but I didn’t really think it was viable with the knowledge that I had at the time.
….Until one day where I just sucked it up and did it.
A Learning Experience
Buckle up, because this is gonna’ be a long one.
If I was going to attempt driving these ancient chips through MIDI, I was going to design a dedicated device for it, rather than shoe-horning that functionality into the MegaBlaster. This was going to be a long, multi-month learning process filled with many hours of trial and error.
First thing’s first: Which microcontroller should I use? While I love the STM32 series of BluePill boards, I figured that would be a little over-kill since I’m not dealing with the same demanding overhead requirements as playing VGM files. I really didn’t need the horsepower of 32-bit ARM and figured 8-bit AVR would be a lot easier to work with. What I really desired was native USB host support. This would make designing a MIDI device a hell of a lot easier with significantly less software pain in the long run. I settled on using the AT90USB1286 since it was the same MCU used in PJRC’s Teensy++ 2.0 boards.
While I was in the bread-boarding stage, I just used a Teensy++ 2.0. It made prototyping SO much easier since it featured just about everything I needed with a lightning-fast programming toolchain. Super handy. This would later result in a bit of pain when it came to handling proprietary bootloaders, but I’ll explain that a little later.
The First Prototypes
The first breadboard prototype
Creating the first breadboard prototype wasn’t actually all that bad. I essentially just duplicated the MegaBlaster’s analog stage and hooked up power, ground, clocks, and data lines. I was only working with the YM2612 for now as I was unsure if I even wanted to include the PSG in this design. One advantage of using AVR is the ability to directly write to 8-bit ports. Other microcontrollers can do this as well of course, but Atmel makes it super easy to do so. You may also notice a little bar of LEDs on a PCB off to the side – I designed this PCB a couple years ago. It’s just a single row of 8-LEDs and a common ground. You can hook this LED board up to 8-bit data busses and have a really quick and easy visualization of the data going across. This little board was invaluable for debugging. You could use a logic-analyzer of course, but when it comes to functional low-tech solutions, it’s hard to beat the ease-of-use and simplicity of a few blinky lights.
With the breadboard all set for testing, I needed a quick way to verify that I hooked the YM2612 up correctly. I referenced this super handy test code which replicates the “Piano Test Voice” found in the Sega Genesis’ technical manual. Both this test code and technical manual excerpt would be a godsend down the line since the official YM2612 application manual has been lost to time. After a bit of tweaking, a single channel of my YM2612 began roughly belching out a single piano tone. Good enough, let’s draw the rest of the owl.
Register Maps
Here’s where it get’s tough. First, let’s define what registers do when referring to these old sound chips. They are simply memory addresses on the chips that represent synthesizer settings. If you’ve ever seen a proper professional synthesizer keyboard, you’ve surely noticed all of the crazy knobs, switches, buttons, settings, etc. All of those sources of input are modifying the circuitry inside of the synthesizer (or values to a specific algorithm) in order to produce your custom waveform. The YM2612 et. all have lots and lots of settings to change in order to modify the final waveform and we can access those settings through the chip’s on-board registers. You can just imagine the registers as a table of values that we can change in order to make the chip do something. Indeed, this is not far off to what is really happening. Not only can you control voice (the overall sound) values, but you can also tell the chip to turn off and on specific channels or to add effects to them.
Usually, register maps are fairly straight forward. Change a value at this register address and boom, something happens. For the most part, that is true, but YM2612 is a complicated chip, so fully grasping the register system and how to write to it properly took ages. The Genesis Technical Manual I mentioned previously provided a nice starting point, but as you’ll soon see, it becomes fairly confusing and difficult to decipher without proper documentation. Before messing around with all these complicated voice register settings, the first thing I needed to do was to handle keyboard MIDI commands, and the easiest one I could think of was the “Key-On” and “Key-Off” commands.
MIDI, HID, and some Other Annoying Protocols
In order to interpret MIDI commands coming in to my prototype board, I needed a library. You could spend the time and interpret the MIDI commands manually since the protocol isn’t all that complicated, but I figured since I’d like USB MIDI support and serial MIDI support, I’d best start off not reinventing the wheel and go with something proven. Also, I didn’t want to deal with the nightmare that is HID packet interpretation. Thankfully, PJRC and the Arduino framework already provide great MIDI libraries to use free of charge. Awesome! I’ll just create my USB MIDI instance and I’ll be off!
…Or so I thought. Since the AT90USB1286 microcontroller on the Teensy was acting as an HID host, telling it to accept MIDI commands means I lost access to my invaluable serial console that I used to debug with. Not to worry, however, as you can make a few changes to the preprocessor directives of the MIDI library to get the best of both worlds. By doing this, you can have access to both USB MIDI commands and have a pseudo serial connection. Why pseudo? Well, the Teensy is actually sending your serial data through HID packets. These packets can be interpreted by the teensy_gateway.exe program included with the Teensy Framework and are broadcasted locally over Telnet to be received by any terminal client you connect to it. After adding that modification script, I wrote a little batch file that invokes the teensy_gateway program and an instance of putty to connect to it over Telnet. Boom, instant “serial” connection and USB MIDI access. You can also use the Arduino IDE’s serial console as well, but you will need to install the Teensy toolchain.
Okay, finally, time to make this chip sing to keyboard commands. Remember how I mentioned the “Key-On” and “Key-Off” MIDI commands? Now it was time to interpret those into commands that the YM2612 could understand. I’ll spare you the details on setting up the boilerplate MIDI side of things since it’s pretty simple and well documented (Got a MIDI command? Call X function).
Recall that the YM2612 is essentially a synthesizer hooked up to a big table of registers that control everything from voices, to effects, and most importantly, whether a key is on or off. In order to turn on a channel, we first need to provide it with a voice, then activate the Key-On register. I’ll stick with the piano test code and a single channel for now. At this stage in development, I am not concerned with pitch or how the voice sounds, I just want to be able to turn a single channel on and off through MIDI commands.
If we take a look at the register map of the YM2612, we’ll notice that register 0x28 is the Key On/Off register. This register isn’t as straight-forward as “1 in this register turns on a voice.” It’s a bit more complicated than that, but since we’re only here to test a single voice, we’ll just pass in the value 0xF0. Once we have the register/value we want to modify in mind, it’s time to tell the YM2612 what to do. Here’s where a little hardware know-how comes into play.
In order to write to the YM2612, we need to follow a strict order of operations. The YM2612 actually has two banks of nearly identical registers. You can select the upper bank by pulling the A1 pin HIGH, and the lower bank by pulling the same pin LOW. Keep this in mind for later. For now, though, the write order of operations is the following:
Set the A1 pin for the register bank you want to access
Set A0 to LOW
Set Chip Select (CS) to LOW
Write the address of the register you’d like to access to the 8-bit bus
Set WR to LOW
Wait a microsecond
Set WR, CS, and A0 back to HIGH to finish the address write
Pull CS down to LOW again since we need to write the data now
Write your new register value to the 8-bit bus
Set WR to LOW yet again and wait a microsecond like last time
Set WR and CS back to HIGH to finish the data write
Set A1 and A0 back to LOW to prepare for next time
Sound like a pain in the ass? That’s because it is! You can see an example of my YM2612 “send” function where I’ve implemented the above procedure here:
With ALL of this in mind, I can finally toggle a single channel through MIDI. Using the MIDI library, any time I receive a Key On command, I’ll simply call my YM2612 ‘send()’ function and write 0xF0 to register 0x28. Once I receive a Key Off command, I’ll send over the value 0x00 to clear register 0x28 which will tell the synth to being the “decay” of the voice.
ym2612.send(0x28, 0xF0, 0); //Reg 0x28, Value 0xF0, A1 LOW. Key On
ym2612.send(0x28, 0x00, 0); //Reg 0x28, Value 0xF0, A1 LOW. Key Off
Writing to the registers like this will be the basis of everything we do moving forward. It only becomes more complicated from here on out!
Understanding the Language of Music …And Japanese
So I’ve got a box that goes ‘bing’ and that’s about it. No chords, no other voices, not even any other notes. How can we take in MIDI Key-On commands and translate them into properly tuned notes that represent the keys you’re pressing? By doing a shit ton of annoying math. You see, instead of just pushing over your desired frequency to some arbitrary register and just letting the chip figure it out, you have to compute something known as the “F-Number.” This F-Number is what’s sent to the F-Number register and is what determines the output frequency of your note. Okay, where can we find the formula for this F-Number? In the YM2612 Application Manual! ….that doesn’t exist. Aw.
But, fortunately for me, the YM2612 has a twin CMOS sister, the YM3438, AKA the OPN2c. These two chips are functionally identical and share the same register map, the only real difference being the output stage. A manual does in fact exist for the YM3438, and you can find it here. Unfortunately for us, it’s entirely in Japanese.
Well as it turns out I can read Japanese just fine so we’re good.
Anyways, let’s get to what we need. The F-Number. On page 23 and 24, you can see information related to the F-number, as well as a little register map showing where that value should eventually end up. The formula for calculating the F-number is:
(144 × fnote × 220 ÷ fM) ÷ 2(B-1)
fnote = Your desired note frequency
fM = The frequency of your master clock
B = Block number
Okay, not the worst formula ever, but for little microcontrollers with no floating point units, this is kind of a nightmare. Let’s try and compute an F-number for note A4, just like the application manual does.
The frequency of an A4 note is 440 Hz. Our master clock frequency is 8MHz (8,000,000 Hz). The block number is… wait, damn it, block number?
Yep, yet another gotcha. As you move up the musical scale, your block number will change. The block number is a 3-bit value that basically represents which octave you’re on. If you compute a table for a single octave, you can use the block number to shift that table up and down for each octave instead of computing the F-numbers each time. For the sake of this example, let’s assign it to 4 (Get it? A4 is in block 4!).
And if we look at the example table in the YM3438 manual…
Perfect! Exactly what we were looking for.
Now, every time we receive a MIDI command, we can grab the key number, convert it to its frequency using some more math, then convert that frequency into our F-Number using the formula above. Don’t forget the block number calculation too!
You’re not done yet. Now you have to pack all of that information into a byte and send it out to each channel’s frequency register! I’ll spare you the details here and have you look the source code for that one. Since this was such a computational nightmare, I scoured the web for more elegant solutions that used LUTs (Look-up tables) instead and discovered a master-class solution by Diego Dorado.
I incorporated a similar design into my final project since it supported pitch bending better, but before I discovered, I did all of the math on the fly.
No polyphony yet, just one dinky FM piano voice and a single key at a time, but it was progress.
Welcome to Register Hell
AHHHHHHHHHH
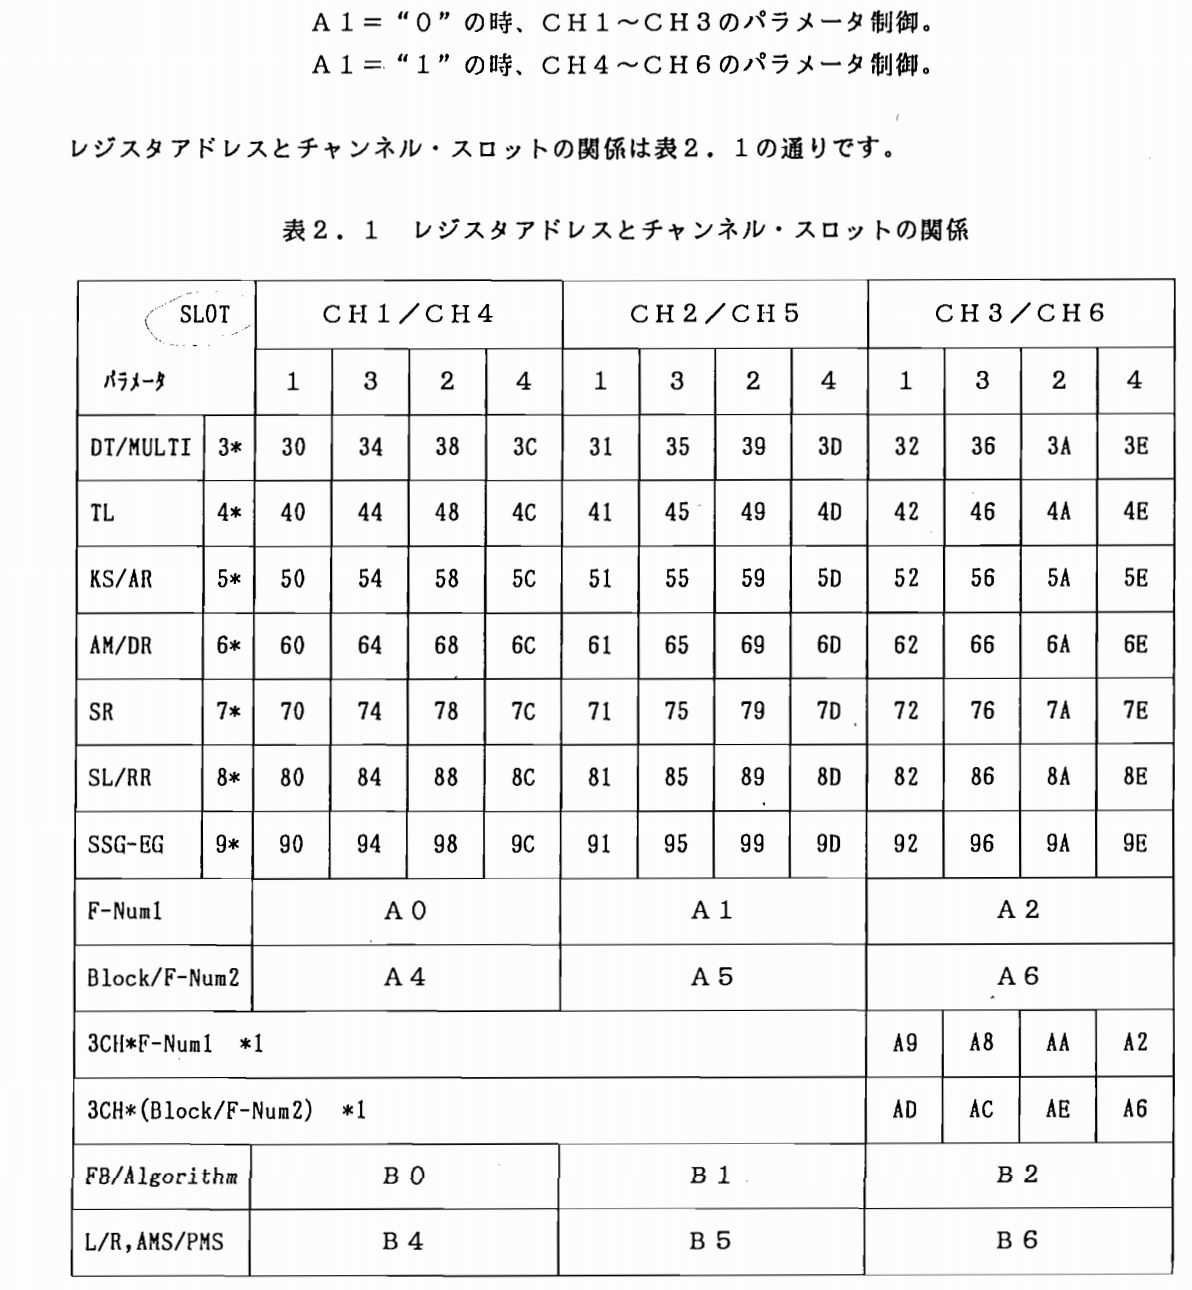
Monophony was pretty tricky, but polyphony was going to be an even bigger nightmare. The image above is the complete memory map of the OPN (YM2612/YM3438). Understanding this map requires a keen eye in pattern recognition and a mountain of patience for cryptic and unhelpful application notes (in a foreign language!). Oh and did I mention: pulling A1 HIGH will swap you over to another identical bank of registers for the upper 3 channels that you must also set. Goodie.
Quickly take a look at that register map and see if you can spot any obvious patterns. To me, the first one that stands out is that each address along the Y axis is spaced out by 0x10. This is handy to keep in mind as we will use it to quickly iterate through each address. Also remember that since we can jump up to the upper register bank that controls channels 4, 5 and 6 using pin A1, the register addresses are identical but the values are not! Also, notice along the X-axis, each address seems to be spaced out by 0x04. Why? There are four operators per channel! (The manual refers to channels as “slots,” by the way.)
Take a look at the setup() function. You can see that I first generate a LUT for F-numbers using GenerateNoteSet(), then perform a little housekeeping to set the clocks and such.
But then you will notice this block:
  ym2612.send(0x22, 0x00); // LFO off
  ym2612.send(0x27, 0x00); // CH3 Normal
  ym2612.send(0x28, 0x00); // Note off (channel 0)
  ym2612.send(0x28, 0x01); // Note off (channel 1)
  ym2612.send(0x28, 0x02); // Note off (channel 2)
  ym2612.send(0x28, 0x04); // Note off (channel 3)
  ym2612.send(0x28, 0x05); // Note off (channel 4)
  ym2612.send(0x28, 0x06); // Note off (channel 5)
  ym2612.send(0x2B, 0x00); // DAC off
Right here, I am simply turning off the Low-Frequency Oscillator (LFO), setting Channel 3 to it’s “normal” mode, sending a Key-Off command to each channel, and finally, disabling the Digital to Analog Converter (DAC). This is just a bit of setup code that prepares the YM2612 without having it digitally scream at us.
The main part of this function is where I actually set the piano test voice for every channel:
for(int a1 =0; a1<=1; a1++)
{
for(int i=0; i<3; i++)
{
//Operator 1
ym2612.send(0x30+ i, 0x71, a1); //DT1/Mul
ym2612.send(0x40+ i, 0x23, a1); //Total Level
ym2612.send(0x50+ i, 0x5F, a1); //RS/AR
ym2612.send(0x60+ i, 0x05, a1); //AM/D1R
ym2612.send(0x70+ i, 0x02, a1); //D2R
ym2612.send(0x80+ i, 0x11, a1); //D1L/RR
ym2612.send(0x90+ i, 0x00, a1); //SSG EG//Operator 2
ym2612.send(0x34+ i, 0x0D, a1); //DT1/Mul
ym2612.send(0x44+ i, 0x2D, a1); //Total Level
ym2612.send(0x54+ i, 0x99, a1); //RS/AR
ym2612.send(0x64+ i, 0x05, a1); //AM/D1R
ym2612.send(0x74+ i, 0x02, a1); //D2R
ym2612.send(0x84+ i, 0x11, a1); //D1L/RR
ym2612.send(0x94+ i, 0x00, a1); //SSG EG//Operator 3
ym2612.send(0x38+ i, 0x33, a1); //DT1/Mul
ym2612.send(0x48+ i, 0x26, a1); //Total Level
ym2612.send(0x58+ i, 0x5F, a1); //RS/AR
ym2612.send(0x68+ i, 0x05, a1); //AM/D1R
ym2612.send(0x78+ i, 0x02, a1); //D2R
ym2612.send(0x88+ i, 0x11, a1); //D1L/RR
ym2612.send(0x98+ i, 0x00, a1); //SSG EG//Operator 4
ym2612.send(0x3C+ i, 0x01, a1); //DT1/Mul
ym2612.send(0x4C+ i, 0x00, a1); //Total Level
ym2612.send(0x5C+ i, 0x94, a1); //RS/AR
ym2612.send(0x6C+ i, 0x07, a1); //AM/D1R
ym2612.send(0x7C+ i, 0x02, a1); //D2R
ym2612.send(0x8C+ i, 0xA6, a1); //D1L/RR
ym2612.send(0x9C+ i, 0x00, a1); //SSG EG
ym2612.send(0xB0+ i, 0x32); // Ch FB/Algo
ym2612.send(0xB4+ i, 0xC0); // Both Spks on
ym2612.send(0xA4+ i, 0x22); // Set Freq MSB
ym2612.send(0xA0+ i, 0x69); // Freq LSB
}
}
ym2612.send(0xB4, 0xC0); // Both speakers on
ym2612.send(0x28, 0x00); // Key off
There are two loops. A loop with an iterator that represents A1 and i that represents a single channels specific register index. As I loop the first time, a1 is set to 0, meaning I keep the A1 pin set to LOW. We’ve selected the lower bank of registers. We then iterate through all of the voice setting registers, one by one, and place our test piano voice values inside of them. We do this three times, as there are three channels on the lower bank. Once we loop three times, we increment a1 by 1. Pin A1 is now pulled HIGH, so we are now on the upper register bank. Recall that the addresses in each register bank are identical, so we just iterate over all of the same addresses with the same data yet again, this time for channels 4, 5, and 6. Finally, I activate both the left and right speaker outputs by writing 0xC0 to address 0xB4 and made sure that the “Key-down” register was reset to 0x00.
We’ve only just set the register’s voice values. Meaning, were this a real standalone synthesizer keyboard, we just set all the knobs and dials to their correct settings. In order to produce polyphony, we still need to tell the YM2612 which channels are on, which channels are off, and at what frequency each channel is supposed to be set to.
In a nutshell, I kept track of how many keys were being pressed on. The YM2612 only has 6 channels, so a maximum of six keys could be pressed at a time. Every time a key was pressed, I would check to see how many other keys were pressed and assign the note a channel after performing the F-number, Block number, etc. calculations. If the channel assigned was 4, 5, or 6, I had to set pin A1 to HIGH so I could select the upper register. To handle a key-off event, I simply referenced which channels were assigned which MIDI note number when they were turned on and would simply reverse the process (without having to calculate for F-Number, of course).
I kept track of all the note channel assignments in the YM2612 driver. Prototype code is messy!
But hey, look! Full six-channel polyphony! Yay, we’ve made a budget-conscious, early-90’s toy keyboard!
New Voices and The OPM File Format
So we’ve got basic polyphony, but we’re still using the same lame piano test voice. The ultimate goal of this project is to be able to play any instrument from any Sega Genesis soundtrack. Now we already know that there are a whole host of complicated registers that we can set to control all of the intricate details that go into crafting each FM voice. If we wanted to, we could go in manually using a Sega emulator, scope out all of the individual memory addresses that make up each voice, and push those values one-by-one into the YM2612’s voice registers. If you really don’t value your time and want to do something mind numbing, this is the route for you.
While the OPM file format was originally designed for… well.. the OPM FM synthesizer chip (AKA, YM2151), we can use it to also program our YM2612’s. Since the YM2612 and the YM2151 are so similar, the voice registers are practically identical. Originally, this file format was designed to be used with VOPM, the YM2151 VST that can also be used to craft custom patches for our final synth project. We can also convert .VGM files to OPM files with ease using a tool that I’ll talk about a little later. OPM files perfectly map out all of the register settings to give us the exact voices we need to replicate those found in Sega Genesis games. The downsides? The format itself is really poorly documented, and since it’s text-based, it’s kind of a pain to parse.
How do we get YM2612 OPM files? Glad you asked, because I have a package of practically every YM2612 OPM voice file available. You’d be hard-pressed to not find a game track in this pack. You can download the YM2612 OPM files here.
Can’t find your game’s patch listed in that archive but you have the VGM file? Don’t worry, I’ve got a tool for you here! Simply follow the directions in the readme file and you should be all set. This should make converting VGM files to OPM super easy.
Now that we’ve got our OPM patch files, let’s explore the format a little bit and see how I applied them to my YM2612. Since OPM files are text-based, you can open them up in a text editor and see all of the individual voice settings. (You can also manually tweak these voice settings in a text editor too, if you know what you’re doing)
Once we open up an OPM file, you will see all of the individual instrument patches. They look like this:
@:voice_num voice_title
LFO: LFRQ AMD PMD WF NFRQ
CH: PAN FL CON AMS PMS SLOT NE
M1: AR D1R D2R RR D1L TL KS MUL DT1 DT2 AME
C1: AR D1R D2R RR D1L TL KS MUL DT1 DT2 AME
M2: AR D1R D2R RR D1L TL KS MUL DT1 DT2 AME
C2: AR D1R D2R RR D1L TL KS MUL DT1 DT2 AME
At the top, you will see an @ symbol, a colon :, a voice number, and the instrument number. These headers are standardized, so we can use them to know which voice we’re looking at. Next, let’s look at the LFO: CH: M1:, C1:, M2:, C2: parameters.
LFO stands for Low Frequency Oscillator. When dealing with standard YM2612 OPMs, these values are always zero. CH is used for global channel algorithm settings that affect every operator at once. M1, C1, M2, and C2 are the names of the 4 operators within every synth channel. If we’re creating a polyphonic, mono-timbral synth, we need to set every channel’s 4 operators with the exact same data. Don’t confuse operators with channels. There are six individual channels, each with their own set of four operators, meaning there are 24 operators in total to set.
Let’s define what all of the OPM settings stand for. Every value is in decimal, not hex.
LFO: Low Frequency Oscillator Settings (Usually all 0)
LFRQ: LFO Frequency
AMD: Amplitude Modulation Enable
PMD: Phase Modulation
WF: Waveform
NFRQ: eNable Low Frequency Oscillator
CH: Channel Algorithm Settings
PAN: Panning? This setting is unknown and is unused.
FL: Feedback Loop
CON: Connection, AKA "Algorithm"
AMS: Amplitude Modulation Sensitivity
PMS: Phase Modulation Sensitivity (AKA Frequency Modulation Sensitivity)
SLOT: Slot Mask
NE: Noise Enable. Unused in our case.
If you take a look at the register map for the YM2612, you’ll find lots of these settings in there. Essentially, all we have to do is read-in these OPM file settings and transfer them over to the appropriate YM2612 registers. Making a plain-text file parser is always a bit of a nightmare, and I’m completely positive there is a better way to do this, but I’ve developed a function that seems to parse OPM files perfectly fine.
First, I create a struct to store my voice data, as well as an array of voices since each OPM file will contain multiple different voices. Each instrument you hear in a Sega Genesis music track (with the exception of PCM samples), will have it’s own voice patch.
Once I have my “voice” struct array, I then populate it with the following function:
Those who are more gifted in C-string manipulation than I am are probably wincing a little right now, but this function works perfectly, so I think I’ll keep it. This function will also automatically detect when there are no more valid voices to read in since the OPM format likes to generate way more voice blocks than are actually available. Brilliant format, right? But hey, it’s what we’ve got to work with.
Now here’s the tricky part. If we take a peek through the YM2612’s register map, you’ll notice that several register settings are actually packed together into a single byte. This is the late 80’s/early 90’s after all, and storage space is at a premium! No worries, though. A bit of careful bitwise scrunching of our otherwise organized voice data is all we need. Once we’ve packed everything into their appropriate bytes, we can send our new fancy voice register data over to the YM2612 just like we did with the old piano test voice.
void YM2612::SetVoice(Voice v)
{
currentVoice = v;
bool resetLFO = lfoOn;
if(lfoOn)
ToggleLFO();
send(0x22, 0x00); // LFO off
send(0x27, 0x00); // CH3 Normalfor(int i =0; i<7; i++) //Turn off all channels
{
send(0x28, i);
}
send(0x2B, 0x00); // DAC offfor(int a1 =0; a1<=1; a1++)
{
for(int i=0; i<3; i++)
{
uint8_t DT1MUL, TL, RSAR, AMD1R, D2R, D1LRR =0;
//Operator 1
DT1MUL = (v.M1[8] <<4) | v.M1[7];
TL = v.M1[5];
RSAR = (v.M1[6] <<6) | v.M1[0];
AMD1R = (v.M1[10] <<7) | v.M1[1];
D2R = v.M1[2];
D1LRR = (v.M1[4] <<4) | v.M1[3];
send(0x30+ i, DT1MUL, a1); //DT1/Mul
send(0x40+ i, TL, a1); //Total Level
send(0x50+ i, RSAR, a1); //RS/AR
send(0x60+ i, AMD1R, a1); //AM/D1R
send(0x70+ i, D2R, a1); //D2R
send(0x80+ i, D1LRR, a1); //D1L/RR
send(0x90+ i, 0x00, a1); //SSG EG//Operator 2
DT1MUL = (v.C1[8] <<4) | v.C1[7];
TL = v.C1[5];
RSAR = (v.C1[6] <<6) | v.C1[0];
AMD1R = (v.C1[10] <<7) | v.C1[1];
D2R = v.C1[2];
D1LRR = (v.C1[4] <<4) | v.C1[3];
send(0x34+ i, DT1MUL, a1); //DT1/Mul
send(0x44+ i, TL, a1); //Total Level
send(0x54+ i, RSAR, a1); //RS/AR
send(0x64+ i, AMD1R, a1); //AM/D1R
send(0x74+ i, D2R, a1); //D2R
send(0x84+ i, D1LRR, a1); //D1L/RR
send(0x94+ i, 0x00, a1); //SSG EG//Operator 3
DT1MUL = (v.M2[8] <<4) | v.M2[7];
TL = v.M2[5];
RSAR = (v.M2[6] <<6) | v.M2[0];
AMD1R = (v.M2[10] <<7) | v.M2[1];
D2R = v.M2[2];
D1LRR = (v.M2[4] <<4) | v.M2[3];
send(0x38+ i, DT1MUL, a1); //DT1/Mul
send(0x48+ i, TL, a1); //Total Level
send(0x58+ i, RSAR, a1); //RS/AR
send(0x68+ i, AMD1R, a1); //AM/D1R
send(0x78+ i, D2R, a1); //D2R
send(0x88+ i, D1LRR, a1); //D1L/RR
send(0x98+ i, 0x00, a1); //SSG EG//Operator 4
DT1MUL = (v.C2[8] <<4) | v.C2[7];
TL = v.C2[5];
RSAR = (v.C2[6] <<6) | v.C2[0];
AMD1R = (v.C2[10] <<7) | v.C2[1];
D2R = v.C2[2];
D1LRR = (v.C2[4] <<4) | v.C2[3];
send(0x3C+ i, DT1MUL, a1); //DT1/Mul
send(0x4C+ i, TL, a1); //Total Level
send(0x5C+ i, RSAR, a1); //RS/AR
send(0x6C+ i, AMD1R, a1); //AM/D1R
send(0x7C+ i, D2R, a1); //D2R
send(0x8C+ i, D1LRR, a1); //D1L/RR
send(0x9C+ i, 0x00, a1); //SSG EGuint8_t FBALGO = (v.CH[1] <<3) | v.CH[2];
send(0xB0+ i, FBALGO, a1); // Ch FB/Algo
send(0xB4+ i, 0xC0, a1); // Both Spks on
send(0x28, 0x00+ i + (a1 <<2)); //Keys off
}
}
if(resetLFO)
ToggleLFO();
}
And the result: A little rough around the edges, but hey! Listen to that! Actual voice patches from Genesis games!
Adding the PSG
Once I was happy with how my YM2612 was turning out, I made the decision to also include the PSG. While PSG synths have been done to death, I figured my project wouldn’t be a “complete” Genesis synth without including it. I assumed since the PSG was just a simple 3-channel square wave synth, it should be much easier to implement than the YM2612.
Weeeeeeellllll….
The SN76489 Programmable Sound Generator is an ancient chip. This IC was first minted in the late 1970’s, so writing to the chip is kind of a pain. The convoluted method involved in writing to this chip makes pitch-bending fairly difficult as well.
Big-Endian. Yuck.
First, let’s focus on how we can transfer data over to the PSG. This part is actually fairly straight forward, especially compared to the YM2612.
Make sure the WE pin is set HIGH
Send your byte over the 8-bit data bus
Set WE to LOW
Wait 14 microseconds to let the PSG process that data
Pull WE HIGH again to complete the write
Technically, step 4 is kind of faux pas, since there is a dedicated READY pin on the IC that will go HIGH once the IC has completed it’s data transaction, but since the IC consistently completes writes within the same amount of clock cycles, it’s not entirely necessary. If you do decide to go with the READY pin instead of waiting 14 microseconds, the READY pin is open-drain and needs to be pulled-up with an external 2K resistor to 5V. The internal 10K pull-ups that are normally found on microcontrollers will not work as they are too weak for the PSG.
Much like the YM2612, there is also a formula required to calculate the data found in the PSG’s frequency register. Thankfully though, this equation is much simpler:
F = N ÷ (32 × n)
F = Desired PSG Frequency
N = Master Clock Frequency
n = Desired Note Frequency (10-bit number)
Let’s calculate for note A4 again using the above equation:
F = 4000000Hz ÷ (32 × 440Hz)
F = 284.1
Again, this part is pretty simple.
Once you have that value, you can send it to the PSG using the following method:
void SN76489::SetSquareFrequency(uint8_t voice, int frequencyData)
{
if (voice <0|| voice >2)
return;
send(0x80| frequencyRegister[voice] | (frequencyData &0x0f));
send(frequencyData >>4);
}
Where it gets super annoying though, is when you have to account for pitch bending. That required a lot more math. You can view the entire PSG driver script here if you’re interested in seeing how it was done.
This video also shows the project after I had implemented hardware serial MIDI.
The Finishing Touches
Don’t judge. It worked perfectly.
All that was really left was a bit of trial-and-error tuning, adding a MIDI circuit, and then finally producing a printed circuit board. I also ditched the buck-converter I was using to knock 12V down to 5V in favor of a linear regulator since the buck converted produced quite a bit of audible noise. In order to test the PCB heat-sinking performance of said regulator, I decided to sacrifice one of my (silly) TQFP-64 to DIP boards and solder the regulator to the ground plane that I exposed by sanding off the solder mask.
Another thing I wanted to test is to see if I could run my code on a bare AT90USB1286 microcontroller without the use of PJRC’s proprietary HalfKay bootloader. With a bit of fiddling on a demo board, yes indeed, I can run my code without the bootloader. I just have to upload the code every time using an ATMEL ICE, or any other ISP (In-circuit Serial Programmer). I also switched from using LTC6904s for my clock generators to discrete crystal pierce oscillators. They’re far more accurate, cheaper, and easier to use.
My AT90USB1286 Test Board
I also added a rotary encoder and a 20×04 character LCD to act as the user interface. All that was left was to plot the schematic and design the PCB.
The schematic
The final breadboard prototype looked like this monster:
Finally, it was time to jump into the KiCAD PCB Editor and design a board. I wanted a relatively compact board, around 100x100mm that had a rotary encoder, several “favorite patch” buttons, and a way to mount my LCD above the assembly. This took a lot of research, measuring, and double-checking. Once I got the boards made, the quality was good and the screen mounted perfectly with 15mm nylon standoffs and 21mm header pins. …Only problem is that I pulled the LCD’s data R/W pin to VCC when it should have been GND. Darn, so close to perfect. Oh well, I just cut the lead and stretched it over to my GND test point. The Op-amp also had an issue – KiCAD didn’t recognize that pin 4 and pin 8 were part of the netlist, so the DRC overlooked them and didn’t tell me they weren’t connected. Damn. A couple of bodges later though, and we were all patched up.
Here’s the board without the LCD or chips installed yet.
I also needed to turn off the JTAG fuse on the new AT90USB1286. This gave me a mini heart attack since it was preventing the main data bus from operating correctly. I thought I was screwed, but all I had to do was change the fuses to:
EXTENDED: 0xF3
HIGH: 0xDF
LOW: 0x5E
Phew.
Once it was all said and done, I polished the unit up and recorded my first video on it! (Top of the page)
All that’s left is to modify the board a little bit to remove the bodged connections. I also want to transition to as many surface-mounted parts as possible as it will likely speed up production times.
GUH! That was a lot and it was only a very high-level overview. In reality, this entire process took many long months. If you actually did read all of this, thank you very, very much! I appreciate your interest in the project! Feel free to look through the source material. Once version 2 is complete, I will release the KiCAD PCB files.


