June 5, 2017
DIY MPU 9265 Arduino-Unity Motion Controller
A do-it-yourself electronics program that communicates accelerometer data to a game built in Unity!


The Basics
Built for: GAM-51: Game simulations and mechanics.
Project Development Time: 3 weeks
Software/Engine: Unity3D, Arduino IDE
Source Code: https://github.com/AidanHockey5/ArduinoUnityMotionController
Introduction
I've always been interested in both video game development and microcontroller-based electronic projects. This project combines my two favorite hobbies and was an awesome learning experience along the way. This article will serve as a guide through my development process and will allow me to share with you some of the challenges I faced while creating this project.
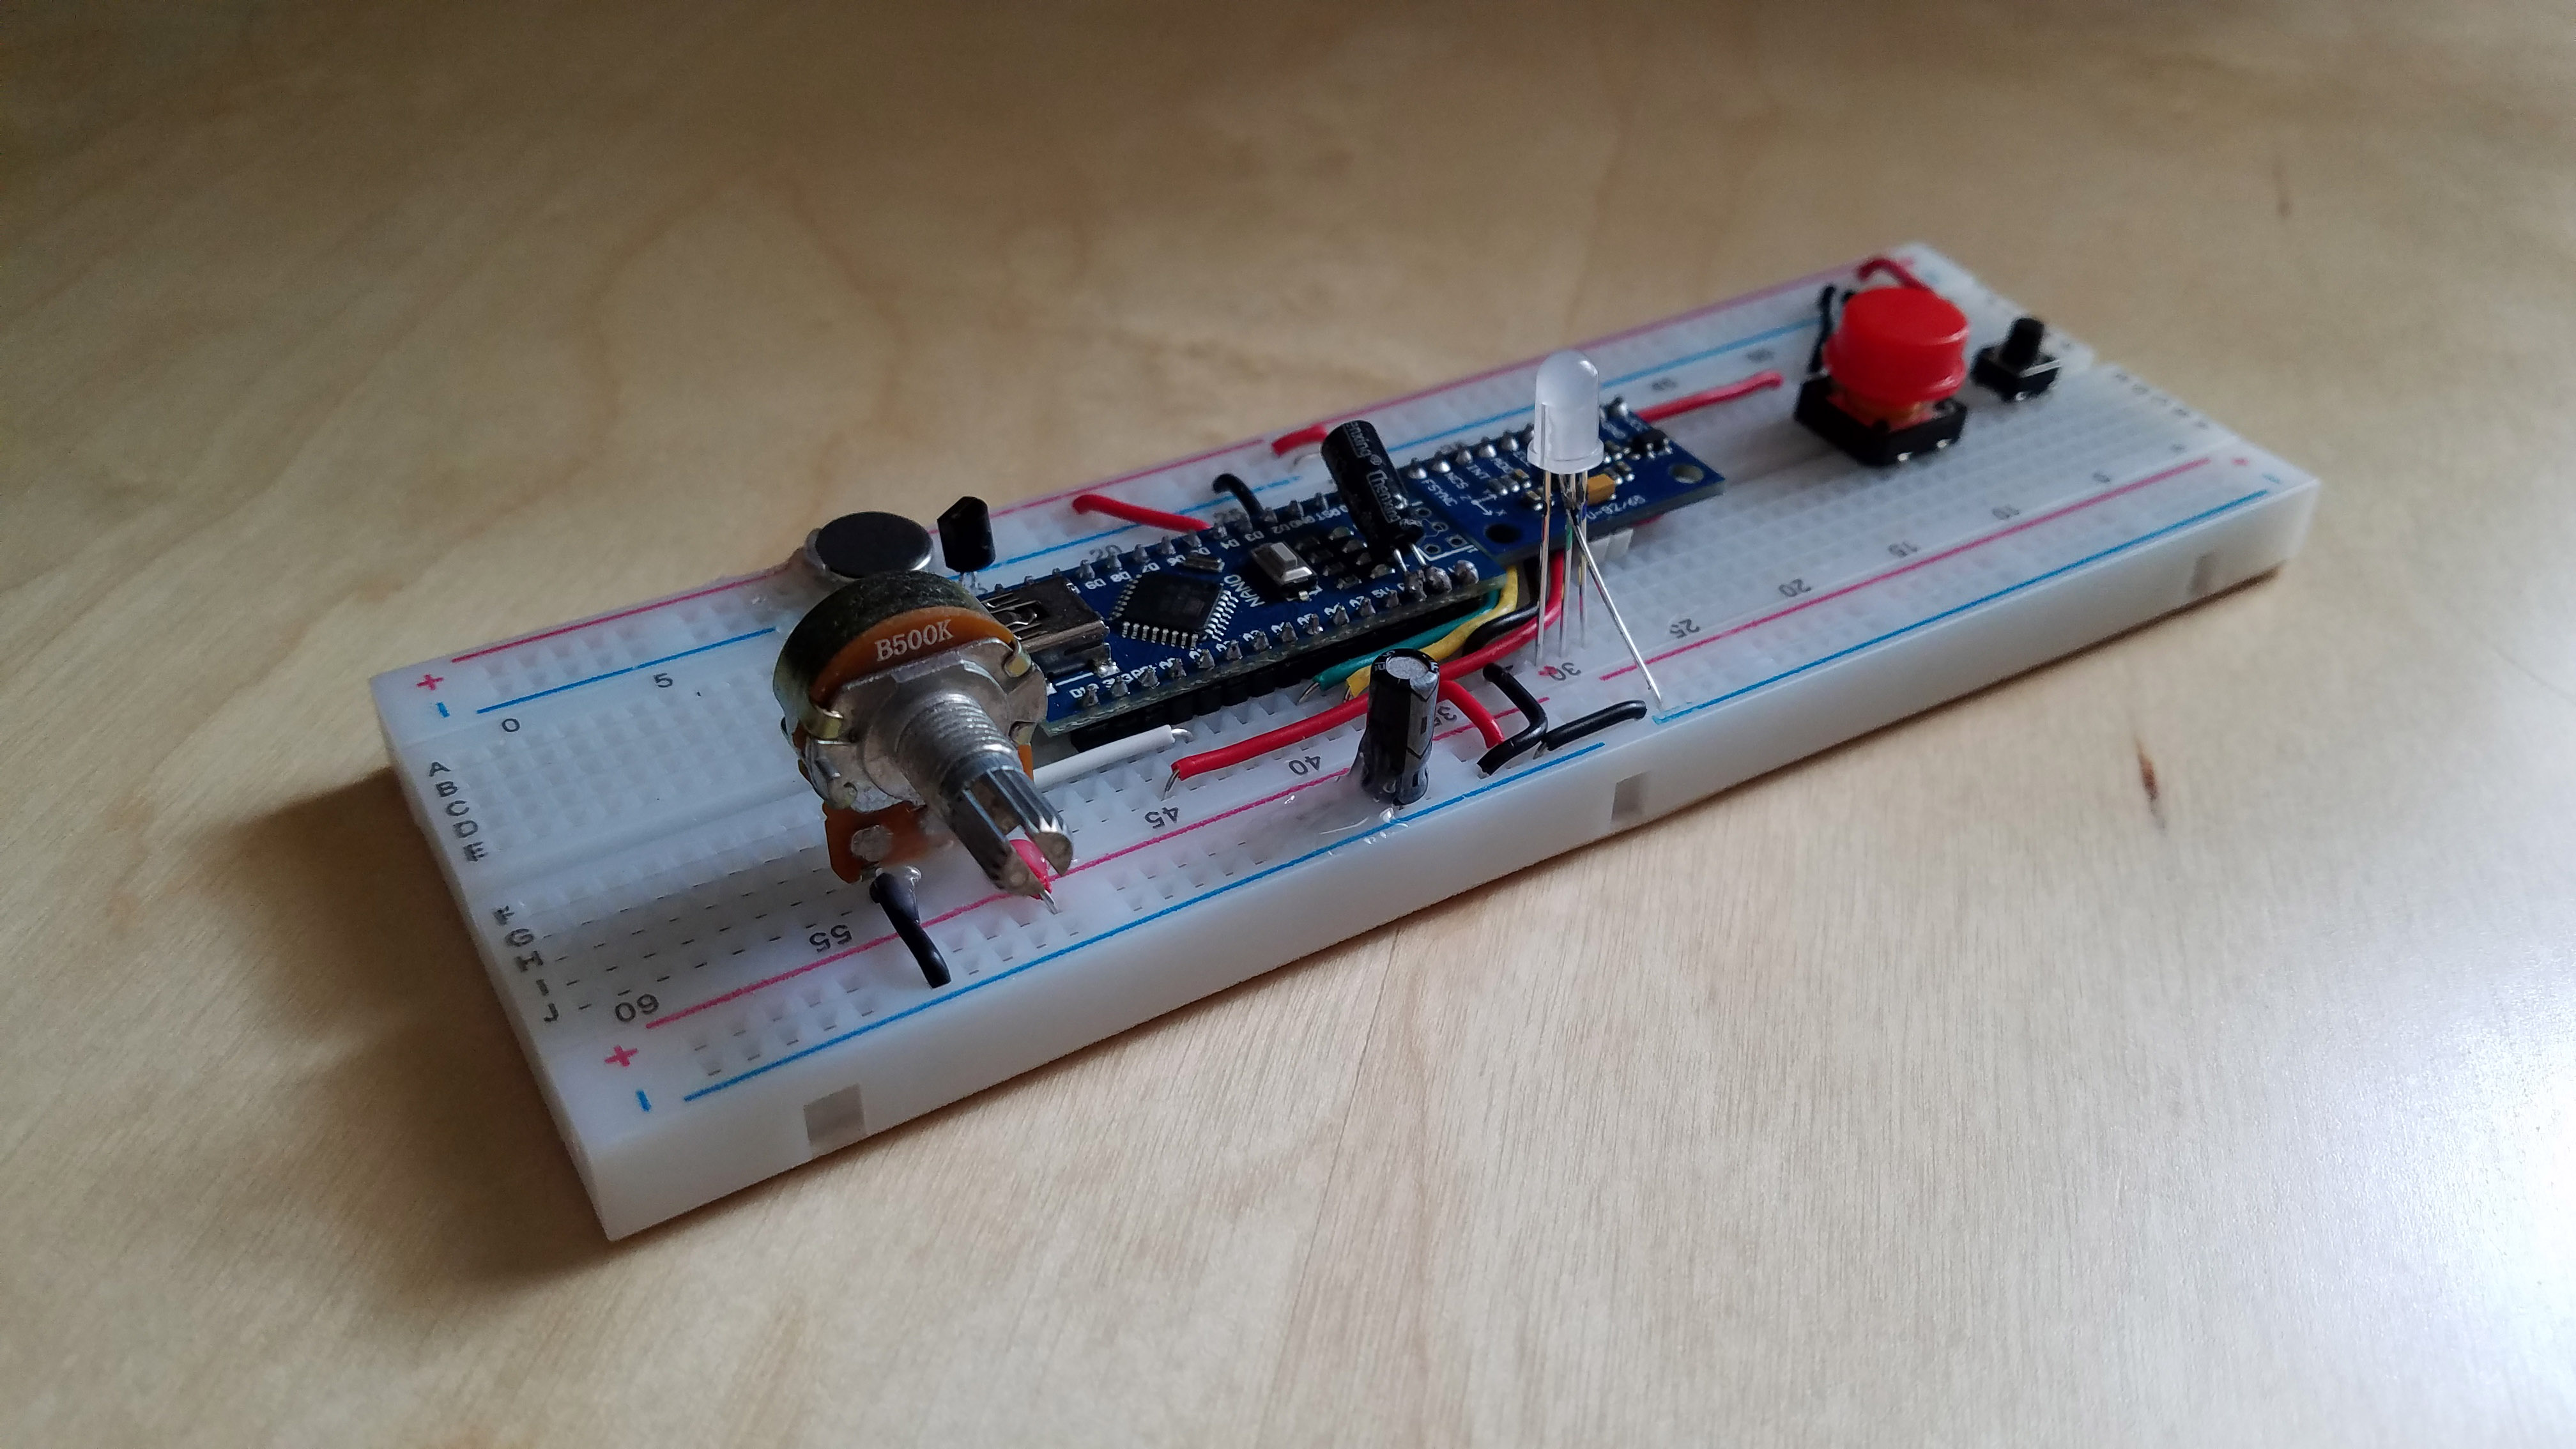
My controller design features haptic feedback vibrations, RGB lighting that matches the in-game background, and an accelerometer for motion controls. There's also two buttons, one for firing your grappling hook, and calibrating the sensors, as well as a potentiometer for zooming in and out.
Part I: Getting Unity to talk to an Arduino over a serial connection
A couple of years ago, I attempted to write my own C# <-> Arduino serial communication system so that I could interface my electronics projects through the Unity game engine. It honestly didn't take too long before I had a basic proof-of-concept program that could set pins high and low on an Arduino board, but my original system was not very robust, reliable, or even intuitive to use. It was a neat experiment, but it was ultimately shelved.
In my final semester in the game program at my college, I felt that I needed to end my four year journey with something special - something that hasn't been done before at this school. My professor at the time previously expressed a great interest in hobby electronics and Arduinos, so I thought, "This is a perfect chance to create something that I love to work with too!" I forked my previous attempt at a C# serial communication system and began work on the "new and improved" version for my final project immediately.
i. Writing to Serial Ports with C#
C# actually has pretty great support for serial ports right out of the box. The problem is, Unity, which uses the Mono compiler, does not fully support all of the great .NET serial port features yet. Namely, the event that is fired whenever there is incoming serial data does not work. Because of this, I was forced to manually connect to the Arduino, verify that the device I'm talking to is the Arduino controller, and poll for incoming serial data myself.
Let's begin by brute-force connecting to the Arduino and sending our first command over serial. All code examples assume you will be working in Unity/C# and the Arduino IDE.
Create a new C# script (I called mine "Interface") in Unity and attach it to any game object.
1 2 3 4 5 6 7 8 9 10 11 12 13 14 15 16 17 18 19 20 21 22 23 24 25 26 |
//C# using UnityEngine; using System.Collections; using System.IO.Ports; using System; using System.Linq; public class Interface : MonoBehaviour { SerialPort sp; void Start() { sp = new SerialPort("COM4", 115200, Parity.None, 8, StopBits.One); //Replace "COM4" with whatever port your Arduino is on. sp.DtrEnable = false; //Prevent the Arduino from rebooting once we connect to it. //A 10 uF cap across RST and GND will prevent this. Remove cap when programming. sp.ReadTimeout = 1; //Shortest possible read time out. sp.WriteTimeout = 1; //Shortest possible write time out. sp.Open(); if (sp.IsOpen) sp.Write("Hello World"); else Debug.LogError("Serial port: " + sp.PortName + " is unavailable"); sp.Close(); //You can't program the Arduino while the serial port is open, so let's close it. } } |
I should point out that there is a downside to sending commands to the Arduino. When you send a command, it will interrupt the incoming data stream until the transmission is complete, blocking out any further input from the Arduino. You only want to send commands to the Arduino during lower-priority times like handshaking and initialization.
ii. Reading Serial Data on the Arduino:
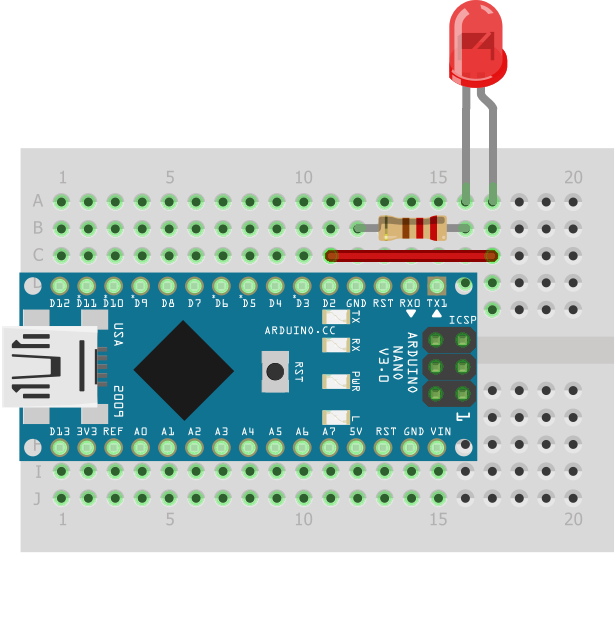
Begin by creating a simple LED circuit. If you would like to use the built-in Pin 13 LED, feel free to do so. In this case, I have connected an LED to digital pin 2 and ground with a 220Ω series resistor.
What we're going to do on the Arduino end is to listen to the serial port and test to see if we've received the "Hello World" message from Unity/C#. Once we receive the correct message, we'll light up the LED for five seconds, then turn it back off again. Enter the code down below into the Arduino IDE, upload it, then play your game in Unity. If everything went to plan, you LED should light up! Make sure to watch your capitalization on "Hello World" and be sure to check your port numbers (Same port you use to upload your code).
1 2 3 4 5 6 7 8 9 10 11 12 13 14 15 16 17 18 19 |
//Arduino IDE C/C++ void setup() { Serial.begin(115200); pinMode(2, OUTPUT); } void loop() { if(Serial.available() > 0) { String incomming = Serial.readString(); if(incomming == "Hello World") { digitalWrite(2, HIGH); delay(5000); digitalWrite(2, LOW); } } |
Part II: Getting an Arduino to send data to Unity
i. Creating a serial polling system in C#
As I mentioned before, there is an event that you can subscribe to in C# that fires whenever incoming serial data arrives; however, this feature does not function properly with Mono, so we must create our own serial polling function. Jump back to your Interface script in Unity and replace it with this:
1 2 3 4 5 6 7 8 9 10 11 12 13 14 15 16 17 18 19 20 21 22 23 24 25 26 27 28 29 30 31 32 33 34 35 36 37 38 39 40 41 42 43 44 45 46 47 48 49 50 51 52 |
//C# using UnityEngine; using System.Collections; using System.IO.Ports; using System; using System.Linq; public class Interface : MonoBehaviour { SerialPort sp; void Start() { sp = new SerialPort("COM4", 115200, Parity.None, 8, StopBits.One); //Replace "COM4" with whatever port your Arduino is on. sp.DtrEnable = false; //Prevent the Arduino from rebooting once we connect to it. //A 10 uF cap across RST and GND will prevent this. Remove cap when programming. sp.ReadTimeout = 1; //Shortest possible read time out. sp.WriteTimeout = 1; //Shortest possible write time out. sp.Open(); if (sp.IsOpen) sp.Write("Hello World"); else Debug.LogError("Serial port: " + sp.PortName + " is unavailable"); //Removed the sp.Close line since we're now polling data. } void Update() { CheckForRecievedData(); if (Input.GetKeyDown(KeyCode.Escape) && sp.IsOpen) sp.Close(); } public string CheckForRecievedData() { try //Sometimes malformed serial commands come through. We can ignore these with a try/catch. { string inData = sp.ReadLine(); int inSize = inData.Count(); if (inSize > 0) { Debug.Log("ARDUINO->|| " + inData + " ||MSG SIZE:" + inSize.ToString()); } //Got the data. Flush the in-buffer to speed reads up. inSize = 0; sp.BaseStream.Flush(); sp.DiscardInBuffer(); return inData; } catch { return string.Empty; } } } |
One thing to note is that we no longer automatically close the serial port. If you can not program your Arduino because access to the serial port is denied, simply run your Unity game again and hit the "Escape" key to close the port, then stop your game.
ii. Sending serial data from the Arduino
This part is relatively easy compared to the C# code above. If you've ever worked with Arduinos before, you'll already be familiar with the Serial.print(); family of functions. All we're going to do for now is to continuously send serial messages to Unity along with a count of how many times we've looped.
1 2 3 4 5 6 7 8 9 10 11 12 13 14 15 |
//Arduino IDE C/C++ unsigned int count = 0; void setup() { Serial.begin(115200); } void loop() { //Multiline serial commands can be made by using multiple "print"s and ending with a "println" Serial.print("Serial command #"); Serial.println(count); count++; delay(1000); } |
Connect your Arduino, fire up your Unity game, and check the Unity console. You should see some verbose information on the incoming serial data.
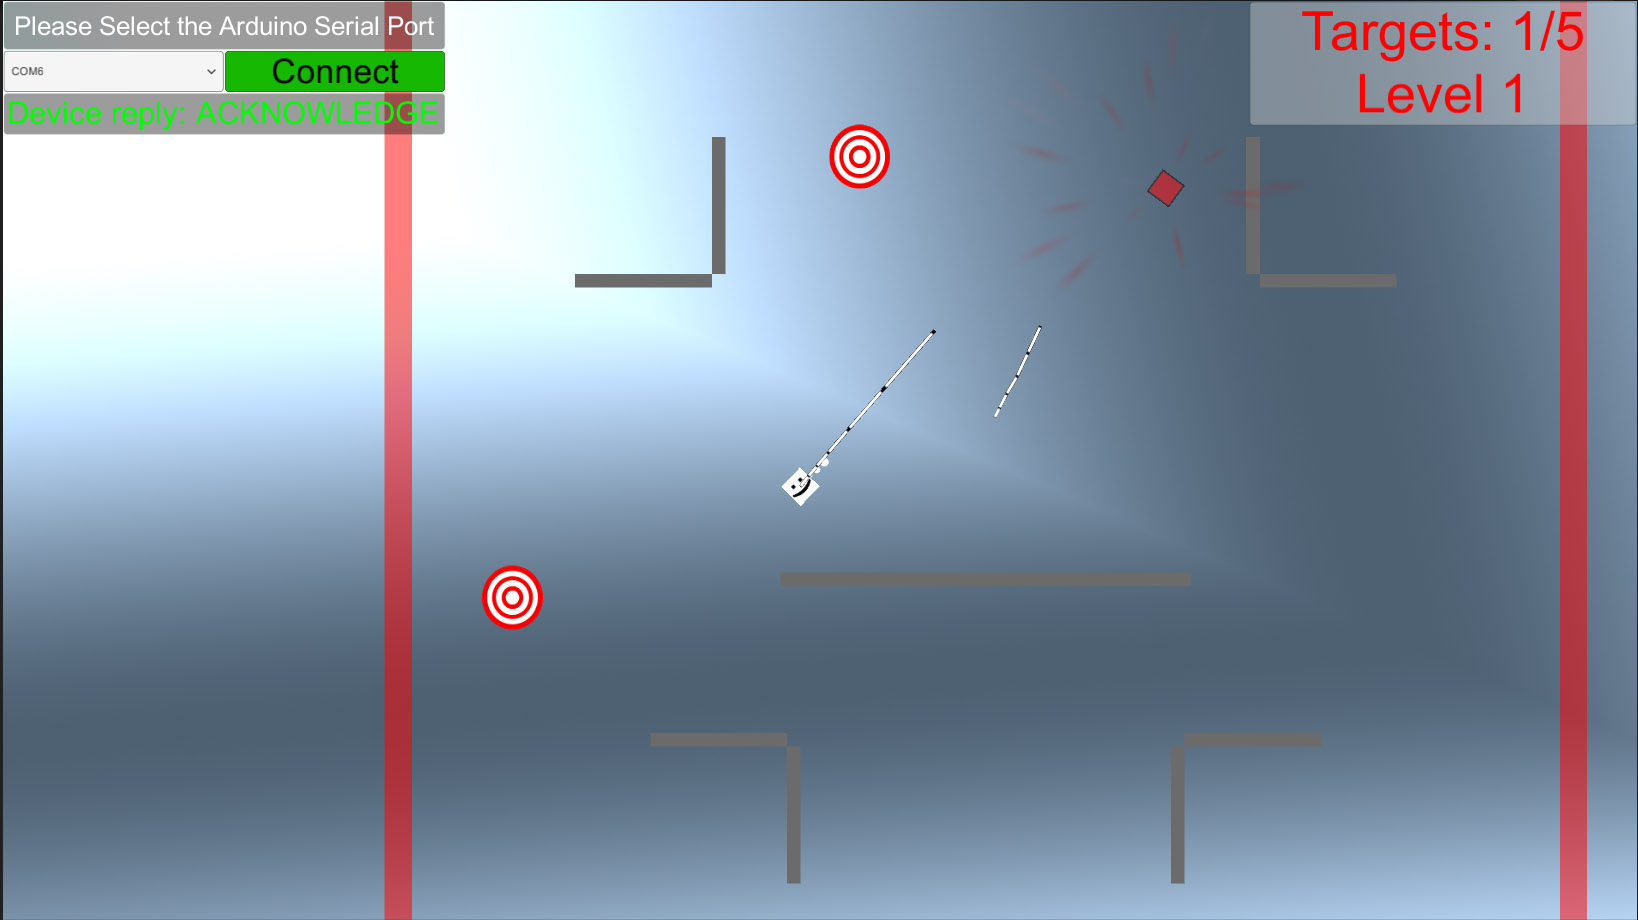
In the interest of brevity, I won't explain the entire serial communication system that I created for this project. Just understand that the "handshake" system that I created is built on the code that you see above. Unity sends over a serial command to the Arduino that says "DISCOVER" and if the Arduino is on the other end, it will reply with "ACKNOWLEDGE." Once this transaction occurs, the Unity Interface will change to a "Connected" state and will begin transmitting and receiving serial commands. You can browse my final Interface script here. and the final Arduino sketch here.
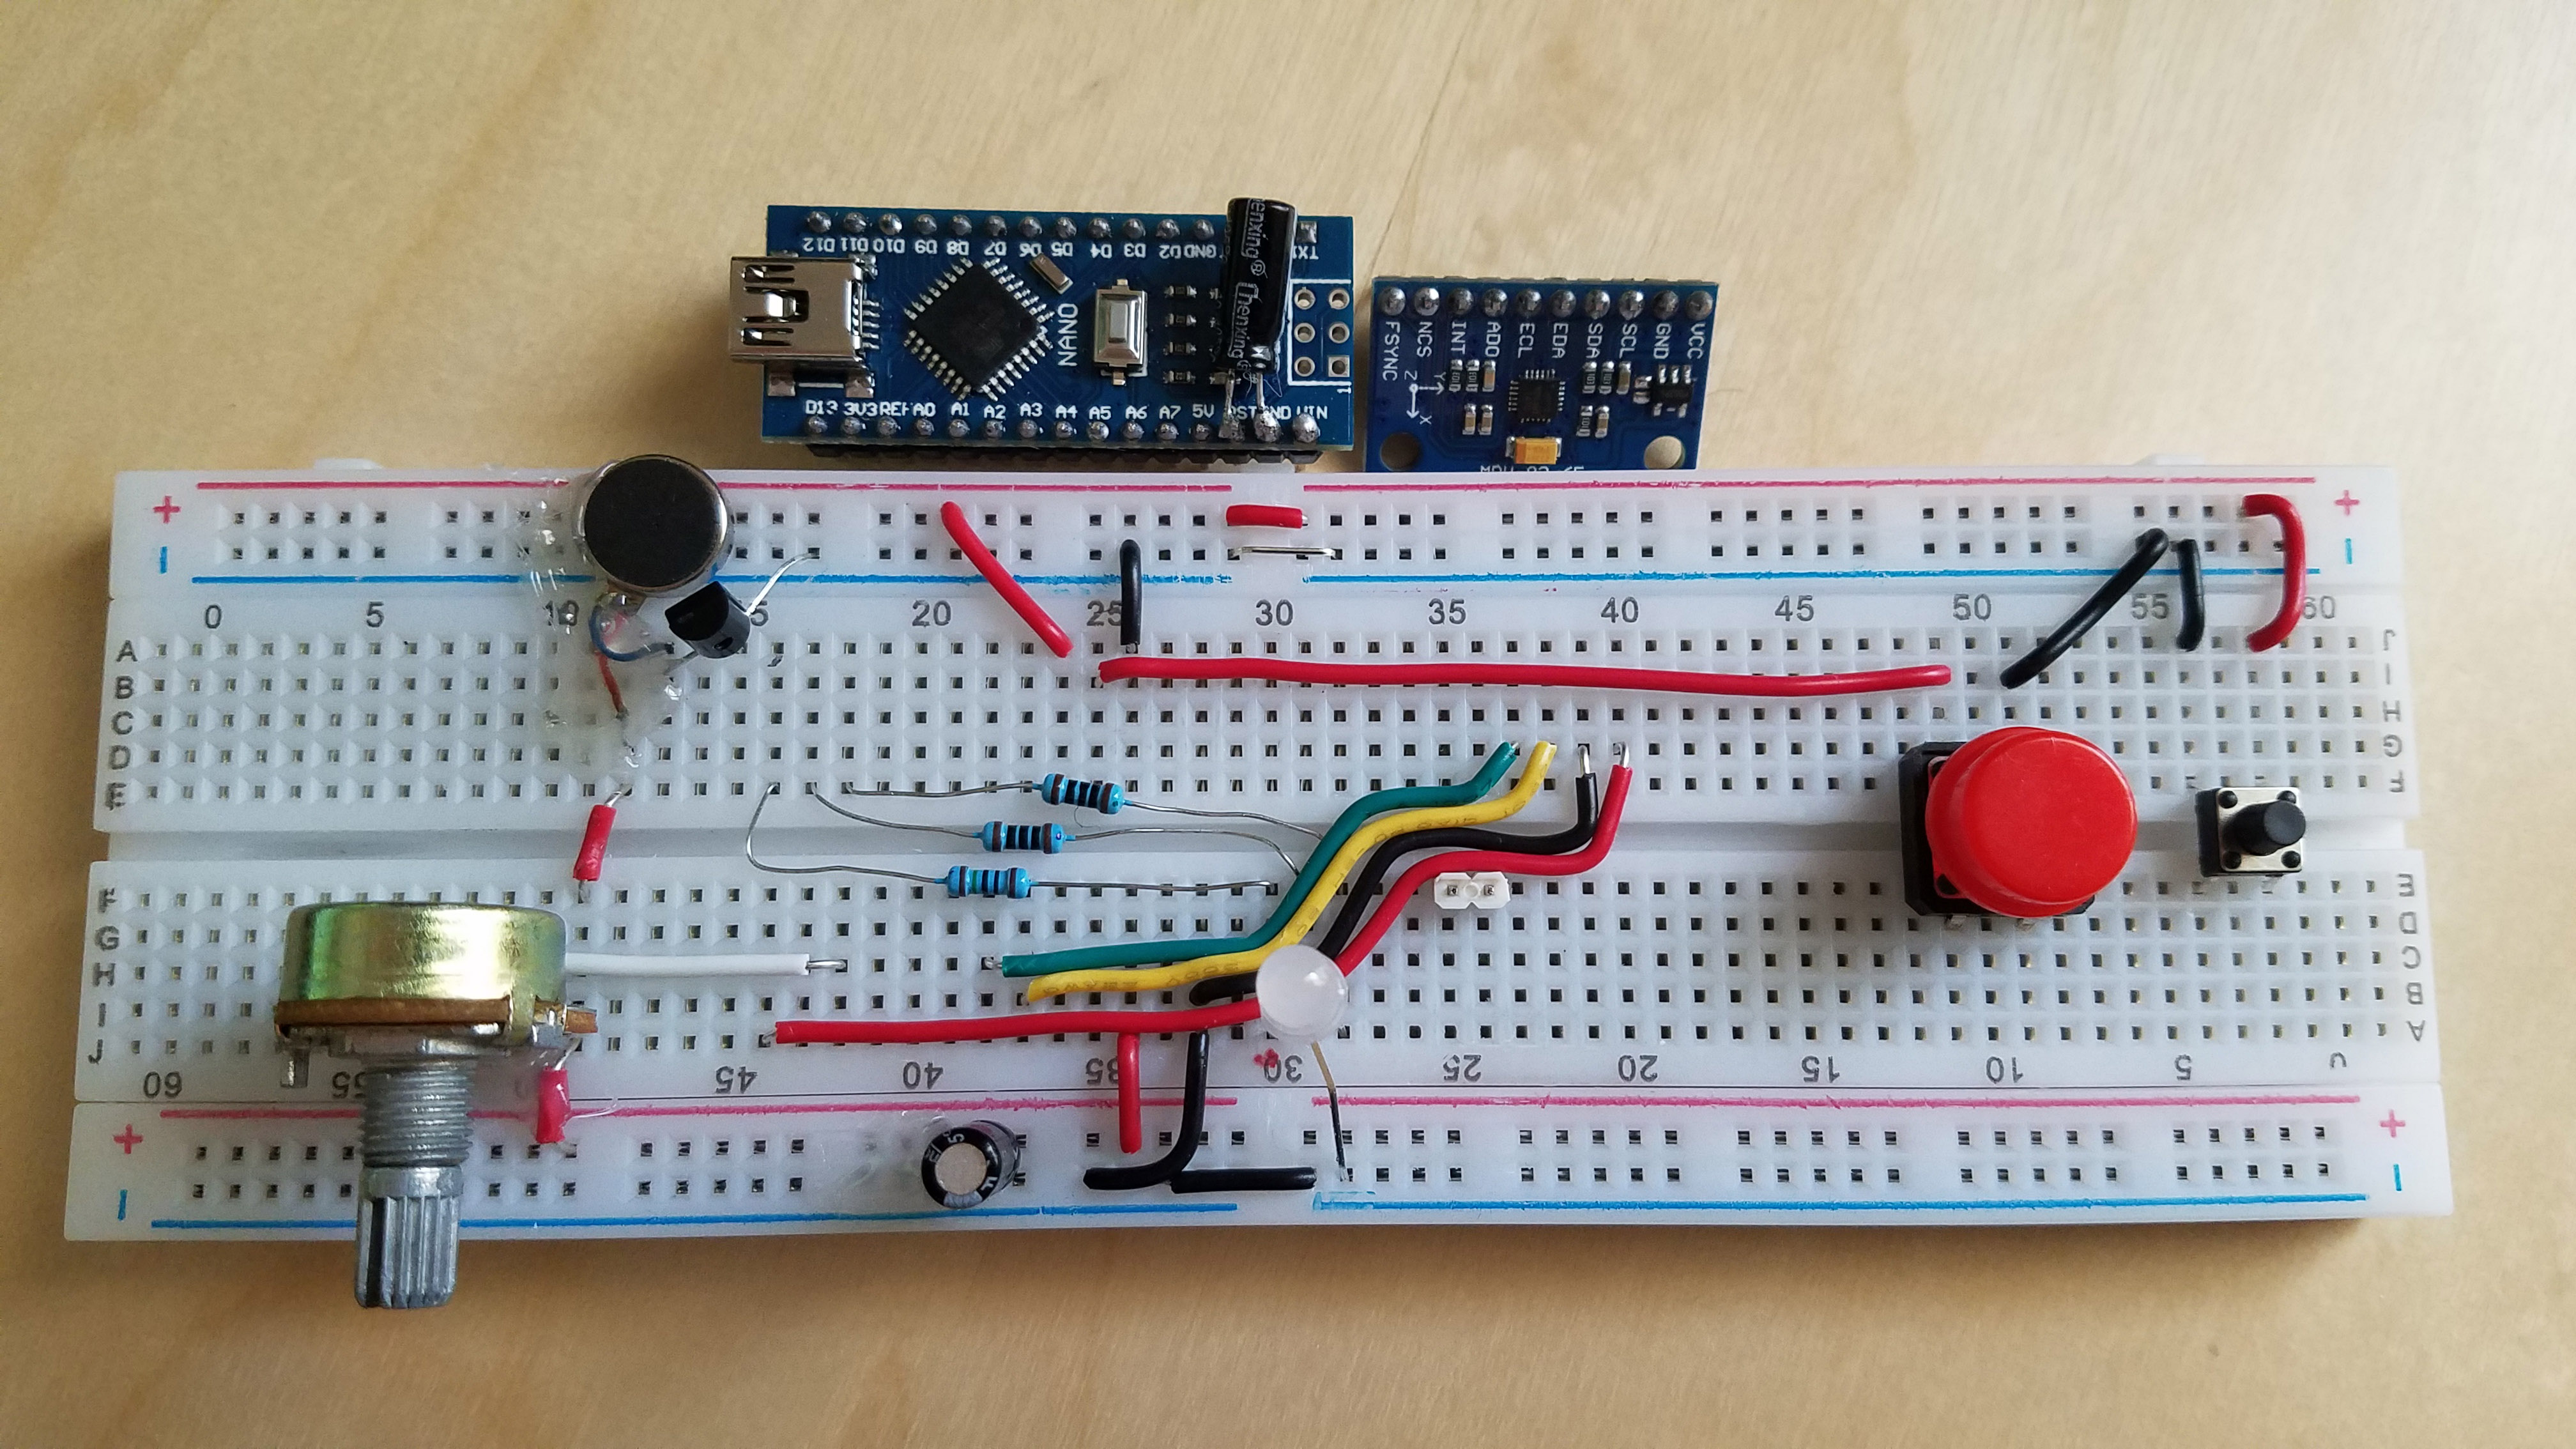
Part III: Accelerometer data from the MPU9265 Module
The MPU9265 is a three-axis accelerometer, gyroscope, and compass module that we can read using the I2C interface. If you're unfamiliar with I2C, don't worry, most of the hard stuff is taken care of by the Wire.h library included with the Arduino IDE. You can also find similar accelerometer units under the names MPU 6500, MPU 6050 and MPU 9250. I'm not sure if they would be completely compatible with my software, but they're all similar enough that it shouldn't be too much trouble to port over code should there be any differences.
Keep in mind, these MPU sensors run on 3.3 volts, not 5. On my module, there are current limiting resistors on the I2C lines and a built-in 3.3v regulator on VCC. So while technically 5v would be fine on VCC, I recommend connecting VCC to the 3.3 volt pin instead to avoid any accidental magic smoke.
Since we are using I2C, we need to connect our sensor to two specific pins on the Arduino. If you're using an Uno, these pins are marked SDA (Serial Data) and SCL (Serial Clock). These lines are also directly connected to pin A4 (SDA) and A5 (SCL) if you'd prefer to use those pins or are using a Nano like me.
Go ahead and follow the wiring diagram to the right and connect the MPU SDA pin to Arduino A4(SDA) and MPU SCL to Arduino A5(SCL).
Before we begin programming this sensor, I'd like to link a project that gives a ton of great example code for this sensor.
Add the following code to your Arduino sketch. This will only give us the accelerometer data from the sensor.

1 2 3 4 5 6 7 8 9 10 11 12 13 14 15 16 17 18 19 20 21 22 23 24 25 26 27 28 29 30 31 32 33 34 35 36 37 38 39 40 41 42 43 44 45 46 47 48 49 50 51 52 53 54 55 56 57 58 59 60 61 62 63 64 65 66 67 68 69 70 71 72 73 74 75 | //Arduino IDE C/C++ #include "Wire.h" //I2C addresses #define MPU9250_ADDRESS 0x68 #define MAG_ADDRESS 0x0C #define GYRO_FULL_SCALE_250_DPS 0x00 #define GYRO_FULL_SCALE_500_DPS 0x08 #define GYRO_FULL_SCALE_1000_DPS 0x10 #define GYRO_FULL_SCALE_2000_DPS 0x18 #define ACC_FULL_SCALE_2_G 0x00 #define ACC_FULL_SCALE_4_G 0x08 #define ACC_FULL_SCALE_8_G 0x10 #define ACC_FULL_SCALE_16_G 0x18 // This function read Nbytes bytes from I2C device at address Address. // Put read bytes starting at register Register in the Data array. void I2Cread(uint8_t Address, uint8_t Register, uint8_t Nbytes, uint8_t* Data) { // Set register address Wire.beginTransmission(Address); Wire.write(Register); Wire.endTransmission(); // Read Nbytes Wire.requestFrom(Address, Nbytes); uint8_t index=0; while (Wire.available()) Data[index++]=Wire.read(); } // Write a byte (Data) in device (Address) at register (Register) void I2CwriteByte(uint8_t Address, uint8_t Register, uint8_t Data) { // Set register address Wire.beginTransmission(Address); Wire.write(Register); Wire.write(Data); Wire.endTransmission(); } void setup() { Wire.begin(); Serial.begin(115200); // Configure gyroscope range I2CwriteByte(MPU9250_ADDRESS,27,GYRO_FULL_SCALE_2000_DPS); // Configure accelerometers range I2CwriteByte(MPU9250_ADDRESS,28,ACC_FULL_SCALE_16_G); // Set by pass mode for the magnetometers I2CwriteByte(MPU9250_ADDRESS,0x37,0x02); // Request first magnetometer single measurement I2CwriteByte(MAG_ADDRESS,0x0A,0x01); } void loop() { // Read accelerometer and gyroscope uint8_t Buf[14]; I2Cread(MPU9250_ADDRESS,0x3B,14,Buf); // Accelerometer int16_t ax=-(Buf[0]< <8 | Buf[1]); int16_t ay=-(Buf[2]<<8 | Buf[3]); int16_t az=Buf[4]<<8 | Buf[5]; // Accelerometer Serial.print (ax,DEC); Serial.print(","); Serial.print (ay,DEC); Serial.print(","); Serial.println (az,DEC); delay(150); } |

Once you've added the above code, check out the Arduino Serial Plotter (Arduino IDE-> Tools -> Serial Plotter) to see a graph of the X, Y, and Z axis values from the accelerometer. Give your prototype board a shake and a turn and watch what happens to the graph.
Part IV: Sending accelerometer data to Unity
Now that we've successfully read the MPU module, it's time to do something useful with that data. Since we're dealing with rotations here, we need to begin by formatting our raw sensor data into something a little more Unity-friendly.
Unity's internal rotation system is Quaternion based, but the numbers exposed to the developer use the friendlier Euler rotation system (0-360 degrees).
Our MPU sensor gives back values that really aren't compatible with either of these systems. Values from the MPU sensor usually range between -3000 to 3000 on each axis. We can use a handy built-in Arduino function to constrain these values to 0-360 for us though. The "map()" function.
We'll also create our own Arduino Vector3 object using structs to help keep our Data organized. Just a word of warning though, this is where things start to get a little trickier.
Let's head back to the Arduino IDE for a moment and update our code to be a little more Unity-friendly, then send out some accelerometer data in a package that can be read by our Unity Interface script!
1 2 3 4 5 6 7 8 9 10 11 12 13 14 15 16 17 18 19 20 21 22 23 24 25 26 27 28 29 30 31 32 33 34 35 36 37 38 39 40 41 42 43 44 45 46 47 48 49 50 51 52 53 54 55 56 57 58 59 60 61 62 63 64 65 66 67 68 69 70 71 72 73 74 75 76 77 78 79 80 81 82 83 84 85 86 87 88 89 90 91 92 93 94 95 96 97 98 99 100 101 102 103 104 105 106 107 108 109 110 111 112 113 114 115 116 117 118 |
//Arduino IDE, C/C++ #include "Wire.h" #define MPU9250_ADDRESS 0x68 #define MAG_ADDRESS 0x0C #define GYRO_FULL_SCALE_250_DPS 0x00 #define GYRO_FULL_SCALE_500_DPS 0x08 #define GYRO_FULL_SCALE_1000_DPS 0x10 #define GYRO_FULL_SCALE_2000_DPS 0x18 #define ACC_FULL_SCALE_2_G 0x00 #define ACC_FULL_SCALE_4_G 0x08 #define ACC_FULL_SCALE_8_G 0x10 #define ACC_FULL_SCALE_16_G 0x18 #define ROTATION_COMMAND 'R' //Custom 16bit Vector3 struct Vector3 { int16_t x; int16_t y; int16_t z; }; //Equality operator overloads for Vector3 //Allow us to easily compare two vector3's to see if the are equal or not. inline bool operator==(const Vector3& lhs, const Vector3& rhs){ if(lhs.x == rhs.x && lhs.y == rhs.y && lhs.z == rhs.z)return true; else return false; } inline bool operator!=(const Vector3& lhs, const Vector3& rhs){ return !(lhs == rhs); } void setup() { Wire.begin(); Serial.begin(115200); // Configure gyroscope range I2CwriteByte(MPU9250_ADDRESS,27,GYRO_FULL_SCALE_2000_DPS); // Configure accelerometers range I2CwriteByte(MPU9250_ADDRESS,28,ACC_FULL_SCALE_16_G); } void I2Cread(uint8_t Address, uint8_t Register, uint8_t Nbytes, uint8_t* Data) { // Set register address Wire.beginTransmission(Address); Wire.write(Register); Wire.endTransmission(); // Read Nbytes Wire.requestFrom(Address, Nbytes); uint8_t index=0; while (Wire.available()) Data[index++]=Wire.read(); } void I2CwriteByte(uint8_t Address, uint8_t Register, uint8_t Data) { // Set register address Wire.beginTransmission(Address); Wire.write(Register); Wire.write(Data); Wire.endTransmission(); } Vector3 lastAccl; void SendGyroData() { // Read accelerometer and gyroscope uint8_t Buf[14]; I2Cread(MPU9250_ADDRESS,0x3B,14,Buf); Vector3 accl; //Create a vector3 to store our accl data in. // Accelerometer accl.x=-(Buf[0]<<8 | Buf[1]); accl.y=-(Buf[2]<<8 | Buf[3]); accl.z= Buf[4]<<8 | Buf[5]; //Map the accl data to a Unity-friendly range accl.x = map(accl.x, -3000, 3000, -360, 360); accl.y = map(accl.y, -3000, 3000, -360, 360); accl.z = map(accl.z, -3000, 3000, -360, 360); if(VectorDistance(accl, lastAccl) > 5) //Only send new accl data if the change is great enough. { // Accelerometer Out Serial.print(ROTATION_COMMAND); Serial.print (accl.x,DEC); Serial.print (":"); Serial.print (accl.y,DEC); Serial.print (":"); Serial.print (accl.z,DEC); Serial.println(""); lastAccl = accl; } } float VectorDistance(Vector3 a, Vector3 b) { return sqr( pow((b.x-a.x),2) + pow((b.y-a.y),2) + pow((b.z-a.z),2)); } int sqr(int x) //Fast, but not accurate integer square root { int s, t; s = 1; t = x; while (s < t) { s <<= 1; t >>= 1; } do { t = s; s = (x / s + s) >> 1; } while (s < t); return t; } void loop() { SendGyroData(); delay(16.6); //Delay to match 60 updates per second. } |
Upload the above sketch and jump back to Unity. We'll demonstrate our new accelerometer data by rotating a cube.
Create a new cube in your Unity scene and place it in front of your camera. Now that we've sent over formatted accelerometer commands from the Arduino, we need a way to parse them. C# has an excellent way to split up strings based on delimiters. If you look back up to the Arduino code, you'll notice that we insert a ":" before we send the next rotation axis value. These ":" are our delimiters and we can use them to split apart strings into individual values. Fortunately for us, C# has great built-in support for splitting strings based on delimiters. You'll all of the string magic happen within the "ParseAccelerometerData()" function. Open up your Interface script in Unity and add replace it with the following:
1 2 3 4 5 6 7 8 9 10 11 12 13 14 15 16 17 18 19 20 21 22 23 24 25 26 27 28 29 30 31 32 33 34 35 36 37 38 39 40 41 42 43 44 45 46 47 48 49 50 51 52 53 54 55 56 57 58 59 60 61 62 63 64 65 66 67 68 69 70 |
//C# using UnityEngine; using System.Collections; using System.IO.Ports; using System; using System.Linq; public class TestInterface : MonoBehaviour { SerialPort sp; string[] stringDelimiters = new string[] {":", "R",}; //Items we want to ignore in strings. public Transform target; //The item we want to affect with our accelerometer void Start() { sp = new SerialPort("COM4", 115200, Parity.None, 8, StopBits.One); //Replace "COM4" with whatever port your Arduino is on. sp.DtrEnable = false; //Prevent the Arduino from rebooting once we connect to it. //A 10 uF cap across RST and GND will prevent this. Remove cap when programming. sp.ReadTimeout = 1; //Shortest possible read time out. sp.WriteTimeout = 1; //Shortest possible write time out. sp.Open(); } void Update() { string cmd = CheckForRecievedData(); if(cmd.StartsWith("R")) //Got a rotation command { Vector3 accl = ParseAccelerometerData(cmd); //Smoothly rotate to the new rotation position. target.transform.rotation = Quaternion.Slerp(target.transform.rotation, Quaternion.Euler(accl), Time.deltaTime * 2f); } if (Input.GetKeyDown(KeyCode.Escape) && sp.IsOpen) sp.Close(); } Vector3 lastAccData = Vector3.zero; Vector3 ParseAccelerometerData(string data) //Read the rotation command string and return a proper Vector3 { try { string[] splitResult = data.Split(stringDelimiters, StringSplitOptions.RemoveEmptyEntries); int x = int.Parse(splitResult[0]); int y = int.Parse(splitResult[1]); int z = int.Parse(splitResult[2]); lastAccData = new Vector3(x, y, z); return lastAccData; } catch { Debug.Log("Malformed Serial Transmisison"); return lastAccData; } } public string CheckForRecievedData() { try //Sometimes malformed serial commands come through. We can ignore these with a try/catch. { string inData = sp.ReadLine(); int inSize = inData.Count(); if (inSize > 0) { Debug.Log("ARDUINO->|| " + inData + " ||MSG SIZE:" + inSize.ToString()); } //Got the data. Flush the in-buffer to speed reads up. inSize = 0; sp.BaseStream.Flush(); sp.DiscardInBuffer(); return inData; } catch { return string.Empty; } } } |
If you look the on object where you've placed this interface script, you'll see an open "Transform" slot. Go ahead and drag your cube into this slot. Then, fire up your Arduino and press play in Unity. You should be able to rotate the cube around using the controller that you've built!
If you play around with your controller a little more, you'll notice that it's matching your movements... but... something doesn't feel right. It's almost as if some of the axis are off or the cube is rotating in an incorrect way. This may be due to a phenomenon called "Gimbal Locking" which is one of the main disadvantages of using Euler angles.
Selecting a single axis to work with seems to work fine for most 2D games, but 3D rotation might be hampered by incorrect rotations. If you're willing to get clever with your vector math, you can probably find a way around it.
Experiment with it a little and see what you come up with! Add a couple more features to your controller to make it special!

Part V: Ending Notes
So that was my high level walk-through on how you can interface an Arduino and an accelerometer sensor to the Unity game engine. You'll notice that my finished controller also has buttons, RGB lighting, a rumble motor, and a zoom-control potentiometer. Once you've mastered the above code, all of these extra additions are trivial because they all rely on the same methods of transmission. If you would like to build the complete controller and interface yourself, you can follow the full schematic here and clone the full source code and Arduino sketch for the game that I made that utilizes this controller.
