Hello Team No Fun Allowed members!
This quick guide is designed to walk you through the steps of installing and using our version control system, PlasticSCM. In this brief tutorial, you will learn how to install the PlasticSCM client, login to our team server, and how to perform basic version control tasks. Before we continue, please make sure that you have received my email with your server login credentials. If you haven't received your login credentials, or would like to change your password, email me at [email protected]
So, with that out of the way, let's install the PlasticSCM client.
Installing the PlasticSCM client
Step 1) Download the client installer by clicking this link.
Step 2) Run the installer and keep clicking "Next" until the program begins to install. You do not need to check or uncheck any options until PlasticSCM has finished installing.
Step 3) If everything installed successfully, you should now check the "Configure Plastic SCM client now" box and hit finish.

Configuring your login credentials
You should now see a screen that looks like this:
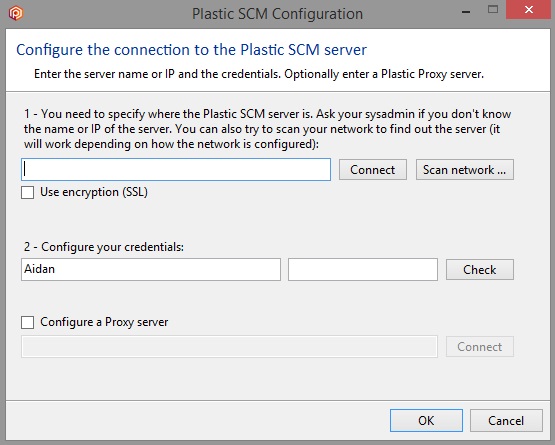
Step 1: The first box is asking for the address of the server. Our PlasticSCM server is hosted at my house and is under a subdomain of my website, so accessing it is easy.
Copy and paste this server information into the first box:
git.aidanlawrence.com:8087
Step 2: Hit the "Connect" button. If everything was successful, you should see a small message pop up under the address bar that reads "Connected OK (UPWorkingMode)."
Step 3: Enter your username and password (sent in an email from me) into the second set of boxes. Both the username and password are case sensitive!
Hit the "Check" button. If all the information on the forum is correct, your configuration screen will look like this:

Step 4: Hit "Okay" and wait for this dialogue box:
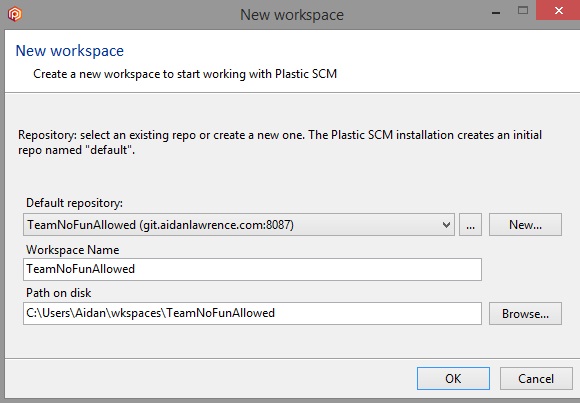
Setting Up A Workspace
PlasticSCM will request a workspace directory in order to sync files between the server and your computer. The workspace is essentially a "Dropbox" sync folder, but will hold our team project files. This is where all of the Unity files and assets will be sent to every time you request a branch of our project.
Step 1: Specify which default repository you would like to sync. Since there is only one on the server, the "Default repository" box should read,
TeamNoFunAllowed (git.aidanlawrence.com:8087)
Step 2: Specify the workspace folder name. The name you give to this workspace is not important, but is handy for locating the folder on your computer. I recommend a name like "TeamNoFunAllowed" or "GAM23_Final".
Step 3: Specify where you would like to save this workspace at on your computer. This location can be anywhere you would like.
A finished workspace configuration box should look like something this: